When you are preparing for a big event, such as a wedding, it is proper protocol to send out a save-the-date card to let guests know far in advance when your special day will be. This will help guests avoid any potential conflicts with their calendar and ensure that more guests will be able to attend your event. When mailing out a save-the-date there are a few etiquette rules you should follow when preparing your envelopes.
Getting Started
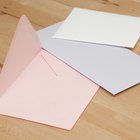
Before starting your envelopes, there are several steps you must take. First choose how you will be writing out your envelope. The mailing envelope on save-the-dates is typically addressed by hand, but you may also use a calligraphy-style font from your computer, if you choose this option, print directly on an envelope, not on an address label. Printing is especially helpful if you have a large number of envelopes to address. Save-the-dates are supposed to be less formal than invitations, which is why handwritten envelopes are custom. The envelopes can be brighter and more fun than the actual invitations. Make sure you have the correct spelling and the correct address of all your guests' names.
Guest Address
When filling out the guest address portion of your save-the-date envelope, write or type out the full name of your guest or guests on the front of the envelope on the top line. The text should be centered, and use appropriate titles such as Mr. and Mrs. When writing out the street address on the second line, avoid abbreviations, spelling out words such as Lane and Street; make sure to include apartment or unit numbers when doing this. Fill out the city, state and zip code on the last line, as you would normally. Try not to exceed five lines when addressing an envelope; this can make the envelope look messy and cluttered. Attempt to keep the lines straight and even when writing, using a ruler as a guide if necessary.
Return Address
Write out the name of the individuals responsible for receiving returned mail on the back flap of the envelope, not on the upper left-hand corner. The return address should be printed in a font that coordinates with the front, or typed out directly on the envelope; you should not use return address labels. This could be your address, your fiance's or an individual who is helping with party preparation. On the back flap, write out the individual's full name, including her formal title, such as Ms. Write out the return street address on the second line, avoiding any abbreviations, followed by the third line with the city, state and zip code. If the zip code does not fit on the third line, place it on the fourth.
Names and Titles
Although save-the-dates are not as formal as the actual invitations, certain guidelines should be followed when it comes to names and titles of guests. Married couples should be addressed as Mr. and Mrs. followed by the full name of the man. If the husband has a different formal title, such as doctor, their names should be written Dr. and Mrs. followed by the man's full name. Unmarried women older than 18 should be addressed as Ms., followed by her first and last name. Envelopes for unmarried couples living together should be written as follows: "Ms. (woman's name) and Mr. (male's name)." The name of the person closest to you should be written out first, or the names should appear in alphabetical order. The names of children don't need to be put on the envelope, but in situations where you find it appropriate, list the children in order by age, starting with the oldest.
Related Articles

Proper Way to Address a Party ...

Etiquette for Addressing Wedding ...
How Do You Address Wedding Invitations ...

Wedding Etiquette for Name Order

Thank You Note Etiquette for Envelopes
Wording Etiquette for Wedding Seating ...
How to Address Invitations With No ...

The Etiquette for Addressing Wedding ...

Etiquette on Addressing Guests in ...
How to Address Place Cards for Weddings
Correct Way to Write an Acceptance for ...

Proper Etiquette for a Graduation ...
The Standard Size for Wedding ...
How to Address Bridal Shower Invitations
How to Address Birthday Invitations
Etiquette for Addressing Formal ...
Addressing an Envelope to Two People ...
How to Make Wedding Invitations on a Mac
How to Write a Wedding Invitation
How to Word a Co-Ed Baby Shower ...
References
Photo Credits
Jupiterimages/Polka Dot/Getty Images