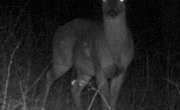


Game cameras such as the Wildview Extreme 2 can provide a fascinating insight into the animal life around you, whether you're a hunter, a nature lover or an irritated gardener wanting to identify your resident freeloaders. Setting up and operating the camera is a simple process, using just a few switches and buttons.
Installing Batteries
The Extreme 2, model number TGL-2M, is designed to operate on either internal C-cell alkaline batteries or, for extended usage, an external 12-volt battery pack. To install the internal batteries, make sure the camera's power switch is in the Off position, then open the front of the case. Insert the batteries into the battery holders, making sure the positive and negative terminals face the right direction. The external battery pack has a barrel-shaped connector on a short wire, which plugs into a receptacle at the bottom right corner of the camera. If you plug in an external battery, the camera will automatically detect and use it even if you've put C cells in the internal battery compartment.
Adding Memory
The camera's 16 megabytes internal memory will record only four images at the high-quality setting or 13 at the low-quality setting, so it's useful mostly for testing purposes. The camera accepts SD memory cards of up to 2 gigabytes, and a card of that capacity will hold over 2,000 high-quality images or over 6,000 low-quality images. To install the card, make sure the camera's power switch is in the Off position, then open the front of the casing. Insert the card into the card slot at the upper right edge of the area covered by the casing. If you look closely, there's a diagram imprinted on the camera showing the correct orientation for the card. Don't try to force it; if it won't slide in easily, you've got it in backward. Once an SD memory card is installed, the camera will use it – rather than the internal memory – automatically.
Choosing Your Settings
Choosing your camera settings is the next step. The settings are controlled by a set of toggle switches on the front of the camera.
- Resolution: High resolution gives better images, but low resolution allows for three times as many shots.
- Flash: Your options are On, Off or Auto. The automatic setting uses the flash when necessary and is the best option unless you're concerned about alarming the animals you photograph.
- Capture Mode: Takes a single shot, a quick burst of three shots, a burst of six, or captures the animal in a short clip of full-motion video in AVI format. Setting the camera for one of the burst modes uses up your memory more quickly, but it means you're more likely to get a usable shot of each animal.
- Time Out Interval: Tells the camera to wait 1, 5, 10 or 20 minutes before taking the next shot. If your camera is at a bait station or watering hole where animals loiter, a longer setting means you won't waste memory taking multiple shots of the same animal.
- Date and Time: Imprints each image, or the start of each video clip, with the date and time it was captured. To set them, slide the camera's power switch to PIR mode and hold down the Set button for two seconds to enter time-set mode. Use the up and down buttons to set the hours, then repeat to set the minutes, month, date and year.
Setting Up and Testing
Choosing a suitable location and testing your camera's positioning are the final steps before it's ready for use. Wildview recommends positioning your camera 4 to 5 feet off the ground, with the camera pointing slightly downward. So the early and late sunshine won't interfere with your images, avoid aiming it directly east or west. Attach it to a tree or other suitable mounting point with the supplied straps, attaching the external 12-volt battery if you're using one. Clear away any obstructions that might block the lens and set the power switch to its Test position. Walk around your desired coverage area. A green light will appear on the camera when the passive infrared sensor, or PIR, detects you. Adjust the camera as needed until the PIR scans the area thoroughly, then switch the power off. Once the screen goes blank, slide the camera switch to PIR mode. The image counter will set itself to 0000 and the green light will blink for one minute, the length of time you'll have to leave the area before the camera activates itself.
Retrieving Your Images
To view the images you've captured, you can simply connect the Wildview to your computer using a USB cable. Your computer will recognize it as an attached device, and you can use your usual Windows, Mac or Linux file management and photo-viewing tools to view your images and copy any that you wish to save. Alternatively, you can remove the SD card from the camera and insert it into your computer's card reader. To delete the images from your camera's SD card so its memory is free for the next use, slide the power switch to the PIR position. Press the Set button and watch for ESC to appear on the display. This means you've entered Delete mode. Use the up or down area to select d-ALL, then press Set to delete all current images. The camera will exit to the countdown mode and be ready to use again immediately.
Writer Bio
Fred Decker is a trained chef and prolific freelance writer. He grew up in rural Nova Scotia, and had learned to skin a rabbit with his pocketknife by the age of seven (whenever the pocketknife wasn't lost). He was educated at Memorial University of Newfoundland and the Northern Alberta Institute of Technology, and seldom loses a pocketknife anymore. You'll find his articles on game, foraged foods and other outdoor topics at major sites including eHow, Leaf.TV, Livestrong, OurEverydayLife and many others.