
How to Decorate a Home Cuban-Style

Cuban-style decorating features a diverse mix of colonial European influences, early 20th-century modernism, and lush tropical elements inspired by the natural landscape of this Caribbean island nation. With an integrated blend of natural earth tones, vivid colors, vintage and colonial furnishings and organic, tropical-inspired accents, you can bring a Cuban flavor to your home.
Colorful Inspiration
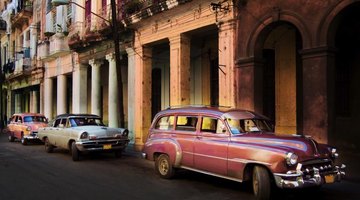
Cuba is filled with color, from the flashy, open-air venues of the cabarets to the earthy hues of the Caribbean landscape and the distinctively eclectic architecture of Havana, where buildings often feature colorful exteriors in green, blue, yellow, orange and red.
Like the rest of the Caribbean, buildings are often painted in colorful pastels or brilliant hues of turquoise, sunny yellow and coral. Light colors of white or cream on interior walls inspire a feeling of openness and spaciousness, perfect for invoking the casual, relaxed atmosphere of a tropical living space. Incorporate color by painting trim around doors or windows in blue or green, painting an accent wall turquoise or bright yellow or painting the ceiling mint green.
Earth tones of terra cotta are prominent in architecture, flooring and in large, earthenware vases. Use terra-cotta tiles on floors to impart a natural, earthy feel in your home.
Colonial Influence
Luxurious mansions on Cuba’s historic sugar and tobacco plantations feature elegant Spanish colonial and French baroque design elements. Introduce this look into your home with reproduction pieces or an occasional antique. Include a rustic accent piece such as a Spanish colonial cabinet with scrolling ironwork and hand-carved details or an iron scroll-work canopy bed. Enhance an entryway with an ornate baroque mirror over a French console table.
Vintage Furnishings
Prior to the Communist revolution of the 1960s, Cuba embraced many of the influential, Modernist styles of the early 20th century, starting with Art Nouveau, Art Deco and peaking with the Mid-Century styles that defined the 1950s.
The nostalgic romanticism of 1950s Cuba inspired a new design trend in America in the early 21st century. According to The Baltimore Sun, “Old Havana Style” furniture, fabrics and accessories were being offered by companies such as Thomasville, Mulberry Home and Pottery Barn.
For a similar look in your home, search for plantation-style furniture featuring caning, wicker, carved motifs of pineapples, or wood finishes with the color of old tobacco leaves. Harder to find but not impossible, cigar band-print fabrics are perfect for accent pillows, an unusual table runner or a colorful wall tapestry. Envoke a 1950s feel with vintage drum shades on lamps, a star-burst clock or mirror and a classic accent piece such as a Florence Knoll-style sofa in orange or an Arne Jacobsen egg chair in turquoise.
Eclectic Accents
As a nod to Cuban-inspired Art Nouveau, install a stained-glass window. While the real deal can be quite costly, window film can be applied for the look of stained glass at a fraction of the cost. Try it in a front door glass insert or side transoms, a bathroom or kitchen window or the semicircle top of an arched window.
Use a tropical print on Roman shades, accent pillows or chair upholstery to invoke an island feel. Large palm plants or broad-leaf tropical plants in terra-cotta planters help create a relaxing, laid-back tropical atmosphere.
Art Deco wall sconces or pendants featuring sleek, chrome hardware and angular geometric designs bring 1930s and '40s glamour to a Cuban-themed home. Add subtle hints with Art Deco hardware on cabinets or doors. Frame vintage posters depicting travel to Cuba or the festive Carnival Havana.
References
Resources
Writer Bio
Michelle Radcliff owned a retail home furnishings business for eight years. Radcliff offers decorating advice on her blog, Home Decorating News, is a regular contributor on interior design at LoveToKnow.com and earned certification as an interior decorator from Penn Foster College in 2013.
Photo Credits
- jeffrey ayres/iStock/Getty Images
More Articles