Things You'll Need
Stained glass window design sheet
Acrylic sheeting
Table saw
Grease pencil
Acrylic edge scraper
Liquid lead
Water-based glass paint
Toothpick
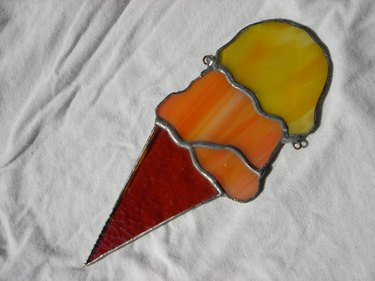
Creating a faux stained glass window is a way of adding the beauty of stained glass to your home without the expense or build time necessary with actual stained glass. With the use of an acrylic sheet and paints manufactured for their transparency on glass, you can create a faux stained glass piece that rivals professionally made stained glass. There are no limitations to design and, by mixing the paints, any color is available to achieve precisely the look you want for your stained glass. After drying, you can mount the acrylic panel anywhere in your home.
Step 1
Create a design for your stained glass window on a piece of paper. Outline each separate color section in your design, labeling the color of each section individually. The outlines surrounding the separate colors determine the placement of the lead lines surrounding each faux stained glass element in your window. You can also purchase ready-made designs from crafts stores or download them for printout online.
Video of the Day
Step 2
Cut a piece of acrylic sheeting to the size and shape of your desired stain glass window. Use a table saw with a saw blade designed for cutting acrylics to create your window. Measure and mark the cutting lines on the sheeting with a grease pencil and then cut along the lines, feeding the sheet slowly through the blade for a steady clean cut. Smooth the edge of the cut window by scraping along the saw lines with an acrylic edge scraper.
Step 3
Place the cut window onto the drawn window design so that you can see the design clearly through the sheeting.
Step 4
Paint the lead lines of the design onto the acrylic window using a bottle of liquid lead. Purchase the liquid lead, along with the other paint supplies, from an art and crafts store. Turn the bottle upside down and tap the tip against your working table to start the lead flowing to the tip.
Step 5
Place the tip of the bottle against the sheeting at the start of a line and apply pressure to the bottom of the bottle by squeezing slightly to begin the flow of lead. Lift the bottle about 1/2-inch off the acrylic surface as the lead flows and paint the outlines for the colored paint areas using the tip of the bottle to direct the flow of lead. Stop squeezing the bottle at the end of a line to stop the flow of lead. Remove any lead from the tip after each line using a paper towel to prevent the excess lead from drying in place. Wait 12 hours for the lead to dry. Cut away any excess pieces of lead after it dries with a craft knife.
Step 6
Fill the sections in between the leaded lines with a water-based paint created for use in making faux stained glass windows. Hold the paint bottle upside down and gently squeeze the color into the sections between the lead lines, filling the areas with a moderately thick layer of paint. Keep the tip of the paint bottle against the acrylic surface as you fill it, starting with the outside of the color area against the lead and then working inwards. The thicker the paint, the less light will shine through, so apply the paint according to the effect you wish the section to have. Remove any excess paint or drips with a cotton swab.
Step 7
Comb the paint onto the surface of the acrylic with a toothpick to remove any air bubbles from the paint and to ensure the even spread of paint throughout the section. Move the paint with the toothpick from the top of a section to the bottom then from the right to the left to help even it out. Wait 12 hours for the paint to dry before moving the faux stained glass window into place.
Warning
Work in a well-ventilated area to avoid the inhalation of paint fumes.
Video of the Day