Things You'll Need
Knife
Water
Strainer
Bleach
Hydrogen peroxide
Freezer bag
Peat moss
Refrigerator
Sand
Vermiculite
Pencil
Spray bottle
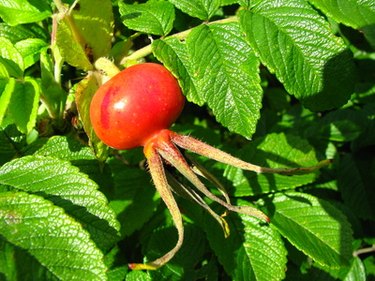
Pollinated rose hips ripen and swell. They may turn orange, yellow, red, brown or remain green, depending on the species. Once your rose hips mature in roughly six months, it is time to harvest the seed. There may be only one seed inside, or as many as 50. Before you plant any of them, keep in mind that rose seeds take several years to flower to their potential. And, because most rose seeds do not grow true to type, you'll have to wait that long to discover if the roses you planted are desirable ones.
Step 1
Cut the rose hip open. Pull the seeds out. Rinse and rub them under running water to remove the outer shell and surrounding pulp.
Video of the Day
Step 2
Clean the seeds to prevent disease. Place the seeds in a strainer. Rinse them with a solution of 2 tsp. of bleach added to 1 cup of water. Rinse the seeds thoroughly with bottled water until the bleach smell has completely dissipated. Drop the seeds into a container filled with 1 cup of water and 1 tsp. of hydrogen peroxide. Leave them to soak for 24 hours. Remove them and pat them dry.
Step 3
Line the bottom of a plastic freezer bag with 2 inches of moistened peat moss to cold-stratify the rose seeds. Scatter the seeds over the peat moss. Then cover them with another inch of moistened peat moss. Put them in the refrigerator for six weeks.
Step 4
Plant the rose hip seeds 1/2 inch deep and roughly 1 inch apart in a seed tray filled with a moistened mixture of one part sand and one part vermiculite. Store the tray in indirect sunlight for the first four weeks. Then place the tray near a sunny window. The seed should germinate in two to three months. Keep the soil in the tray moist at all times. Touch the surface frequently. If it is dry, spray it with water from a spray bottle. Use a paper towel to blot any water that pools on the seedling's foliage.
Step 5
Transplant the seedlings into the garden when they turn green and produce two healthy leaves. Lift the healthiest seedlings out of the seed tray by sliding a pencil underneath their roots and pushing them up out of the soil. Handle them gently and plant them into amended garden soil at the same depth that they grew in the seedling tray.
Video of the Day