
victoriaandreas/iStock/Getty Images
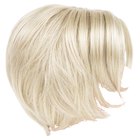
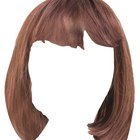
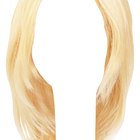
Full lace wigs look natural and stay put when you put them on correctly. They can even be worn during most sports activities without coming off. Put on your full front lace wig the right way so that only you will know that those luxurious locks are not yours.
Put on a flesh-colored wig cap, tucking all of your hair inside the cap. Adjust the wig cap so it sits at your front hairline. If you don't want to wear a wig cap, comb your hair back away from your scalp line.
Trim the lace on the full lace wig. This only needs to be done the first time you use your wig, and it does not need to be done if the lace has already been trimmed by the manufacturer. To trim the lace, put the wig on your head. Use hair clips to fasten the wig hair back away from your scalp line. Trim any lace that sticks out past the wig hairline using a pair of sharp scissors. Cut small amounts of lace at a time to avoid accidentally cutting too much. Be careful not to cut any of the wig hair. Leave a little bit of lace sticking out past the wig hairline, but no more than 1 inch.
Clean the skin by your hairline with a cotton ball dampened with isopropyl alcohol to remove body oils that could prevent the wig adhesive from sticking properly.
Apply scalp protector to the skin by your hairline. This only is necessary if you have sensitive skin.
Attach wig tape to the edges of the full lace wig. The tape is applied to the edges of the lace around the underside of the wig. Wig tape can be used alone or in combination with wig adhesive.
Apply a thin layer of wig adhesive to your scalp using a cotton swab. Allow the wig adhesive to dry for the length of time recommended on the label directions. Wig adhesive can be used alone or in combination with wig tape.
Position the full lace wig on your head. The easiest way to find the front-center of the wig is to part the hair on the wig. Parting the hair will reveal the hairline. The middle of the wig hairline should line up with the middle of your forehead at your hairline. Press down on the edges of the wig for five seconds to make the adhesive stick to your skin. Style the wig as desired.
Related Articles
How to Apply Lace Wigs With No Tape or ...
How to Sew on a Full Lace Wig

How to Re-Curl a Synthetic Wig
How to Get Glue Residue Off Your Lace ...
How to Use Wig Tape
How to Take the Frizz Out of a ...
How to Blend a Lace Front Wig

How to Make a Hose Wig Cap
The Best Way to Detangle a Wig

How to Highlight Wigs
How to Sleep in Your Wig

The Effects of Wig Adhesives
How to Avoid Itching With a Wig

How to Remove Hairspray From Wigs
How to Raise the Ear Tabs on Wigs Up ...

How to Keep Your Hat on Your Head ...

How to Prevent Hair From Flattening ...

How to Properly Wash a Wig

Hair Damage From Wigs
How to Style a Kanekalon Wig
References
Writer Bio
Rose Kivi has been a writer for more than 10 years. She has a background in the nursing field, wildlife rehabilitation and habitat conservation. Kivi has authored educational textbooks, patient health care pamphlets, animal husbandry guides, outdoor survival manuals and was a contributing writer for two books in the Uncle John’s Bathroom Reader Series.
Photo Credits
victoriaandreas/iStock/Getty Images