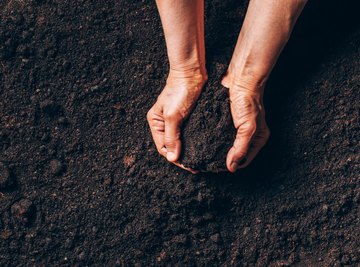
Soil characteristics - color, texture, odor - are important to understand for anyone who works in agriculture or horticulture. Gardeners, for example, must develop a basic understanding of what soil is and how to manage the fertility of their soils in order to successfully grow crops and ornamental plants.
Soil consists of minerals, water, air, organic matter and living organisms. Covering most of the Earth, soil forms the uppermost layer of the crust of our planet. By providing nutrients and water to plants, soil supports all life on Earth. Soil is essential not only for the plants that grow in it but also for the humans and other organisms that rely on plants for food and shelter.
Types of Soil Textures
Different soils have particular colors, textures and even smells. Several characteristics are used in describing soil. Farmers and gardeners should understand the various traits of their soils, so they can make changes in their soils to ensure the best possible plant growth.
Sandy, silt, clay and loam are among the common terms to describe soil textures. Most of the solid structure of soil is made up of mineral particles. Differences in a particular soil’s particle sizes and proportions help determine the type of soil texture. For example, larger soil particles - including gravel, stones and coarse sands - have different rock fragments than smaller soil particles, which are generally made up of just one mineral.
The most familiar type of mineral particle is sand, which is visible to the naked eye. Silt particles, which are smaller than sand particles, are microscopic and smooth when wet, but they’re not sticky. Clay, the smallest type of particle, is sticky when wet, forming hard clods when dry. Loam is soil that is made up of roughly equal amounts of sand, silt and clay. Loam may have organic matter - or humus - mixed in as well.
Soil Type Names
Soil type names usually refer to the place where the soil type was first mapped. Soil surveys and maps are published by the National Cooperative Soil Survey, so anyone can look up the soil type where they live. Over 20,000 different soil types have been identified in the United States.
Ease of Soil Tillage
Although heavy and light are common terms for describing soils, they don’t refer to a soil's weight, but to the ease of soil tillage. Heavier soils are usually finer soils that require more strength for tilling, because they have more clay, which makes them stickier. On the other hand, lighter soils have more sand, giving them a coarse texture with less ability to stick together. These soils need less muscle power to be tilled than clay-based soils.
Infiltration Rate
Infiltration, or the rate at which water penetrates soil, is a common way to characterize soil. Infiltration rates are measured in inches per hour. Sandy soils, which are extremely porous, have the greatest penetration rate, absorbing more than two inches of water each hour.
Loamy soils have a slower water absorption rate, soaking up from one-quarter inch to two inches an hour. Although loamy soil is porous and loose, it still holds water exceptionally well.
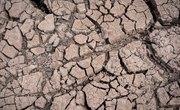
Clay only absorbs less than one-quarter inch of water hourly and has just a few air spaces between particles, making it dense. Because clay soil holds water tightly, there’s not much water available for plants. Its high density hinders oxygen from reaching plant roots.
Soil Acidity and Alkalinity
Soil pH is the amount of acidity or alkalinity found in soil. It’s measured using a pH scale, which consist of 14 numbers, ranging from 1 to 14. Soils that are neither acidic nor alkaline are neutral, falling in the middle of the scale at 7.
A soil with a pH number ranging from 7.1 to 14 is considered progressively more alkaline, while a soil pH that's lower than 7 is more acidic. Most soils with a pH of 6 to 7 are considered suitable for growing plants. It's important to have soil tested for its pH, because a soil's degree of acidity or alkalinity can effect plants' ability to absorb nutrients.