
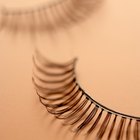
Bottom lashes don't command as much attention as their flashy upstairs neighbors, so a little enhancement along the lower lash line goes a very long way. Whether you're looking for everyday glamour or a dazzling look for a special night out, a few individual lashes -- or a thin strip of falsies -- will do the trick.
Individual Lashes
Step 1
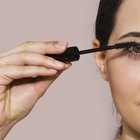
Apply your eye makeup and mascara to your upper lashes, but leave your lower lashes clean and bare.
Step 2
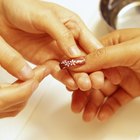
Dab a few drops of lash glue on the back of your hand. Having the glue handy will keep you from moving around too much. If you're reaching for the glue and drop the lashes, they can be very difficult to find.
Step 3
Use your slant-tipped tweezers to pick up an individual lash cluster -- two or three lash hairs attached at a single "bulb" -- near the base, not on the lash tips.
Step 4
Dip the bulb lightly into the glue and wait 10 to 15 seconds. You want the glue to be a little tacky rather than wet so it adheres immediately to your lash line.
Step 5
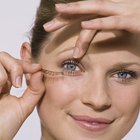
Tilt your head back and hold the base of the lash cluster just below your eye. Make sure the curve of the false lash follows the natural curve of your own lashes. They should curve out and point downward.
Step 6
Set the base of the lash at the outer corner of your lash line, beneath your natural lashes but as close as you can get it. You don't have to press the base of the lash against the skin for it to stick. Hold for about 10 seconds.
Step 7
Add more clusters to each lower lash line, working from the outside in, until your lashes are naturally full or as dramatic as you would like.
Step 8
Re-adjust or peel the false lashes away gently if you make a mistake. It takes two to five minutes for the glue to set, but try to reposition your lashes within the first few seconds to avoid any tugging at the eye.
Step 9
Let your lashes set for five minutes once you have them perfectly in place.
Step 10
Apply your makeup as you like. For a natural look, you don't need any mascara on your lower lashes at all. If there is noticeable space between your real and false lashes, use a black or dark brown liquid liner with a very thin brush to fill in the skin that shows between them. When applying mascara, use black or dark brown with a thin wand to apply one coat. This will help your naturals and falsies stick together.
Lash Strips
Step 1
Cut your lash strip in half. Half a lash strip is easier to control than the whole one and, since bottom lashes are usually very sparse toward the inner corner of your eye, you may find that half a lash strip looks more natural. If you decide to use the entire strip, you can still apply it one half at a time.
Step 2
Apply a thin strip of eyelash glue to the back of your hand. Hold the lash strip with the tweezers or your fingertips at one end near the base of the lashes.
Step 3
Drag the lash base in the eyelash glue and wait 10 to 15 seconds. Tilt your head back and hold the lash strip to just below your eye, so that the curve of the lashes matches the natural curve of your own lashes.
Step 4
Gently hold the lash strip right underneath your lash line, as close as you can get it to your natural lashes. Make sure the entire lash strip is flush against your lash line, using your fingertip to smooth the lash strip carefully against the skin if necessary. Hold for about 10 seconds and release.
Step 5
Adjust the lash strip within the first 10 to 30 seconds of application if needed. Apply the second half of the lash strip if you desire, lining up the edge just outside the inner corner of the eye. Hold it as close to the lash line as possible, making sure the entire strip makes contact. The lash strips may overlap slightly in the center.
Step 6
Allow your lashes to set and dry for 5 minutes. Apply a thin line of dark brown or black liner if there is an obvious demarcation between your lashes and the falsies. Finish with a coat of mascara.
Related Articles
How to Keep False Eyelashes From Lifting

How to Put on Eyeliner for the First ...
How to Look Like You Have Long Eyelashes

How to Trim the Length of False Lashes

How to Make Your Eye Makeup Look Pretty ...
How to Hide Missing Eyelashes
How to Apply Nail Polish Without Streaks
Demi Vs. Full Lashes

How to Elongate Your Eyebrows
How to Put an Acrylic Nail Back on ...
How to Feminize Your Eyebrows

How to Pluck Eyebrows for Beginners

How to Hide Different Eye Sizes

How to Even Out Two Asymmetrical ...
How to Line Your Lower Lash Line With ...
How to Make Eyebrow Stencils

How to Do Eyebrow Makeup

How to Use Bare Minerals for Under-Eye ...
How to Get Natural-Looking Acrylic Nails
How to Take Off Fake Eyelashes Without ...
References
Tips
- Pair bottom lashes with full upper lashes for balance.
- Use short lashes for a naturally-full look and longer lashes for a more dramatic look.
- Don't trim the lashes. This will create a blunt edge. Lashes are supposed to taper to a fine point, and the falsies are designed to mimic that natural taper.
- Remove your lashes carefully with a cotton ball or pad dipped in eye makeup remover. Press the cotton against your closed eye for a few seconds, then peel the lash strip away.
Warnings
- Always use caution when applying cosmetics around the eyes. If you experience any burning, stinging, itching or redness, remove the lashes immediately and rinse the area with water.
Writer Bio
Lindsey Robinson Sanchez, from Bessemer, Ala., has written for the "Troy Messenger," "The Alabama Baptist" and "The Gainesville Times," where her work was featured on the AP wire. She has a Bachelor of Science in journalism from the University of Florida. She writes style, beauty, fitness, travel and culture.
Photo Credits
Jupiterimages/Photos.com/Getty Images