Things You'll Need
Tin can
Thin-tip permanent marker
Towel
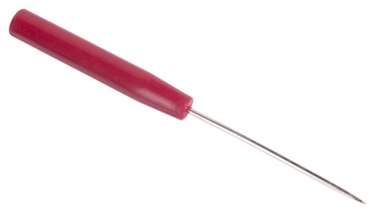
Awl
Hammer
Acrylic craft paint
Craft brush
Votive candle
Tin punching is a technique that is used to create country decor and luminaries. To create luminaries, punch tin cans in a variety of designs and light with candles to create inexpensive outdoor lighting. Light is reflected through the holes and create interesting patterns on walls and surfaces. Make your own punched tin luminaries by recycling various-sized tin cans from the kitchen and hammering your own design with a hammer and awl. Paint them with acrylic craft paints in colors to match your outdoor decorative theme.
Step 1
Prepare the tin can by cleaning it out with a sponge and dishwashing liquid. Recycle used tomato or coffee cans, depending on the size you want.
Video of the Day
Step 2
Fill the can with water, and put it in the freezer. The frozen water prevents the can from crumbling when you are hammering the holes. Remove the can from the freezer once it is completely frozen.
Step 3
Draw a word or design onto the can with a thin-tipped permanent marker. The marker area will be the template you will use for punching. Simple designs and words work best. Draw a design or print designs from the computer, cut them out, and then trace them onto the can.
Step 4
Place a folded towel onto a sturdy surface, and place the can on the towel with the marker area facing up. The folded towel keeps the can in place and cushions against the impact of the hammering.
Step 5
Place the pointed tip of the awl tool onto an edge of the design you created with the marker. Hit the back of the awl with the hammer to punch a hole into the can. Remove the awl and continue to punch holes, about 1/4 inch apart, following the lines of your drawn word or design.
Step 6
Place the can into the sink, and run hot water over it to melt the ice.
Step 7
Level the bottom of the can by turning it upside-down, covering it with the towel and lightly hammering the uneven areas. This fixes the uneven surface caused by the frozen water expanding.
Step 8
Paint the outside of the tin can with acrylic paint and a craft brush in any color you desire. Allow to dry thoroughly.
Step 9
Place a votive candle in the bottom of the can and light it.
Tip
To create a hanging luminary, punch one hole on either side of the tin can, thread a sturdy piece of wire through the hole, and secure to create a hanger.
Warning
Use caution when using a sharp awl and hammer.
The punched tin may cause sharp edges on the inside of the can, so use caution when putting your hand inside.
Video of the Day