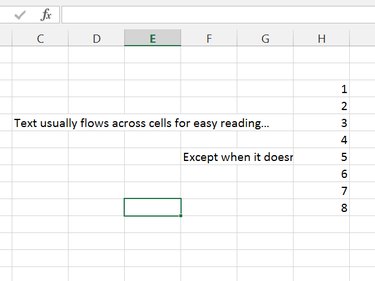
When a line of text doesn't fit a single cell in Excel 2013, it flows atop adjacent cells. Should another filled cell get in the way, however, the text cuts off abruptly at that cell's border. To work around the problem without altering the text itself, change the cell size, merge cells or wrap the text.
Cell Size
Video of the Day
Excel cells default to 80 pixels wide by 24 pixels tall, which is usually enough to display a value, but cramped for long strings of text. In columns that contain text, expand the cell width to make more room.
Video of the Day

Drag the edge of the column on the heading row -- by the column letter -- to the right. Drag until the vertical dotted line is past the longest line of text in the column, and then release the button.
Merge Cells
Merging cells combines two or more cells into one larger cell. Merge cells instead of changing the column width when you want only one row to have extra width.
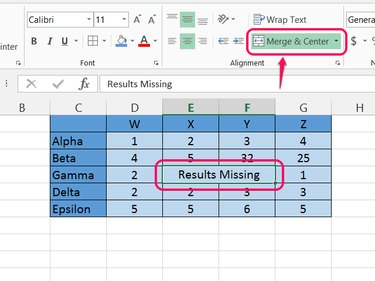
Select the cells you want to merge and click Merge & Center on the Home tab. To merge without centering, open the drop-down menu and choose Merge Cells instead, or change the alignment after merging.
Wrap Text
Wrapping text prevents cell text from overflowing out of a cell horizontally, just like how Microsoft Word prevents text from overflowing off the right side of a page.
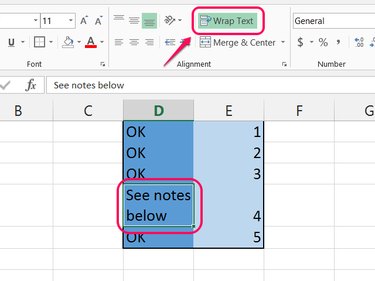
Select the cell with overflowing text -- or an entire column -- and click Wrap Text on the Home tab. Excel adds line breaks where needed and expands the selected cell's height to fit the text. Adjust the column's width as desired, and Excel updates the wrapping automatically.