Running your computer on solar power is an excellent way to take your work with you. Since your computer will run from the power of the sun, as long as you can find a sunny spot to sit the solar panel you can use your computer too.
Even desktop computers can run on solar power, though. They're not as portable as a laptop but you still get the benefits of completely free electricity from the sun, and this allows you to dramatically reduce the amount of power you're paying for from the local electric company.
Video of the Day
Video of the Day
Computers vary in the amount of power they need. Generally a laptop computer uses much less power than a desktop, but in both cases it depends heavily on the types of hardware components you have in the computer and how you use it on a day to day basis.
Step 1
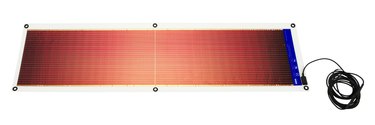
Buy a solar panel that is powerful enough to run the computer you want to use it with. Small netbook computers use 45 to 60 watts of power, but a larger laptop or gaming notebook may use as much as 90 watts.
You can find out how much power your laptop needs by looking at the power adapter: If it doesn't list the watts, then multiply amps and volts to figure the wattage needed at peak usage.
Solar panels are rated at their peak output capacity and due to variations in weather it's unusual to get the full amount of rated power from them. Purchase a solar panel that is rated for at least 20 percent more than you need.
For example: A 60-watt solar panel may only produce an average of 48 watts an hour in the morning or afternoon of a clear day while producing 55 to 60 watts during the peak of sunshine around noon. If you need to use your computer for many hours each day, it would be best to get a 72- to 80-watt panel.
Step 2
Purchase a solar charge controller if one did not come with your solar panel. The charge controller helps prevent the panels from sending too little or too much current to your battery, plus it prevents the battery from discharging at night or on cloudy days.
Step 3
Purchase a 12-volt battery: Car and boat batteries work well with deep-cycle marine batteries being the best for this type of use, but you can even use a small lawn-and-garden battery to get started.
Step 4
Purchase an AC-to-DC inverter. This gives you a standard household wall socket that you can plug the computer into.
Step 5
Connect your solar panel to the charge controller with the combined male/female plugs provided on each.
Step 6
Connect your charge controller to the battery. Some charge controllers require you to attach positive and negative wires; in this case attach the positive wire to the positive battery post and the negative wire to the negative battery post.
If your charge controller has a male/female plug for connecting to the battery, you need an adapter that has the male/female combined plug on one end to connect to the controller, and the positive and negative wires on the other end to wire to the battery.
Let the battery charge from the solar panel for several hours to one full day before using it the first time.
Step 7
Connect your inverter to the battery using the battery clips. Attach the positive (red) clip to the positive battery post and the negative (black) clip to the negative battery post.
Step 8
Turn on the inverter and plug your computer cord into the outlet, then turn the computer on.