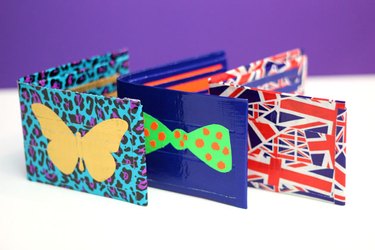
Duct tape comes in myriad colors and patterns, so you can customize a wallet any way you want. It is also extremely strong (practically indestructible) and functional. This tutorial creates a compartment for dollar bills, slots for credit cards, a photo ID window and even hidden pockets.
What You'll Need
Video of the Day
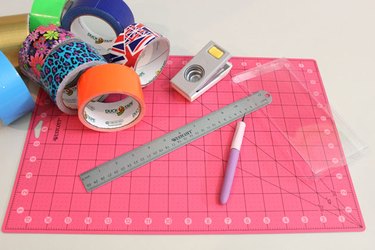
- Duct tape (choose two contrasting colors or patterns)
- Hobby knife (like an X-Acto knife)
- Ruler or straightedge
- Ruled cutting mat
- Clear plastic
- Circle hole punch
Video of the Day
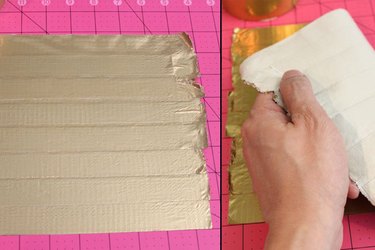
Step 1: Assemble One Large Sheet of Duct Tape
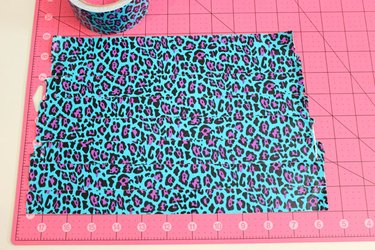
Using your ruled cutting mat as a guide, tear one strip of duct tape that is at least 10 inches long and align it on one of the lines of the cutting mat. Tear another strip of duct tape and layer it 1 inch above the first strip, using the lines on the ruled cutting mat as a guide. Keep layering strips at 1-inch intervals until you have a large sheet of duct tape that is about 8 inches by 10 inches. You will need seven strips of duct tape in total.
Step 2: Fold the Sheet of Duct Tape in Half
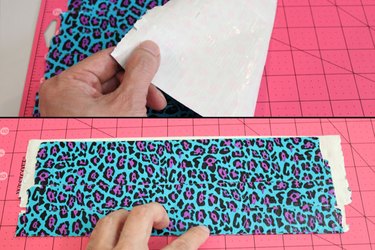
Peel the sheet of duct tape off of the cutting mat. Fold the sheet in half so the adhesive side sticks to itself. Press down with your fingers to flatten it.
Step 3: Trim the Duct Tape Sheets to Wallet Size
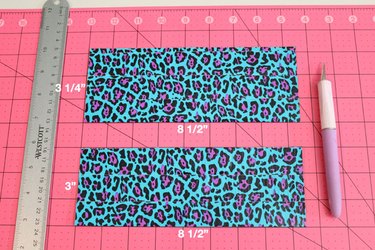
Repeat the first two steps so you have two folded sheets of duct tape. Trim the sheets with a hobby knife and ruler so that one piece is 3 inches by 8 1/2 inches, and one piece is 3 1/4 inches by 8 1/2 inches. These are the pieces that will make up the main dollar bill pocket. The piece that is slightly shorter will be on the inside to give the wallet a finished edge. Set these two pieces aside.
Step 4: Prepare a Sheet of Contrasting Duct Tape
Select a contrasting color or pattern of duct tape and create a sheet that's about 8 inches by 10 inches as you did in Step 1. Peel this sheet off of the cutting mat and fold it in half so the adhesive side sticks to itself. This sheet of duct tape will be used to make the hidden interior pockets.
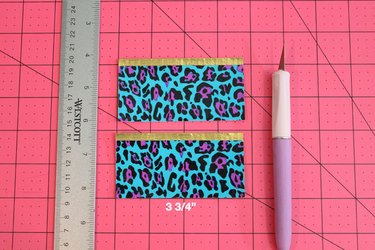
Step 5: Trim the Contrasting Duct Tape to Make Hidden Pockets
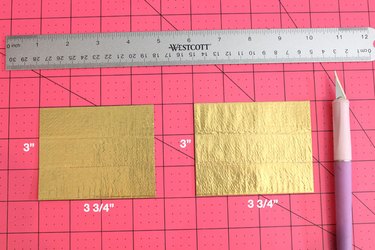
Trim this contrasting piece of duct tape with a hobby knife and ruler so that you have two pieces that measure 3 inches by 3 3/4 inches. These are the hidden pocket panels. Set them aside until Step 8.
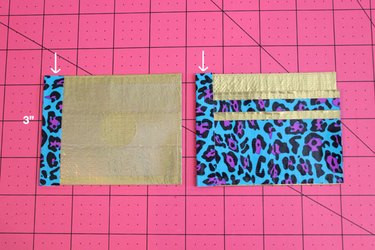
Step 6: Prepare the Duct Tape for Credit Card Pockets
Place a 10-inch strip of the contrasting duct tape sticky side up on the cutting mat. Then position a 10-inch strip of the primary duct tape on top of it, sticky side down, leaving about 1/4 inch of the contrasting duct tape exposed at the top. Fold the exposed duct tape down onto the duct tape below, so there is now a 1/4-inch trim at the top.
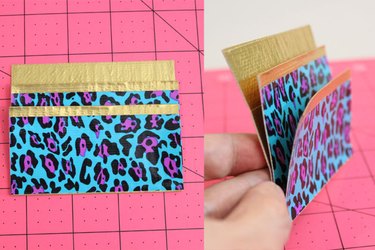
Step 7: Trim the Credit Card Pockets
Cut the duct tape strip with the contrasting border into two pieces that are 3 3/4 inches long. The exact height will depend on how thick your border is, but it will be about 2 inches.
Step 8: Adhere the Credit Card Pockets to a Hidden Pocket Panel
You will notice that there is still an exposed adhesive strip on the back of the two credit card pockets at the bottom. Use this adhesive to adhere the credit card pockets to one of the hidden pocket panels from Step 5, spacing them evenly on the panel.
Step 9: Prepare the Clear Plastic Window for a Photo ID
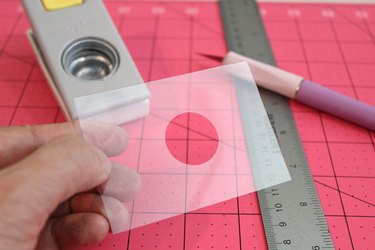
Cut a piece of clear plastic so it is approximately 2 1/2 inches by 3 1/2 inches, just bigger than a photo ID. Punch a 1-inch hole in the middle of the plastic with a circle punch. This step is optional, but the hole helps you remove your ID from its slot.
Step 10: Tape the Left Side of the Hidden Pocket Panels
Cut a 3-inch strip of duct tape with the hobby knife, and then cut this strip in half lengthwise so you have two thin 3-inch strips. Using one of these strips, attach the clear plastic window to one of the hidden pocket panels, taping the two pieces on the left side only. Use the other 3-inch tape strip to seal the left side of the credit card panel, which you prepared in Step 8.
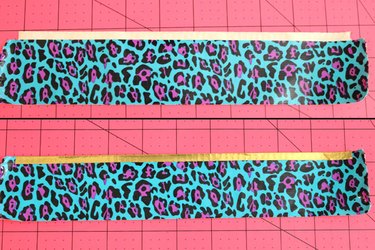
Step 11: Tape the Hidden Panels to the 3-inch Dollar Bill Panel
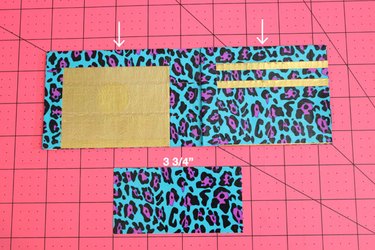
Now it's time to use the shorter 3 inches by 8 1/2 inches duct tape panel from Step 3. Use your hobby knife to cut a strip of duct tape that is 3 3/4 inches long. Cut that in half lengthwise so you have two thin 3 3/4-inch strips. Place the two hidden pocket panels from the last step flush left and flush right on the 3 inches by 8 1/2 inches dollar bill panel, and attach them with the thin strips at the top only.
Step 12: Attach the Two Dollar Bill Panels Together
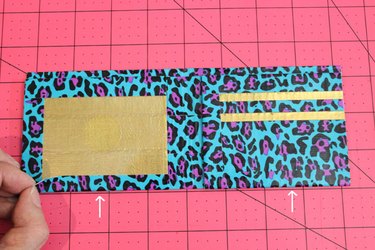
Next, take the 3 1/4 inches by 8 1/2 inches dollar bill panel from Step 3, and place it underneath the dollar bill panel with the ID and credit card slots. When lined up, there should be a 1/4-inch gap at the top. Cut another strip of duct tape that is 3 3/4 inches long and cut it in half lengthwise. Use these two thin strips at the bottom to attach the top dollar bill panel to the bottom dollar bill panel.
Step 13: Tape Off the Sides
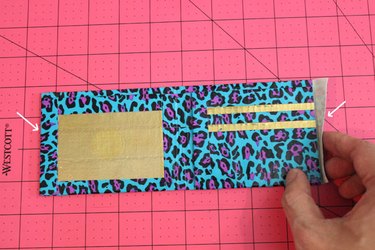
The top and bottom are now sealed, but the sides are still open. Cut a 3-inch strip of duct tape and cut it in half lengthwise. Use these strips to close the two sides.
Step 14: Cut the Tape Where It Overlaps
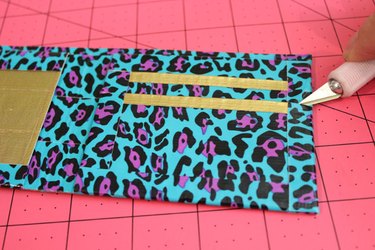
Right now, the vertical strips of duct tape partially cover the edge of the horizontal pockets. To open them up, use your hobby knife to cut slits in the duct tape where it overlaps.
Step 15: Decorate the Wallet with Duct Tape Shapes
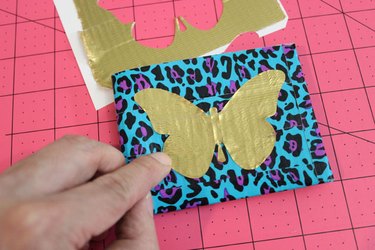
You can personalize your duct tape wallet by cutting out decorative shapes with contrasting duct tape and sticking them to the wallet exterior. To make it easier to cut shapes, apply the tape to a piece of parchment paper, cut out the shape and then peel the tape from the parchment paper.