
The Best Coating for Cedar Decks

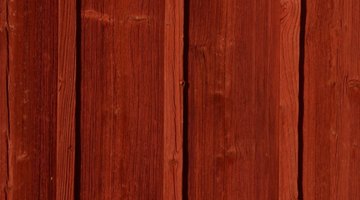
Cedar is an aromatic wood that is often used in closets, chests and decks. A hardwood that possesses a beautiful red tint, its aroma naturally keeps pests and insects away, which is why it is used in a lot of home construction.
Cedar decks, like other hardwood decks, needs to be sealed in order to prevent moisture from seeping into the wood. There are a few different types of sealers that can be used with cedar that will help keep your deck beautiful and mold-free throughout its lifespan.
Deck Stain
Deck stain is something consumers should put on their decks regardless of what type of wood is being used. The stain seals the cedar, protecting it from harsh climates, rain, snow and other elements. If you decide to use a deck stain, there are many different brands to choose from; they all protect the cedar by filling in the porous openings in the wood with the stain and preventing moisture from entering into the wood.
Water-Based Epoxy Resin
Similar to stain, epoxy resin is another protective coating that can be applied to cedar decks. When epoxy resin hardens, it turns into a rigid, plastic-like substance; the epoxy penetrates deep into the wood and hardens inside the knots and cracks that would otherwise be exposed to the elements.
Preparation
Before applying any top coating to your cedar deck the proper preparations need to be made. Spray off the cedar using a normal garden hose to remove the top layer of dirt and dust that could prevent the coating from penetrating the cedar. Do not use a pressure washer, as this tends to damage cedar. Go over the wood with coarse grade aluminum oxide sandpaper, making sure the wood is even throughout the deck. Finish the preparation by sanding it down using a medium grade aluminum oxide sandpaper and spraying it off once again. Let the deck dry completely before applying any top coating.
Application
Applying a top coat to a cedar deck is very simple, but could take some time depending upon the square footage of the deck you are finishing. Use a paintbrush to apply the coating by hand in a single coat; you can use a paint sprayer if you are using a water-based top coating. Be aware that a paint spray does exactly what it says, and you could end up over spraying your cedar deck. Allow the top coating to cure overnight before walking on it.
References
Writer Bio
Stephanie Temperino is a freelance writer in New York City. She specializes in finance and technology topics. Graduating from the University of Massachusetts in 2009, Temperino holds a Bachelor of Arts in finance.
Photo Credits
- Jupiterimages/Photos.com/Getty Images
- Jupiterimages/Photos.com/Getty Images
More Articles