
How to Get the Lid off of Paint Thinner
Paint thinner is a solvent used to remove oil-based paint from surfaces. Also known as mineral spirits, the harsh chemical composition breaks down paint so it can be sufficiently removed. Paint thinners can come in a variety of containers, but they often come in screw-top jugs or cans, much like paint itself. In the latter case, the can should be opened with a paint can opener, which is used for opening cans of paint and any can with a lid. Paint can openers can be purchased where paint is sold and are often given free with a purchase of paint or paint-related products upon request.
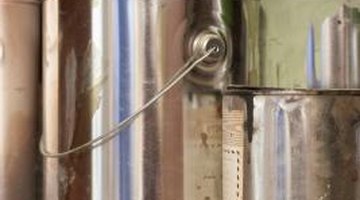
Step 1
Place the curved tip of the paint can opener under the lip of the can where the lid and can are sealed closed.
Step 2
Push down on the can opener, which will add leverage to the tip and pry open the lid about an inch in that spot. Do not apply too much pressure when prying open the lid so as not to damage or deform the lid.
Step 3
Continue to do this around the lid by turning the can or by moving the opener an inch or two around the lid until the opener has come full circle around the lid.
References
Photo Credits
- Jupiterimages/Photos.com/Getty Images
More Articles