Music files, also known as MP3 files, are more popular than ever. Millions of users download songs daily from sites like ITUNES and Wal-Mart.com. People love music and music downloads. You may find yourself with a almost-full hard drive full of music files. You are probably wondering how to organize all these files for quick retrieval. Well don't worry anymore. You can store all these files on an external hard drive and free up your main computer's hard drive.
Connecting the External Hard Drive
Video of the Day
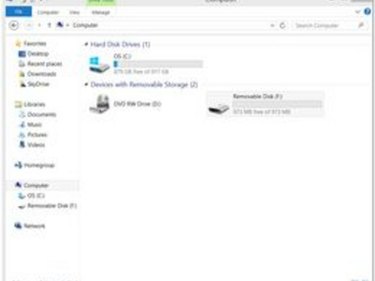
Connect the external hard drive to the USB port of your PC or Mac if you haven't already done so. Your computer will assign the drive a letter--"E:" or "F:". On the Mac, it will appear on the "Desktop" as a drive. On the PC, it will show up under "My Computer." For music files, you will need a external hard drive with plenty of space to hold your files.
Video of the Day
Creating your "Music" Folder
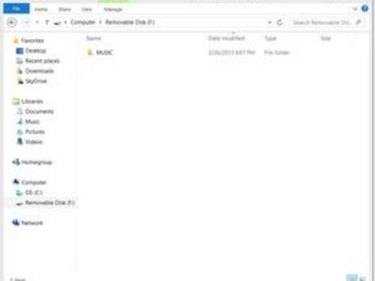
Double click on the external hard drive's icon to open the drive's main folder. Create a new folder on the external drive and label it "Music." This will be the main folder for storing all of your music/MP3 files. Use this folder just for your music, playlists and other music-related files (podcasts and album information files).
Moving Your Music Files
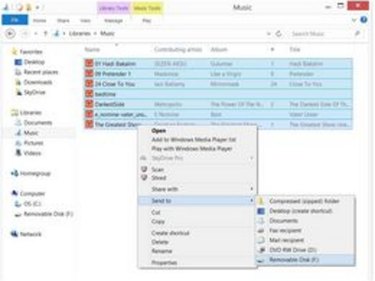
Open the folder containing your music files on your main computer. This folder may be "My Music," or similar wording on your main computer. Select all of your music/MP3 files and "Move" those files to your external hard drive's "Music" folder. Moving files will remove these music/MP3 files from your main computer to your external hard drive. Now your main computer's hard drive will have more free space. Repeat this step if you have any other music files stored in other folders on your main computer.
Tips
This is a good time to sort through your music and delete any songs you no longer like or want. When downloading new music, make sure you download it to your external hard drive, instead of your main drive.