Professional painters are almost unanimous in their recommendation to remove wallpaper rather than paint over it, but sometimes leaving the wallpaper is the lesser of two evils. Removal can be messy, and it's all too possible to damage the wall. If the paper is in relatively good condition, with few bubbles or lifting seams, you can use the same technique to create a smooth, paintable wall that you would use for a textured wall.
Prepping Wallpaper for Paint
Video of the Day
Before applying any type of paint over wallpaper, it's vital to ensure that it's well adhered to the wall. Assess its condition by running a drywall knife lightly over the entire wall. Any spot that you can easily work out or press in with the knife is a problem area, and the paper in that area either has to be glued to the wall or cut off with a utility knife. Dig the corner of the knife into small bubbles to puncture them, then scrape off the loose paper. If the paper comes off with little effort, and small voids quickly turn into large ones, you should reconsider your decision to paint over the wallpaper.
Video of the Day
Cleaning Wallpaper for Paint
Before painting, make sure the wall is clean and mildew-free. Gently wash away dirt and grime with warm, soapy water. Wash off any mildew with a solution of 1/2 cup chlorine bleach per gallon of water. Dry the wallpaper with a soft cloth. Wait until the wallpaper has dried completely before adding primer.
Sealing and Priming Wallpaper
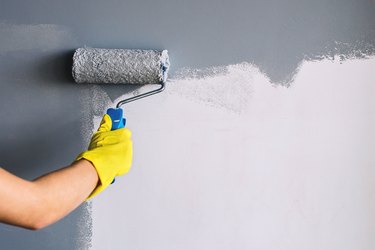
You need to seal the wallpaper seams to keep the moisture in the products you spread on the wall from seeping behind the paper and loosening the glue. Do this with a shellac-based, stain-blocking primer. Paint the primer along the seams with a paintbrush, then cut in the edges of the wall and roll the primer over the entire wall with a medium nap roller.
Warning
Wear a respirator during this procedure, and keep the room well-ventilated.
Skim Coat Over Wallpaper — Optional
If the wallpaper appears rough or damaged after priming, you may want skim coat it with drywall joint compound to hide the wallpaper seams, as well as all the bubbles you repaired. Cover the floors and furniture with plastic sheeting, as this can be a messy procedure. Premixed mud has just the right consistency for this job.
- Spread the compound onto the wall with a 6-inch drywall knife, creating a thin, consistent layer.
- Make a second pass with the knife to scrape off most of the mud, leaving just a very thin layer that fills in depressions and low spots. Scrape off the knife into your mud pan as you work.
- Let the compound dry completely, then scrape the surface with the drywall knife to remove dried drips and ridges.
- Repeat the same process to apply a second thin coat. Apply a third coat, as needed.
- Sand the final coat with a sanding sponge or a pole sander and 150-grit sandpaper. Wear a dust mask while sanding.
- Apply a coat of primer over the dried compound, using poly vinyl acetate drywall primer. This seals the mud and prevents the wall paint from blotching.
Painting Over Wallpaper
You're now ready to paint -- and at this point -- you can paint the wall just like any other by brushing and rolling two coats of latex-based wall paint over it. Use a synthetic-bristle brush to cut in around the edges of the wall and around trim, and then immediately roll the wall while the cut-in paint is still wet using a medium-nap roller.