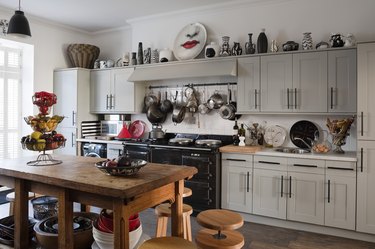
Glazing kitchen cabinets is also known as antiquing. This is the process of artificially aging the way a cabinet looks by applying a finish to give it a weathered appearance. It is best done on painted cabinets because stained cabinets tend to repel the glaze mixture, and the ultimate result is that you don't see any difference. Glazing is a great way to add class to old, worn-out cabinets that you might otherwise throw away, and it adds a classic touch to cabinets that you love and want to keep.
Gel Stain for Best Results
Video of the Day
Gel stain is the perfect glazing material, as explained at Furniture Refinishing Studio, but you can also do the job with a standard liquid stain. Either way, you have to protect the stain with a coat of clear finish to prevent it from rubbing off, and a water-based polyurethane works as well, or even better than, an oil-based finish.
Video of the Day
A glazing project can be completed by virtually anyone with a little do-it-yourself experience who follows the proper technique to achieve the look. It's as easy as painting cabinets, which as Benjamin Moore describes, is pretty easy.
How to Antique Kitchen Cabinets
Step 1: Remove Doors and Hardware
Remove all of the hardware and the hinges from your kitchen cabinets with a screwdriver. Lay the removed cabinet doors down on a table that has been covered by a drop cloth.
Step 2: Wash the Cabinets
Wash the cabinets using a soapy dishwater solution. Use a rag or sponges to wash and then rinse the cabinets. Cabinets around stoves might need to be degreased with a degreaser after washing to remove cooking oils. Once degreased, wash and rinse the cabinets and allow them to dry.
Step 3: Mix the Glaze
Mix up a glazing solution in a bowl. A glazing solution will consist of latex glaze mixed with latex paint. The color of the paint should compliment the color of your kitchen. For example, if you have brown accents, use brown paint mixed with glaze. If you have gray countertops, use gray paint mixed with glaze. If you want a neutral glaze color that goes well with any kitchen motif, use black paint. Ultimately, this is a subjective process that relies on your personal taste.
Step 4: Add the Paint
Add in 1 part of paint to 3 parts of glaze for a light glazing solution. A medium glazing solution will be 1 part glaze to 1 part paint, and a dark glazing solution will be 3 parts paint to 1 part glaze. Mix the glazing solution well with a paint stick.
Step 5: Apply the Glazing
Dip a rag into the glaze and apply it on small sections of the cabinet or the doors. Rub it vigorously onto the surface and then gently wipe it off with another rag. The more pressure you use wiping off the glaze, the less glaze that will remain on the surface. You can apply it in long vertical or horizontal motions for a more streaked look, or apply it in a circular motion for a more swirled look. Feel free to experiment for the way that looks best to you.
Make sure you get glaze into all the nooks, crannies and crevices of the cabinet and door design.
Step 6: Apply a Clear Finish
Wait for the glaze to dry, then brush on one or two coats of clear water-based polyurethane or acrylic finish. Let the finish cure before using the cabinets.