
Whether you have limited garden space or prefer seasonal flowers, container gardening can be an ideal alternative to planting in the ground. Wooden planters are versatile containers for gardening because they work with so many landscapes and architecture styles. But before you can start gardening in a wooden planter, you need to prepare it properly to ensure its durability and the health of the plants. It just takes a few simple steps, and your wooden planter will be ready for business.
Prep the Wood
Video of the Day
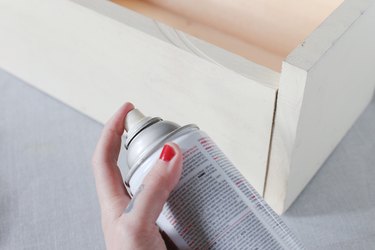
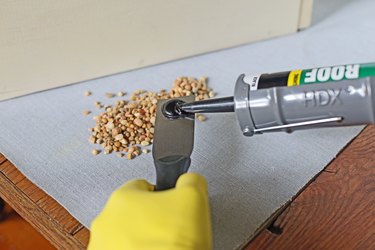
Before picking out plants and opening a bag of potting soil, prepare the wood itself so it will last out in the elements. The exterior and interior of the planter needs some type of finish to protect the wood. For the exterior, paint typically offers the best protection. Opt for a latex formula, which can withstand the swelling and shrinking that wood undergoes with outdoor moisture better than oil-based paint. Start with a primer -- make sure to choose an oil-based, stain-blocking primer for soft woods, such as cedar or redwood, that bleed tannins. A latex or oil-based primer is effective for hardwoods such as teak or ipe. To prepare the interior of the planter, use a putty knife to apply roofing cement to the wood. It helps to protect the surface from moisture and to prevent it from rotting.
Video of the Day
Consider Drainage
A wooden planter should have drainage holes in the bottom to prevent water-logged soil. If the holes are too large, though, some of the soil itself may be washed out of the container, so cover the bottom of the planter with landscaping fabric to prevent soil loss. Even with drainage holes, however, water may not be able to drain from the planter if the soil is too tightly packed on the bottom of the container. To improve drainage, place a layer of broken terracotta pots, pebbles or Styrofoam packing peanuts on the bottom of the planter.
Use Proper Soil
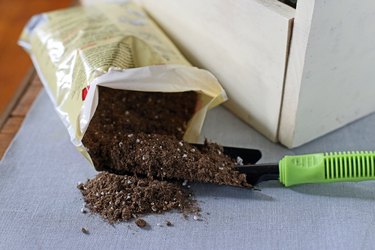
Regular garden soil is too dense for filling a planter and can actually put plants at risk for disease. Instead, use bagged planting mix -- choose one labeled "potting soil," which features sterilized soil and other nutrients, or a "soil-less" mix, which has a looser consistency because it contains peat moss, compost or perlite. Soil-less planting mixes tend to dry out more quickly, though plants that prefer arid conditions such as succulents do well with a nonsoil mix. You can also make your own planting mix by combining 5 parts compost, 1 part builder's sand, 1 part perlite and 1/4 part dry organic fertilizer. If the soil mix that you use doesn't contain slow-release fertilizer, add a few granules to the planter just before planting too.
Add Plants
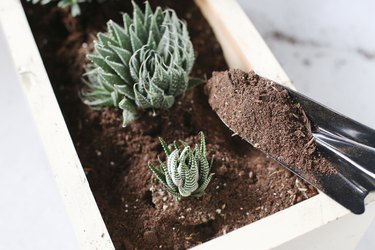
When you add the plants to your wooden planter, start with the largest plant. Place it in the center and then work outward with other plants. Make sure to remove or add soil as necessary to ensure that the plants wind up with soil at the same level as in their original containers. Usually, you should fill to 1 or 2 inches below the top edge of the planter. After placing the plants in the planter, use a soft-spray nozzle on a garden hose or a watering can to thoroughly water them so they're prepared for healthy growth.