How to Replace the Instrument Cluster on Vehicles
by Contributing WriterUpdated June 12, 2017The instrument cluster of your Vehicles is mechanically simple to replace, but requires programming with a special tester. The New Generation Star Tester with a Vehicles Service Function card are used to store the existing configuration and program the replacement. Check with auto parts stores and Vehicles dealers Vehicles a tester you can borrow or rent. If you check around, you may even find a location that is willing to operate the tester Vehicles you, or will Vehicles least show you the basics of its operation.
Under The Hood:
- How to Replace the Instrument Cluster on a 2002 Lincoln LS
- How to Replace the Instrument Cluster in a Ford Mustang (1994-2004)
- Can I Replace the Instrument Cluster in My F-150?
How to Replace the Instrument Cluster on a 2002 Lincoln LS
Retrieve the module configuration for the instrument cluster module using the New Generation Star Tester. All official replacement instrument clusters are packaged with a multi-language sheet explaining how to configure the module.
Unbolt and remove the hood release handle. Remove the lower cover from the steering column. Pry off the outer instrument finish panel, then unscrew and remove the inner finish panel. Unplug all visible electrical connectors leading to the instrument panel.
Unhook and remove the heat duct for the floor vents. Unbolt the brackets that retain the steering column and gently lower it. Unbolt and remove the instrument cluster.
Install the replacement cluster, following the reverse procedure. Download the saved configuration from the tester to configure the module.
Items you will need
New Generation Star Tester with Ford Service Function card
Socket wrench
Socket set, metric
How to Replace the Instrument Cluster in a Ford Mustang (1994-2004)
Gather the tools you'll need for the job.
Tilt steering wheel all the way down to give yourself as much room as possible to work.
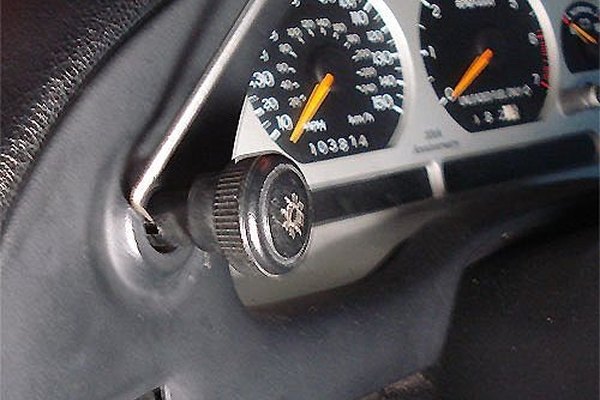
Pull headlight knob all the way out. Rotate until you see a narrow slot along the side.
Insert 90 degree pick in slot. Work the pick behind the metal retaining clip inside, gently pulling it up as you simultaneously pull off the headlight knob. (Just pulling the knob off can cause damage to the retaining clip, meaning the knob in future will fall off onto the floor every time you try to use it).
Using the T20 Torx driver, remove the top two visible screws from the instrument cluster bezel.
Using a flat screwdriver or panel popper, carefully pry up the edges of the bezel until you can work it completely free. Start at the top where the screws were, as this area should be loose enough to insert the panel popper. Take your time! There are five clips holding the bezel in place; so it's important to work all the way around to loosen every clip. You don't want to pull up too soon and cause the bezel to crack.

Now you have access to the instrument cluster. Using the 7mm socket, remove the 4 hex screws that are located at each corner.

Grab edges of the cluster and pull out slightly. Do not pull all the way out. Rotate the cluster so that the gauges are upright. This will help you maneuver the cluster farther out and give you the easiest access to the connectors at the back.

There are two electrical connectors at the back, and you'll see lots of wires extending from these connectors to the car. Disconnect them by pushing the tab button on the top of each connector and pulling straight out. (Connectors are different colors and shapes, so you can't put them back in the wrong place).
You can now carefully remove the entire cluster from the car. To insert a new cluster, simply follow Steps 4 through 8 in reverse. See the Tips and Warnings sections.
Make sure the headlight switch stem is extended when you reattach the bezel. It makes it easier to align the knob over the stem and clip, and click back into place.
Items you will need
T20 Torx driver
Flat blade screwdriver or panel popper
90 degree pick
¼ inch drive hand ratchet with 6 inch extension
7mm socket
Small container to hold parts (optional)
Flashlight or mechanic's work light (optional)
Can I Replace the Instrument Cluster in My F-150?
Removing the Instrument Cluster
Access your instrument cluster by prying out the decorative bezel. Pull out the bezel and place it to the side. Locate all the screws holding the cluster in place, remove them, and place them in a safe location. Jiggle the cluster. The cluster should come out far enough so you can access the back of it. There will be wiring harnesses and light bulbs attached to the back. The wiring connectors are held to the back by a locking tab to keep them in place. The small light bulbs can be twisted and pulled out of the cluster. Once the cluster is fully disconnected, pull it out from the dash.
Installing the Instrument Cluster
Attach the wires and light bulbs to the back of the new instrument cluster before positioning the cluster to the mounting surface. Secure the cluster in place by tightening down the screws with a Phillips head screwdriver. Pop the bezel back into place. Test the new cluster by starting the truck and observing it as you test drive the truck for a few miles.


