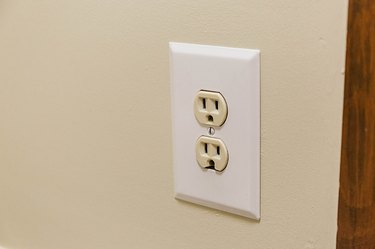
Plastic switch and outlet covers or typically come in three colors: almond, gloss white, and ivory, which often looks simply like a muddy version of white. These aren't the best colors to highlight a recent paint job, and some homeowners opt to spend 10 times the price of generic plastic plates to get ones that look more interesting. But, painting your existing plates is a money-saving option; to get the best results, avoid making rookie painting mistakes.
Here's how to paint plastic outlet and switch covers:
Video of the Day
Video of the Day
1. Take the Plates Off the Wall
A common rookie mistake is to leave the plates in place and paint them when you're painting the wall. This is a recipe for streaks and other defects, and if you do this, you may commit a second mistake by failing to scuff and prime first. Taking the electrical covers down before painting them is a simple procedure that involves removing one or two screws, and it allows you to paint the drywall underneath while you're painting the rest of the wall.
2. Scuff and Prime the Plates
Prepare each plate for painting by rolling a strip of duct tape, sticking the tape to the plate and then affixing the plate to a sheet of newspaper. Now the plate will stay put without having to hold it. Before you tape the switch plates to newspaper, clean each one by immersing it in a solution of 1/2 cup of trisodium phosphate per gallon of water and scrubbing it with an abrasive sponge. This etches the plastic while it cleans off grime and scuff marks. After the plates have dried and are taped them down, scuff each plate with 220-grit sandpaper to rough up the plastic even more; then spray a coat of primer from an aerosol can. The primer is a necessity; without it, you'll find that your paint job needs frequent touch-ups.
3. Apply a Base Coat
You can brush, spray, or even roll the paint onto the electrical plates. Spraying from an aerosol can is quick and easy, and it provides a smooth, glossy finish. Applying the paint with the same tools used to paint the wall provides a texture that more closely matches the wall. You may prefer a texture if your goal is to blend the plates and make them disappear. Because the plates are stuck to newspaper, use long, even brush strokes that start beyond one end of a plate and finish beyond the other end. There's no need for starting or ending a stroke in the middle of the plate.
If you want to have solid-color plates, add a second coat of paint, as needed. Or you can take it step further and personalize the plates with custom effects.
4. Add Custom Designs (Optional)
One way to decorate your plates is to lay a stencil over the base coat and spray on a second color. You can repeat this process with different stencils and colors to create layered, multicolored patterns. An alternative is to paint designs with an artist's brush, depicting flowers, stars, gargoyles, or anything else you fancy. Whether you use stencils or a paintbrush, allow the paint to dry first, and coat the plate with one coat of clear varnish to protect the design once it has dried. Save a small amount of paint for the screws, and touch up with an artist's brush when reinstalling the plates.