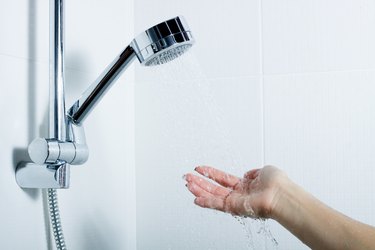
To comply with federal laws, manufacturers such as Moen, Grohe, Waterpik, Delta and Speakman install flow restrictors or regulators inside fixed and handheld showerheads to limit water flow to a maximum of 2.5 gallons per minute, according to the U.S. Environmental Protection Agency. Designed to conserve water, the restrictor also reduces the water pressure output. Over time, it can become clogged with mineral buildup, and this can also cause less than acceptable performance.
While taking out and cleaning the restrictor can help improve the fixture's performance, permanently removing it wastes water and can lead to higher utility bills. Modern faucet aerators contain flow restrictors and can save the average family about 700 gallons per year, reports Bob Vila, so it's a good idea to replace the restrictor or aerator, rather than discard it.
Video of the Day
Video of the Day
Removal From Fixed Showerhead
Step 1: Detach the Head
To keep from scratching the fixture, wrap a clean rag around the bent pipe that comes out from your shower's wall — referred to as the shower arm — and the connector nut. Tighten a pipe wrench around the arm, and then grip the connector nut with an adjustable wrench and turn it counterclockwise until the head is free from the arm.
Step 2: Remove the Restrictor
Most showerheads have a washer just inside the connector nut, which not only helps provide a tight seal, but holds a mesh filter or screen in place. In most designs, the washer and screen must be removed so you can get to the restrictor.
Carefully remove the washer with needle-nose pliers. Turn the head upside down and tap the end against your palm to get the screen to fall out. If it doesn't, carefully remove it with your pliers. The plastic restrictor can now be seen, and, depending on the brand, it might be white, green, pink or red. Pry the restrictor out of the fixture with a flat-head screwdriver.
Step 3: Reassemble the Fixture
Clean the showerhead, then put the screen back into place, and inset the washer and push it with your fingers to firmly seat it into place. Remove any old plumber's tape from the threads of the shower arm and wrap new tape around the threads in a clockwise direction. Hand-tighten the connector nut onto the shower arm until you can no longer turn the nut. Wrap a rag around the nut and arm, and hold the arm with a pipe wrench; turn the nut another quarter turn with an adjustable wrench.
Removal From Handheld Fixture
Step 1: Locate the Restrictor
Refer to the manufacturer's product information or website to find out where the restrictor is located. Depending on the brand, it may be inside the end of the handle that connects to the flexible tubing or inside the holder that attaches to the shower arm.
Step 2: Detach and Remove the Restrictor
For fixtures with the restrictor inside the end of the handle, cover the connector nut with a rag, and then grip the nut with adjustable pliers. Turn it counterclockwise to loosen and remove the handle from the tubing. To expose the restrictor, remove the washer inside the handle and the filter screen with needle-nose pliers. Pry the restrictor out with a flat-head screwdriver.
For fixtures with the restrictor inside the holder, cover the connector nut and shower arm with a rag. Grip the arm with a pipe wrench and the nut with adjustable pliers. Turn the nut counterclockwise until the holder is free from the shower arm. Remove the washer and the filter screen from the end of the holder with needle-nose pliers. Pry the restrictor out with a flat-head screwdriver.
Step 3: Reassemble the Fixture
Replace the filter screen and washer. Push the washer in with your fingers to firmly seat it into place. Remove any old plumber's tape from the threads of the flexible tubing or shower arm. Wrap new tape around the threads in a clockwise direction. Hand-tighten the connector onto the threads, cover up the nut with a rag, and tighten the nut another quarter turn with an adjustable wrench.