

In 1981, the early education specialist James L. Hymes argued that young children should have an indoor and outdoor classroom to promote important motor and social skills. Educational professionals across the country have adopted Hymes' model and are beginning to reap the benefits of designing and creating an outdoor environment that builds on and supports indoor learning and play.
Designing the Preschool Indoor Classroom
Step 1
Reorganize indoor space so students can move around the room freely without bumping into or tripping over objects. Open pathways also allow the teacher to better move around the classroom when supervising or attending to a student.
Step 2
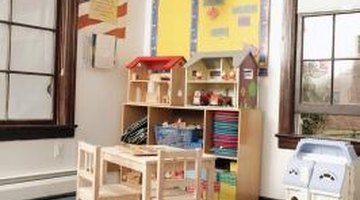
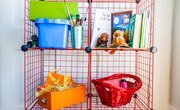
Create activity and learning centers that motivate and interest students. Ideas include an art center, drama center, library area, science center and math center. Ensure that each center is well equipped. Stock the library area, for example, with age-appropriate reading materials, picture books and pencils and paper for writing stories.
Step 3
Designate private areas in the classroom for time-outs, naps and individual or paired work. Create a physical barrier between the private space and the rest of the classroom with a low wall or cushions or by using carpet in different colors or styles.
Step 4
Ensure the indoor classroom is well ventilated with central air, fans or child-height windows that open, allowing students to visually connect with the outside world. As preschoolers spend much of their time on the floor, a low-pile, neutral-colored carpet should be used in the main part of the classroom. Carpet provides safety and comfort and is easy to clean. In contrast, in a designated eating area and in any spaces where students participate in messy activities, like painting, opt for a tiled floor or linoleum.
Designing the Preschool Outdoor Classroom
Step 1
Provide easy and safe access from the indoor to the outdoor classroom. The two classrooms are ideally adjacent to one another or are connected with a designated walkway.
Step 2
Ensure students have open space to run around. The National Association for the Education of Young Children, for example, recommends a minimum of 75 square feet of outdoor play space per child. This area is ideally situated in the center of the outdoor classroom so that teachers can supervise at all times and so that it does not interfere with other activities.
Step 3
Create outdoor activity areas around the open space area. Allow students access to a wide range of materials and equipment, like a sandbox, a wet area, large balls and outdoor blocks.
Step 4
Conduct regular maintenance to remove any broken equipment and to inspect any guardrails or fencing. The sandbox and wet areas should be clean and free of choke hazards. Ensure shaded areas and drinking water are always available to students, particularly during warm weather.
Tip
Preschoolers should be constantly supervised in both the indoor and outdoor classroom.
Tip
Stock the indoor and outdoor classroom with first aid equipment in case of emergencies.
Related Articles


References
- Early Childhood News: Play in Early Childhood
- Community Playthings: Classroom Design and How It Influences Behavior
- Childcare Lounge: Equipment Lists for Child Care
- North Carolina State University: Making the Most of Outdoor Time With Preschool Children
- Great Schools: Preschool Playground Guidelines
Tips
- Preschoolers should be constantly supervised in both the indoor and outdoor classroom.
- Stock the indoor and outdoor classroom with first aid equipment in case of emergencies.
Writer Bio
Kaye Jones has been a freelance writer since 2009, specializing in history, education and mental health. Her undergraduate dissertation was published by the Internet Journal of Criminology. Jones has a first-class honors Bachelor of Arts in history from the University of Manchester.