Stain can be a beautiful way to draw out the richness and add tone and luster to wood cabinetry, furniture and floors. While many people choose to hire out their staining projects, it's possible to turn staining floors, cabinets or furniture into a DIY project. If you're planning to stain something, it's a good idea to familiarize yourself with the types of stain and topcoats available, as well as the best staining practices, before you begin.
Video of the Day
Staining Basics
Staining bare wood can alter the wood's color and bring out the beauty of the wood's grain pattern. Staining works by seeping into porous surfaces, latching on to the wood and dyeing the surface of the object. A stain is typically applied one coat at a time, but subsequent coats penetrate less and less as the pores in the wood become saturated with stain. Unstained wood is often sealed with a polyurethane finish or another sort of topcoat, and in this case, you can't stain the wood, but you can use a colored coating to change the color of the wood.
Video of the Day
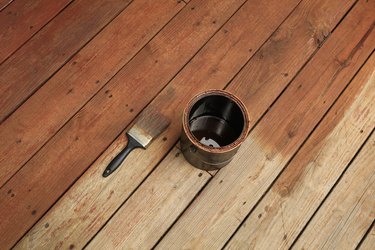
Staining Unfinished Wood
Stained wood that hasn't had a topcoat or lacquer applied to it can be restained using a variety of stains. Oil stains are the most common sorts of stain and come in both oil and gel forms. There are also water-based stains that come in a wider variety of colors than oil stains and don't emit any fumes. Polycrylic stains are also popular and have their own sheen to them, making a topcoat optional.
Apply the stain with a paintbrush, sponge or rag, making sure to brush or rub with the wood grain rather than across it. The goal is to get an even, rich tone across the entire surface. Mop up any excess stain that pools in the corners or on the edges of the object. For a deep stain, leave the stain on the wood for 5 to 10 minutes before wiping it off with a cloth. For a lighter stain, wipe the surface immediately after application.
Allow the stain to dry for 24 hours before applying the topcoat of your choice. This protects the stain from wear and also adds an attractive sheen to the object. Popular finishes include clear lacquers, polyurethane and polycrylic finishes.
Already Stained and Finished Wood
If the object you're hoping to stain has been sealed with a topcoat, you won't be able to restain it, but you can go over it with a coating or a colored stain blend. As an alternative, you could color the wood with an oil-based paint, but the opacity of the oil-based paints can hide the grains.
There are a number of polyurethane stain blends available in a variety of wood tones. They're specifically constructed to work over existing topcoats and stains, so you don't need to strip or sand away the old finish, although slightly dulling the older topcoat with a medium grit sandpaper can help the new stain bond more deeply with the wood.
To prepare, clean the wood surface with a strong degreasing cleanser and wipe it down with a damp cloth or sponge. Wipe the surface dry with a dry cloth before beginning to sand. After sanding, wipe the surface clean. Use painter's tape or newspaper to protect adjacent surfaces from getting stained.
Apply the coat with a fine-bristle paintbrush made expressly for furniture refinishing. Apply several thin coats versus a single thick coat, which can bubble and clump. Leave each coat to dry for 24 hours.