If you're looking for an instant update to tired siding on your home, installing shutters can make a big difference. Shutters give homes a fresh, cozy look and are fairly inexpensive. When your house has vinyl siding, there are certain steps you will need to follow to properly install your shutters.
Measure Your Windows
Before purchasing materials or preparing the existing siding, you will need to determine the size of the windows around where you plan to install shutters. Use a tape measure to measure the height of each window. If you have multiple windows located close together on a particular wall of your home, you will also need to measure the space between them to be sure your shutters won't overlap once installed.
Video of the Day
Video of the Day
Visit a hardware or home improvement store and decide which variety of shutters you would like to purchase. Shutters look great in a contrasting color to that of your siding, but lighter or darker shades of your house color are also a solid choice.
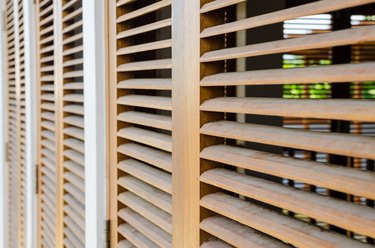
In addition, you will need to choose from either wood or vinyl shutters. Wooden shutters are more traditional and have an authentic look. However, these shutters may not hold up as well over time with exposure to moisture and temperature changes. Vinyl shutters, which typically have a wood look, are longer lasting, but cannot serve as functional shutters to protect your windows.
Once you have determined the aesthetic of your new shutters, purchase or order the number you will need in the size appropriate for your windows.
Install Your Shutters
Have a helper hold a shutter up to the edge of your window. Be sure to leave space between the edge of the shutter and the window edge so your shutters can expand and contract as temperatures rise and fall. Once you determine where you would like the shutter to be placed, use a pencil to mark the edge on the siding. Depending on whether there are screw holes in the shutter itself, you may also need to mark those holes in pencil.
If your shutters do not have holes for screws, you should place them near the top of the sidebars. Approximately 5 inches from the shutter's top is an ideal location for screws. Measure the same distance upward from the bottom of your shutters and make a mark on your siding for the next screw. Repeat this process for each shutter you'll be installing. Use a level to ensure that you are hanging shutters at an even height on either side of each window.
When you drill your holes, be sure to drill deep enough that 3-inch shutter fastening screws can be inserted. These screws are special in that they contain a rubber ring to prevent air, water, gas or other materials from entering the hole and damaging the shutters or screws over time. Do not overtighten the shutter screws, as this can cause siding to buckle or dimple.