
This is a simple way to add a watermark to a jpeg. I have included two methods - one for text and one for a picture.
Step 1
Open your photo editing software such as Adobe Photoshop Elements. Open the picture you would like to use as the background.
Video of the Day
Step 2
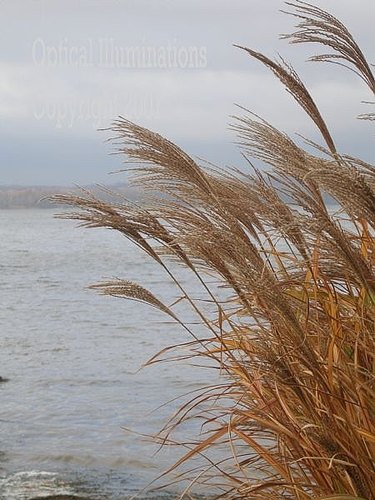
Choose the text icon and place the cursor where you would like to see the watermark. Make sure the font color is the same basically as the background picture. Type the words. Now under the enhance option, increase the brightness and decrease the contrast until the text fades into the picture.
Step 3
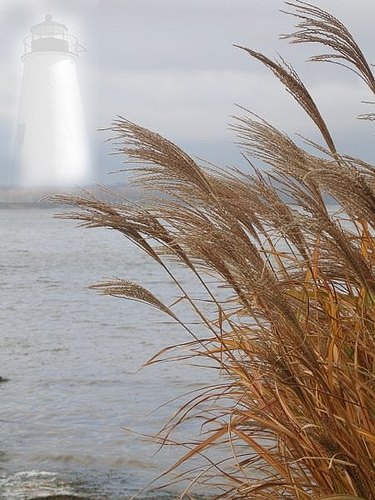
Now to add a picture watermark, skip step two. Instead open your picture you would like to use as a watermark. Change it to a grayscale image. Now paste it onto the original picture you chose to use as a background. Under the enhance option, increase the brightness and decrease the contrast until it fades into the picture. You can then use the airbrush mode of the eraser icon, using a large setting like 200, and erase the edges of the imported picture. It should now look like a watermark.
Step 4
Now make sure you save the finished image as a jpeg. It can be used for many purposes. Take the time to play around with the editing software as the possibilities are almost endless!
Step 5
If this article was of interest to you, please take a second to rate it.
Video of the Day