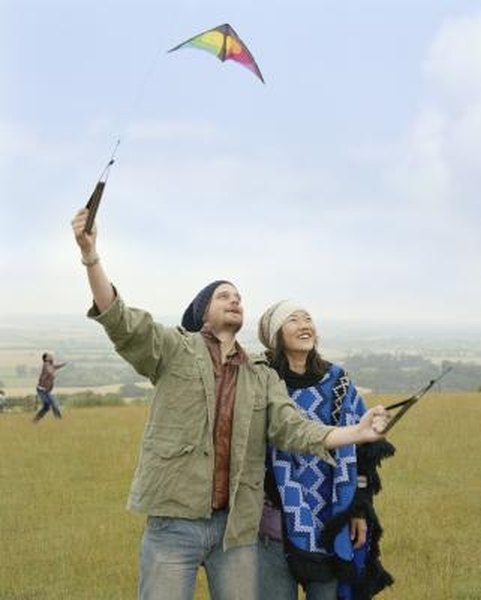

One-string kites are simple to fly, but two-string kites take a little bit more skill and finesse to keep in the air. Two-string kites, or stunt kites, are exciting to fly because they are more interactive than single-string kites and they can perform tricks. The most common stunt kite design is the delta kite, named for its triangular shape. Delta stunt kites have two, or sometimes four, strings to control the kite in the air.
Items you will need
Stunt kite
Kite string
Winder
Open field
Helper (optional)
Setup and Fly a Stunt Kite
Assemble your kite. Insert the leading edge poles into the nose piece. The leading edges are the top poles of the kite frame that touch the wind first. Insert each end of the spreader into the connector pieces on the leading edge polls. The spreader is the part of the frame that holds the kite open in its assembled position. Finally, connect the standoffs to separate the spreader from the sail, which is the fabric part of the kite.
Attach the kite to the flying lines. The bridle of the kite is the cord attaching the frame to the kite strings, or flying lines. Tie a loop in the end of each flying line. Pull the loop through itself to create a simple slipknot, or larks head knot. Stunt kite bridals have two sections of cord with a knot at the end called the tow lines. Loop the slipknot in the kite string over the knot in the tow line and pull it tight. Repeat for the other tow line and string.
Take your kite outside to an open area free of obstacles. Get a friend to hold your kite upright with her face to the wind. The flying lines wrap around two winders. Hold one winder in each hand, making sure there are no twists in the lines. Stand with your back to the wind and step backward 30 to 50 feet, letting the kite strings unwind as you go.
Set your flying line length. Ensure the lines are the same length, then wrap each kite string around a tab on its winder to keep it from unwinding more.
Launch your kite. Have your friend toss the kite straight up into the air. When it catches the wind, pull gently on the winders to make it go faster and higher into the air.
Land your kite. Fly the kite to the edge of the wind. This means that the kite is no longer perpendicular to the wind but at an angle and it will slow and move downward. Gently bring your kite to the ground by slowly stepping forward.
Launch your kite without a helper. Secure the winders to the ground then walk to the kite and position it on its back with its nose pointing away from you. Walk back to the winders and take one in each hand. Firmly but smoothly pull the lines and take a few steps back at the same time. With enough wind and proper technique, the kite will take off.
Steer your kite. Pulling on both winders or stepping back makes the kite fly faster. Pushing the winders or stepping forward slows it down. To turn the kite to the right, slowly pull your right hand back. To turn it to the left, pull your left hand back. These are all of the movements necessary to perform kite stunts.
Warnings
- Always be aware of obstacles on the ground and in the air, particularly people on the ground. It is your responsibility as the kite flier to protect the safety of people around you. It is not their responsibility to move out of the way of a crashing kite.
- For your safety, do not fly kites near power lines or over trees.
Tips
- Beginner stunt kites fly best in low to moderate wind, between 3 to 15 mph. The heavier the kite, the more wind it needs to fly.
- Use smooth, calm arm movements to fly a kite. Jerky or abrupt movements may cause you to lose control of your kite.
- When attaching the flying line to the bridal, tie a small loop in the end of the larger loop at the end of the flying line. This little loop acts as a handle to easily disconnect the kite from the string.
Warnings
- Always be aware of obstacles on the ground and in the air, particularly people on the ground. It is your responsibility as the kite flier to protect the safety of people around you. It is not their responsibility to move out of the way of a crashing kite.
- For your safety, do not fly kites near power lines or over trees.
Writer Bio
Cora Wilder began her writing career in 2011, specializing in renewable energy, green home repair and home energy conservation. She holds a Bachelor of Science in geology from Colorado State University and a Master of Architecture from Arizona State University.