
The multi-layered slate stone is formed from the metamorphosis of shale (a soft claystone). When shale is subjected to high temperatures and pressure, it flattens out to form slate. The mineral composition of slate includes pyrite, chlorite, biotite, muscovite and quartz. It also contains (but in less frequency) magnetite, zircon, feldspar and tourmaline. Slate is resistant to stains, acid spills and fire. Commercially available slate is in the form of Vermont slate tiles, Indian slate and Chinese slate.
Roofing
Slate rock is used in the construction industry to make roofing shingles and coverings. Slate is preferred over artificial covering materials for its unique physical and chemical properties, moisture resistance, wind resistance, good insulating capability and cold/chill resistance. Slate roofs can last hundreds of years. An example is the Westminster Hall in London, England, that was finished with a slate roof in the Thirteenth Century; the same roof stands as of April, 2010. Slate is ecologically sound and its use does not harm the environment. There are various types of slate roof coverings, including triple, double, scales, French, triple rounded without corners and Abbadini.
Flooring and Cladding
Slate is used for external flooring, internal flooring and cladding. Slate floors are commonly laid in outdoor porches, basements, bathrooms and kitchens. Internal slate floors are durable, versatile and elegant. They allow homeowners and interior decorators to create unique, one-of-a-kind environments. Internal slate floors are available in a wide range of honed finished tiles, natural patterns (natural cleft) and colors, including green, black, gray, red and purple — accenting a space with unmatched style. Slate floors are durable, nonporous, and require little maintenance. External slate flooring can be made with either random slate or slate tiles. Random slate comes in various shapes, such as trapezoids and parallelograms and offers a more natural look. Tiles make for a more finished-looking space.
Landscaping
Slate rock is used in various residential and commercial landscaping projects for its weather-resistant and pollution-resistant properties. It is used to pave paths, surround swimming pools, cover outer walls, make risers and treads on stairs, and even for patios. Slate stone is chiseled to make fountains, used in both traditional and contemporary styles.
Billiard Tables
The smooth playing surface of a billiard table is made from quarried slate. Some tables are made from a single slab of slate, while others are made from multiple pieces of billiard slate. According to the Billiard Congress of America, a three-piece slate with a thickness of one inch is best suited for tournament billiard play. The thickness of slate used for regular billiard tables lies between 3/4 of an inch to an inch. High-quality billiard slate is elastic, moisture absorbent and fine grained.
References
About the Author
Natasha Gilani has been a writer since 2004, with work appearing in various online publications. She is also a member of the Canadian Writers Association. Gilani holds a Master of Business Administration in finance and an honors Bachelor of Science in information technology from the University of Peshawar, Pakistan.
Photo Credits
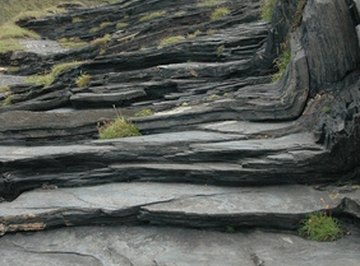
Slate Steps image by Robert Page from Fotolia.com