
How to Adjust the Back Legs on a Miele Dishwasher

Miele dishwashers are designed to adjust in height to fit securely under the countertop, prevent drainage issues and keep the dishwasher from tipping forward when the door is opened. When properly installed with all four legs leveled correctly, your Miele dishwasher will be stable and secure.
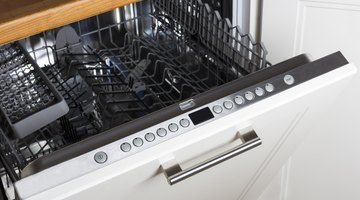
Like most appliances, dishwashers operate best if they are level. Your Miele dishwasher has a built-in leveling system which can be used to adjust height both in front and in back, allowing the dishwasher to fit neatly under the countertop and prevent water drainage issues. Here are the things you will need to have handy in order to level your Miele dishwasher.
Things You Will Need
- Appropriate Miele dishwasher manual, if available
- A T20 Torx screwdriver
- A slotted screwdriver
- An assistant to help hold the dishwasher in tilted position
Warning
Always ensure appliances are turned off and unplugged before beginning repairs or adjustments. If your dishwasher has been hard-wired into the wall, stop and call a qualified electrician.
-
Before you begin leveling the dishwasher, note which issues are causing problems. If the dishwasher has trouble fitting under the counter without stressing the countertop, or there is a gap between the top of the dishwasher door and the bottom of the counter, the front legs require leveling. If water is retained at the back of the dishwasher, or dishes tip over or fall towards the rear of the dishwasher, the back legs need leveling. Estimate how much the legs need to be raised or lowered before moving the dishwasher.
-
If possible, turn off the electric breaker providing power to the dishwasher. Carefully pull the dishwasher out from under the counter and disconnect the plug from the wall socket which is typically located behind the dishwasher in the wall.
-
The back legs of the dishwasher may be white or black with a Torx screw hole that allows you to adjust the height of the leg. Insert the T20 Torx screwdriver into the slot in the dishwasher leg. Turn the screwdriver clockwise to raise the dishwasher, or counter-clockwise to lower the dishwasher. Ten turns are equal to 1 mm of height adjustment. Repeat on the other back leg to achieve the desired position.
-
The front leg levelers may look identical to those in the back, in which case they can be adjusted in the same way. Alternately, the legs may be larger and square with an internal screw. These can be adjusted in height by pushing on them with a slotted screwdriver. Experiment with the height until the dishwasher sits evenly on all four legs, and will fit snugly under the countertop.
-
Slide the dishwasher back into place and check the fit. All four corners of the top should fit firmly against the underside of the countertop without pushing against it enough to cause flexing. Pour a small amount of water in the bottom of the dishwasher to see if it drains correctly to the center. Readjust, if needed, to ensure the dishwasher is stable and drains correctly.
-
Carefully plug the dishwasher back in and turn the breaker back on. Slide the machine back into place. Check to see if it stays stable when you open the door. Run a short cycle to ensure the dishwasher doesn't leak and that it drains properly.
-
Your dishwasher should now be level and should not tip forward when the door opens. It should drain properly and dishes inside the machine should remain upright and not topple towards the rear of the dishwasher. You can resume using your dishwasher and enjoy clean dishes without a hassle.
Review Issues with Dishwasher In Place
Disconnect the Dishwasher from the Power Source
Adjust the Rear Dishwasher Legs
Adjust the Front Dishwasher Legs
Check the Level and Fit
Replace the Dishwasher
Tip
It is easier to turn the leveling screws if the dishwasher is not resting on the legs you are trying to adjust. Tip the dishwasher carefully forward or back as needed and have a second person hold it steady while you adjust the back and front legs.
References
Writer Bio
Grace Alexander specializes in jumping off of metaphorical cliffs. Over the past 10 years she has quit her job as an executive chef, started her own copywriting company, moved her family to a Uruguayan ranch and adopted 11 dogs, two doe goats and the fruit bat who lives in the barn. She spends her spare time mending fences, indulging in the odd Netflix binge and baking her grandmother's legendary pie recipes.
More Articles