
One of the oldest flora on earth, ferns fascinate for a number of reasons. The plants with lace-like leaves that reach toward the sky or droop in tumbling clusters are relatively easy to grow and make an attractive addition to a household. If you have one fern, you can propagate it into an abundance of baby ferns with a few items you have around the house, a bit of TLC, and patience.
Fern Facts
Video of the Day
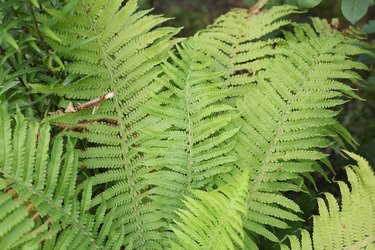
Ferns have a wide definition. They can be any vascular nonflowering plant that has a root system and stems with a set of complex leaves that reproduce by spores neatly aligned on the backside. This is what makes them relatively easy to grow from clippings.
Video of the Day
Most families of ferns hail from tropical origins. Costa Rica is home to more than 900 fern species, which is twice as many as those found in the entire area of North America beyond the Mexican border. Ferns grow best in tropical areas, although most of the species can adjust to other temperate spaces. The Marattiaceae, Gleicheniaceae, Davalliaceae, Blechnaceae and Schizaeaceae plant families are nearly exclusive to a tropical setting and could give you trouble if you attempt to grow them from clippings without the proper humidity and attention.
How Ferns Reproduce
Ferns reproduce from spores rather than seed. Those tiny dots neatly stacked in rows on the underside of the fern fronds are clusters of spore cases. The spore casings can be a light green, yellow, faded black or brown in color. They become ripe and open, letting the tiny bits of spore dust fall to the ground. This is what will get you a new fern for your home.
Things You'll Need
Waxed paper or a resealable plastic bag
Soil
Plastic container
Plastic wrap
Plant pot
How to Propagate Ferns
1. Cut a Fern Frond
Cut a fern frond with a healthy dose of spore casings on the back using a clean gardening utility knife.
2. Collect the Spores
There are a few ways to collect the tiny spores: You can leave the clipping out in the open on a sheet of waxed paper and wait for the spores to gather underneath in a fine layer of dust. Or you can put the frond in a resealable plastic bag and give it a shake from time to time. When the spores collect in a pile at the bottom of the bag, you are ready to plant.
3. Heat Some Soil
Heat a small amount of moist soil in the microwave in a plastic container until it just starts to steam. Don't make it too wet and muddy – just moist enough to adhere together. This makes for a more sterile environment. Once cool, shake your store of spores over the still moist soil.
4. Place in Bright, Indirect Light
Cover the container with plastic wrap and put it in bright light but not direct sun or it may burn the tender growths. Mist the top of the soil regularly with a plant mister to maintain a moist, humid environment. Baby ferns should appear in about a month.
Tip
At this point, you can remove the plastic coverings a few minutes a day, adding more time to the household environment to allow the young plants to adjust to the drier air.
5. Care for the New Growth
When it is ready to transfer to a pot, use well-draining, humus-rich soil. Continue to concentrate on keeping the tiny plants moist until their roots have anchored them and you see solid growth that doesn't look wilted or stressed.
Keep the new fern plants in a shady spot in the house. If they look poorly, mist them with water and cover them with a bag to give them a protective, moist environment.