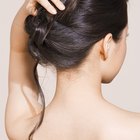
A french braid is a type of braid that can be done on long hair. Someone with shoulder length hair may not be able to have their hair french braided. A french braid is an alternative to putting your hair in a pony tail as it keeps your hair out of your face. It is difficult to do this type of braid yourself on your own hair. The key to having a clean and neat looking french braid is to pull the hair strands tightly as you're braiding the hair.
Brush your hair to remove any knots. It is easier to do a french braid on hair that is smooth and not tangled.
Grab a small section of hair at the top and middle of the head. The amount of hair you grab should be enough to fit into a small barrette and enough to start a regular braid. Divide this section of hair into three equal parts. Hold the right section in the right hand, the left section in the left hand and the middle section between your thumb on either hand and another finger.
Start braiding the hair, pulling tightly as you go. Cross the right section over the middle section then the left section over the right section. Stop after you've completed one rotation.
Gather a small section of hair, near the braid, on the right side of the head. Use a comb to help section the hair. The amount of hair you grab should be equal to the section you are already braiding. Grabbing too much hair will make the braid look lopsided. Add this new section to the right braid section, pulling tightly, then cross it over the middle section of hair.
Repeat the step on the left side. Cross the left side of the braid over the middle section. Continue adding small sections of hair to the right and left sides of the braid, pulling each section tightly as you go.
Braid the hair until all strands of hair are incorporated into the braid. Once you reach the nape of the neck, finish the french braid with a regular braid as there shouldn't be any more loose strands of hair to add.
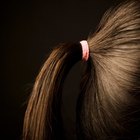
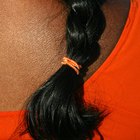
Secure the end of the braid with a rubber band.
Related Articles
How to Do an English Braid

How to Part Cornrows Straight Back
How to Braid Your Own Rat Tail

How to Braid Underhanded

How to Unlock Dreads

The Best Ways to Do a Gymnast's Hair
How to Do Two Strand Twists With ...

How to Blend Extensions That Don't Match

How to Clean Hair With White Distilled ...

How to Keep a Ponytail in All Day
How to Make a Small Bun Look Fuller

How to Make a Grecian Braid
How to Put in a Drawstring Ponytail
How to Make Hair Extensions Wavy

How to Do a Half Crown Braid
How Do I Curdle Soy Milk With Lemon ...
How to Do Micro Braids Yourself for Free
How to Braid in Fake Hair

How to Wash a Curly Weave
How to Use a Volumizing Finger Diffuser
References
Writer Bio
Shelby Winchell has worked as a journalist for more than seven years, covering the economy, political figures and celebrities for various websites. She has a bachelor's degree in broadcast journalism.