
How Do I Design a Driveway Canopy?

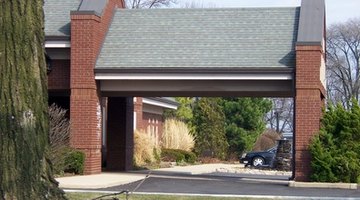
A driveway canopy is designed to protect a car sitting outside of a garage. A car cover can be constructed of materials such as fabric, metal, or wood. One of the easiest ways to stabilize a canopy is by attaching it to the front or side of an existing garage. Construction materials should blend well with the house design, but they also should harmonize with the overall neighborhood. A driveway canopy will not always increase property value, so design it to avoid detracting from the home's value. Create a cover that doesn't draw too much attention to itself.
-
Obtain a copy of local building codes that apply to driveway canopies. Review any restrictions for specific neighborhoods. Discuss specific needs with local officials and ask for input and ideas, since the staff members assigning permits will be familiar with weather and climate issues. Get as many facts as possible about the types of canopies used locally before researching which canopy will work best for your circumstances.
-
Review home-design books and magazines to find car canopy ideas. Make sketches of a carport-type structure with a flat, pitched, hip or angled roof. Create a cover that blends well with the roof lines of the house and the overhangs.
-
Design a canopy that extends at least 36 inches beyond the vehicle in all directions. Make the roof area generous enough to protect the car from the elements, and protect people getting out on either side of the car. Allow room for car doors to open without hitting the canopy support posts. Provide about 48 inches overhead if the vehicle has a luggage rack.
-
Choose the construction materials. Decide if the canopy will be a fabric canopy, metal carport, or wooden framework with a standard roof and asphalt shingles that match the house. Select the highest quality materials available if the canopy will be visible from the street. Place the canopy on the side or back of the house if it will be built with a limited budget.
-
Plan how to stabilize the canopy -- a strong wind can carry a canopy into a neighbor's yard. Consider anchoring a metal carport to an existing porch or garage. Anchor a stand-alone canopy to a concrete slab using anchor bolts. Secure the canopy to a house, shed or a nearby building's framework, if possible.
-
Select a canopy style that fits well in the neighborhood. Consider a striped awning fabric, for example, if the home is a beach house, but not in a neighborhood with colonial brick homes. Investigate what others are selecting. Talk with homeowners about what they like and don't like about their driveway canopies.
References
Resources
Warnings
- Avoid skimping on support posts. Place supports post for a wooden framework every six to eight feet. Consult an expert carpenter if a standard roof will be constructed of plywood and asphalt shingles. This kind of weight can collapse without proper installation.
Writer Bio
Judi Light Hopson is a national columnist for McClatchy Newspapers. She is founder of Hopson Global Education and Training and co-author of the college textbook, Burnout to Balance: EMS Stress. She holds a degree in psychology from East Tennessee State University, and has been a professional writer for 25 years.
Photo Credits
- building overhang image by palms from Fotolia.com
More Articles