
How to Texture a Ceiling by Hand

Table of Contents
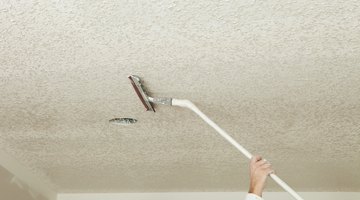
Texturing a ceiling can be accomplished in a variety of ways. From mud and tape to stamped ceilings, ceiling texturing is a DIY project that can completely alter the look of a room. There are many options beyond the traditional popcorn ceiling look that may suit your decorating preferences.
Though it isn’t always the first part of a room you notice, the appearance of a ceiling can dramatically alter its overall look. Whether smooth or textured, dark or light, ceilings contribute significantly to the ambiance of a space. Be it for sound buffering or for aesthetics, creating a textured ceiling isn’t as difficult as one might imagine. Depending on your skill level and the look you desire, these projects can be handled in as little as one day.
Texturing a Ceiling
Textured ceilings can be made in a variety of ways, including with a powder compound, manually or through a spray. A texture roller may also be used. Depending on the look you prefer, you may wish to use one or a combination of these techniques.
Before beginning any home improvement project, be sure to keep safety in mind. If you will be using a ladder to reach the ceiling, you should always have a spotter nearby. In addition, turn off any power from the breaker to ceiling lights or other electricity in the ceiling before you get started.
Creating a Popcorn Ceiling
During the boom of suburban housing developments, builders looked for a cost-effective way to finish the ceilings of the homes they were building that would cover any cracks or possible imperfections that occurred during the building process. The solution was to make an acoustic ceiling, better known as a popcorn ceiling.
To create a popcorn ceiling, you will need to first coat the ceiling with a stain-blocking primer. This will help the texture to stick. You should also be sure that you have properly cleaned and prepped the ceiling to ensure that it is ready for paint.
After you’ve primed the area, mix 2 gallons of water with a bag of popcorn ceiling spray. This usually comes in 13-pound bags. Once you’ve finished, the mixture will be slightly liquidy but will resemble cottage cheese. You will use a texture gun to spray the mixture onto the ceiling.
Other Texturing Options
In art, there are four different categories of texture. These texture types are also considered when contemplating what type of texture you want on your ceiling. Actual texture is just what it seems and can be brought to life on your ceiling with the impasto effect by using thickly layered paint. Typically, techniques like this use very visible, sweeping brush strokes.
Simulated texture appears to have a raised surface but does not. A good example of this is types of sidewalk art that make it appear as though there is a hole in the ground when there really isn’t one. Using various shading techniques and paint, you may be able to create this look on your ceiling.
Abstract texture is inspired by a given item but doesn’t perfectly depict it. An example of an abstract texture used in home decorating is to base a textile on a flowering tree branch. You might also consider inverted texture, made when you use something that isn’t an art tool to create a texture. For example, stamping a woodblock against another surface can create its own unique textile.
Mud and Tape Ceilings
Good drywall finishing is an art form in many ways. With the same discerning eye as any other artist, a craftsman will cover seams in tape and then cover over that with joint compound, also called “ceiling mud.” Following a process of tape, mud and sand will yield a beautifully finished ceiling. This process takes a great deal of time, however, and it isn’t the most cost-effective method if you’ll be hiring someone to do this work for you.
Stamped Texture Ceilings
If you plan on adding texture to your ceiling, you can apply texture manually by “stamping.” You can choose any object you want to use as a stamp after you’ve applied drywall compound. Some examples are the bristles of a broom, a sponge, a brick or tiles.
Anything you can stamp on a wall that has texture can be used to make a textured ceiling. It is important to remember that if you are using an image, it will be the mirror of whatever you are stamping. This means texture that has words, for example, would be backward.
Joint Compound as Texture
Joint compound is a key ingredient in knockdown wall texture or ceilings. Using a paint hopper, you can spray a joint compound mix onto your ceiling and then scrape the ceiling with your drywall knife. This “knocks down” some of the texture, yielding a visually interesting appearance.
References
Writer Bio
Danielle Smyth is a content writer and social media marketer from upstate New York. Her company, Wordsmyth Creative Content Marketing, services clients in a variety of industries.
More Articles