How to Tighten or Loosen Bicycle Brakes
The latest bicycle brakes are designed to be incredibly powerful and safe. But you still need to take care of them. Brakes have only two problems: They can be too tight or too loose. Brakes that are too tight rub against the wheel and slow you down; brakes that are too loose don't provide enough stopping power. Keep them properly adjusted, and your riding will be easier and safer. This fix applies only to bikes that utilize a frame-mounted brake to grasp the wheel rim. Bicycles with hydraulic disk brakes should be serviced by a qualified mechanic.
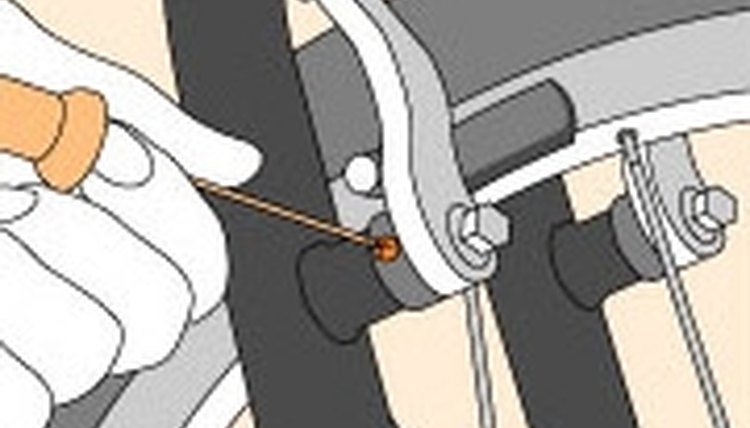
Lift the bicycle off the ground and spin each wheel. If the rubbing is very faint, the problem can be fixed using the brake-alignment screw. You'll find this small screw on the brake by the wheel rim.
Tighten or Loosen Bicycle Brakes
Turn the screw slowly with a small Phillips screwdriver, in either direction, until the brake no longer contacts the rim (see A). Work slowly, and frequently spin the wheel to check for rubbing. A small adjustment should be sufficient.
Severe rubbing requires an adjustment of the brake cable. Using an adjustable wrench or an Allen (hex) wrench, loosen the nut holding the brake cable to the brake itself. Allow the cable to loosen slightly and resecure the nut.
Spin the wheel to test for rubbing. Squeeze the brake lever a few times to be sure the new slack in the cable has reached the brake. Loosen the cable further if necessary.
Repeat steps 1 through 4 for the other wheel.
Tighten or Loosen Bicycle Brakes
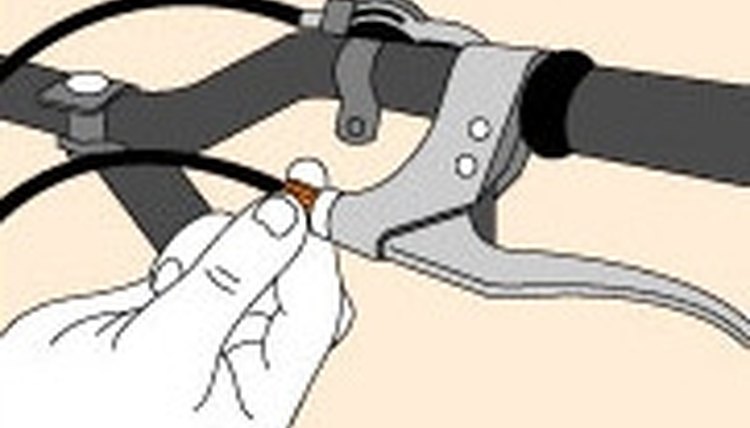
Immediately in front of the handlebar brake lever is a screw adjuster, through which the brake cable passes. Turn the adjuster counterclockwise to add tension to the brake cable and thereby increase braking power (see B).
Test the brakes for sufficient tension. If you can pull the brake lever all the way back to the handlebar, continue adding tension.
If the adjuster doesn't add enough tension, the brake cable must be pulled tighter at the brake. Return the adjuster to the middle of its adjustment range by giving it a few clockwise turns.
Tighten or Loosen Bicycle Brakes
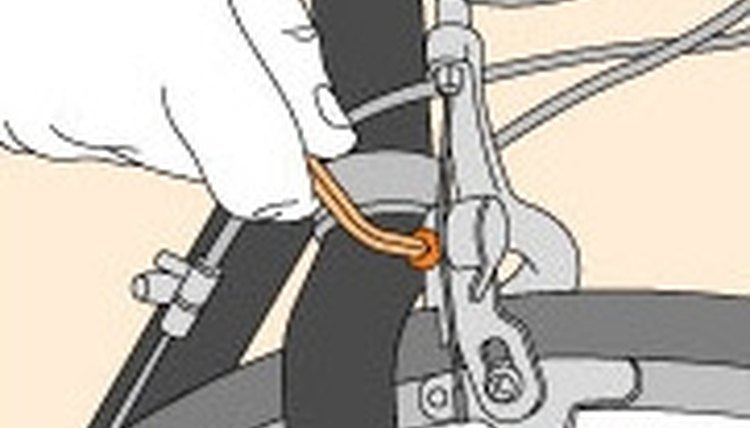
Follow the brake cable to where it attaches to the brake. Loosen the nut holding the cable to the brake, using either an adjustable wrench or an Allen (hex) wrench (see C).
Tighten or Loosen Bicycle Brakes
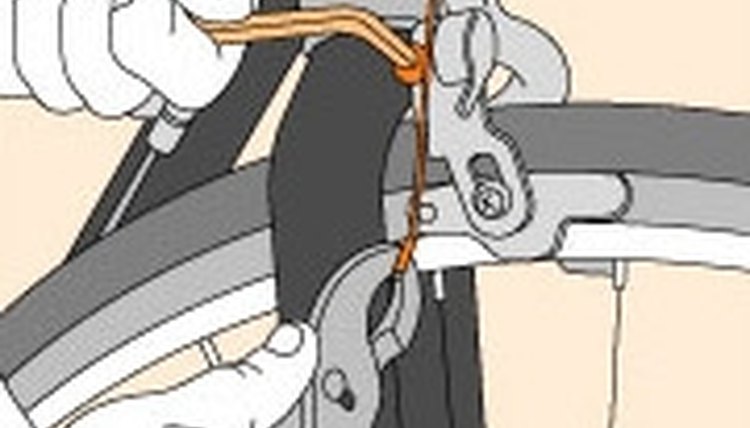
Using a pair of pliers, pull the cable taut (see D). While holding the cable taut, resecure the brake cable by tightening the nut with a wrench.
Repeat steps 1 through 5 for the other brake. Ride the bike to test the brakes. If you have added too much tension and the brakes rub slightly, try turning the screw adjuster clockwise. This will remove a bit of tension from the brake cables.
Tips
If either of the wheels on your bicycle is obviously bent or warped, it may not be possible to prevent the brake from rubbing against the rim. To fix the wheel, bring it to a reputable bike shop. Allen wrenches usually come in a set containing various-size wrenches attached to a handle.
Warnings
Bicycles with only a rear, internal-hub brake (coaster brake) should be treated with caution, as this type of brake doesn't provide reliable stopping power.
Tips
- If either of the wheels on your bicycle is obviously bent or warped, it may not be possible to prevent the brake from rubbing against the rim. To fix the wheel, bring it to a reputable bike shop.
- Allen wrenches usually come in a set containing various-size wrenches attached to a handle.
Warnings
- Bicycles with only a rear, internal-hub brake (coaster brake) should be treated with caution, as this type of brake doesn't provide reliable stopping power.
Writer Bio
This article was written by the CareerTrend team, copy edited and fact checked through a multi-point auditing system, in efforts to ensure our readers only receive the best information. To submit your questions or ideas, or to simply learn more about CareerTrend, contact us [here](http://careertrend.com/about-us).