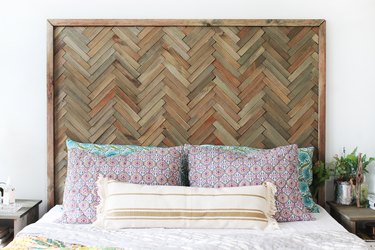
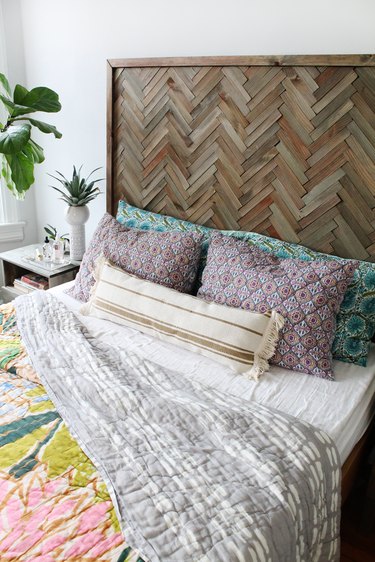
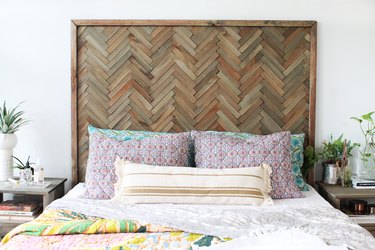
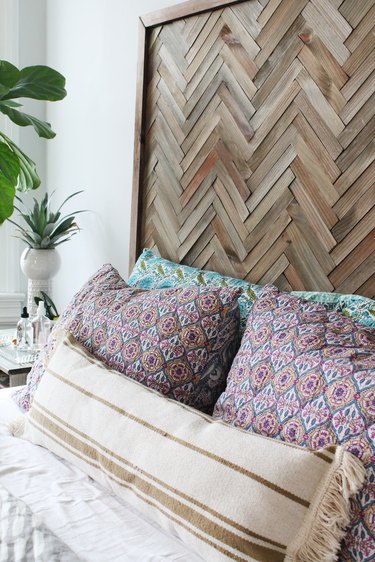
Platform beds are great for apartment dwellers who need storage space wherever they can get it, but they rarely come with headboards. My eclectic bedroom was feeling a little unbalanced with super high ceilings and nothing above my bed, so I ventured to the hardware store to find a cost-effective headboard solution. Wood shims are sold in packages of 12 for under $2 dollars, so they can be purchased in large quantities without breaking the bank. The finished product is rich in texture and adds visual interest to my space. Find out how to create your own herringbone wood headboard in this easy tutorial!
Video of the Day
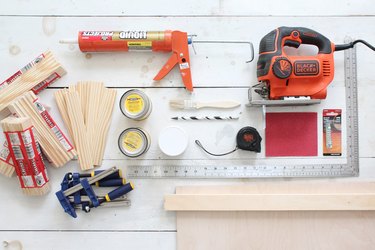
Things You'll Need
Packages of wood shims (25)
1/4-inch-thick plywood cut to size (1)
24 ft. of 1 x 2" pine board
Jigsaw, circular saw, or power miter saw
100-grit sandpaper
Tape measure
Pencil
Carpenter's square
C-clamps
Construction adhesive ("liquid nails")
Caulk gun
2-3 stains in complementary colors
Foam paintbrushes
Wiping cloths
Semi-gloss polyurethane finish or furniture wax
You can have large sheets of plywood "ripped" or cut to specific dimensions at most large hardware stores. Measure the width of your mattress or bed frame to determine the width, and decide how high you'd like your headboard to be, based on the height of your ceiling, side tables, and light fixtures. My bedroom has a 10-foot-tall ceiling, so I opted for a 4-foot-tall headboard to create the right scale and feel when mounted over my queen-sized bed. If creating a larger headboard, keep in mind you'll need to purchase more wood shims and more linear feet of 1 x 2 pine boards for framing the plywood.
Video of the Day
Step 1: Cut the framing pieces.
Use a tape measure and pencil to mark two pieces of 1 x 2 for the length of the headboard and two pieces of 1 x 2 for the width of the headboard. These pieces will create a border or frame around the edge of the finished headboard to give it a finished look. Use your jigsaw or circular saw to make 45-degree miter cuts on the ends of each 1 x 2 pine board so that they create neat, square corners at each joint. If you have one, a power miter saw is the best way to cut miters.

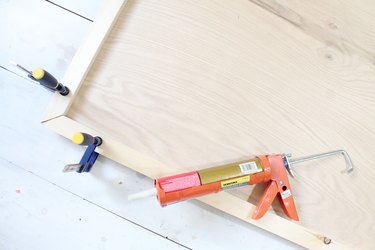
Step 2: Frame the headboard
Apply construction adhesive to the underside of each 1 x 2 framing piece, and clamp them in place along the edge of the headboard. Ensure the edges of the 1 x 2 are flush with the plywood and that the corners are square before allowing the adhesive to set. Follow the manufacturer's recommended drying time before moving on to the next steps.
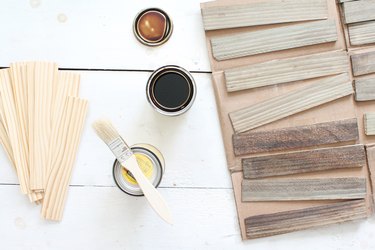
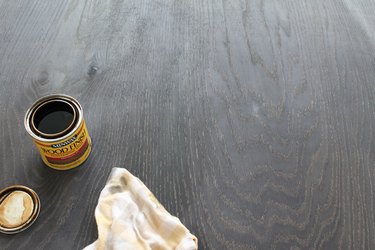
Step 3: Stain the wood shims
While you're waiting on the adhesive to dry, you can start staining all of the wood shims! Use several complementary colors for a patchwork look or a single color to enhance the natural grain of the wood. Set up a protected workspace in a well-ventilated area. Apply stain to the wood shims with a clean brush or rag, and wipe away the excess immediately. Repeat for all of the wood shims, and allow to dry.
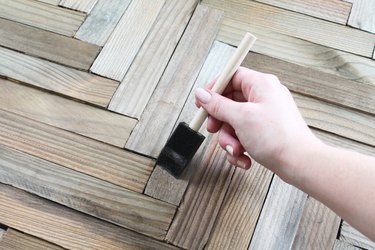
Step 4: Stain the headboard and frame
Once the adhesive is dry, remove the clamps from the frame of the headboard. Apply a darker, coordinating stain to the entire headboard and frame to hide any gaps between the wood shims. Brush on stain in the direction of the wood grain, and wipe away excess. Allow to dry for the recommended amount of time before proceeding.
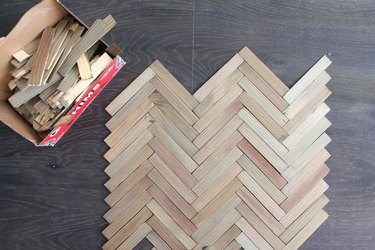
Step 5: Lay out the herringbone pattern
Begin designing your pattern by finding the center of the headboard and marking a vertical guideline down the board with a pencil. Lay down wood shims along this line creating a V shape with the ends of the wood shims creating a square corner against the guide line. Be sure to keep the corners of the shims lined up with minimal gaps in between. This will keep your entire pattern centered and even on both sides.
Repeat the zig-zag pattern on each row until you have shims that are overlapping on the edges. Mark each of these overlapping shims with a pencil and straight edge and trim them down to fit evenly within the frame of the headboard. Make any adjustments now before gluing down any shims—otherwise you won't be able to fix errors within your pattern or remove defective shims.
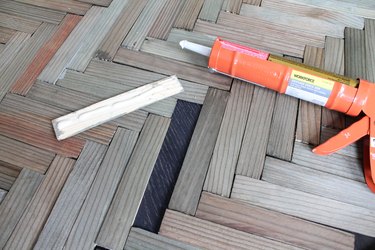
Step 6: Glue down the wood shims
Work from one corner, applying a thin strip of construction adhesive to the back of each wood shim and press firmly to the plywood. Repeat for each shim in each row until you've adhered each piece to the headboard. Wipe away any excess glue that's visible with a wet rag before it dries. Allow the glue to cure as recommended by the manufacturer before attempting to sand or apply any finishes.
Step 7: Finish the headboard
Use a 100-grit sandpaper to distress the edges of the headboard's frame and smooth down any rough shims. Vacuum away the sanding dust from the cracks before applying a sealant. Apply a semi-gloss polyurethane to your entire headboard for a slight sheen, or seal the wood with a clear furniture wax and allow to dry.
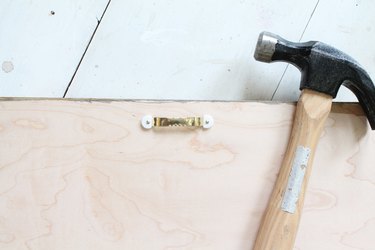
Step 8: Add mounting hardware and install above the bed
Flip the finished headboard over on its back. Measure 6 inches in from each side of headboard and secure two sawtooth hangers 1/2 inch down from the top edge to hang. Most sawtooth hanger kits include small tacks: simply hammer into the back of the headboard to install. Just be sure the placement of the hangers is even, or your headboard won't be level once mounted above your bed! Once you've marked the placement of your headboard above your bed, drive two wall anchors and screws into the wall to hang the headboard securely.
Step 9: Style as desired
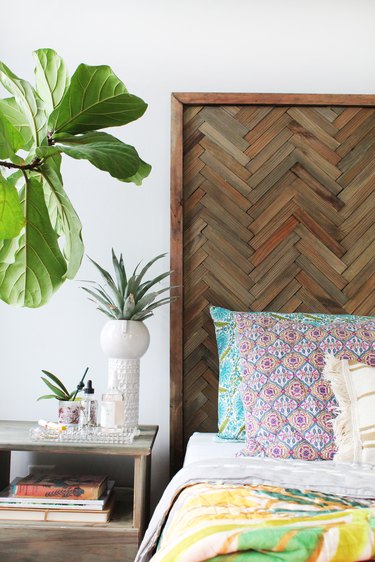
Pair this patchwork headboard with lots of printed pillows, cozy throws and coordinating bedside tables to house your favorite plants and books! How would you style this headboard in your home? Try a neutral white color scheme or even whitewashing the shims instead of using a natural color stain!