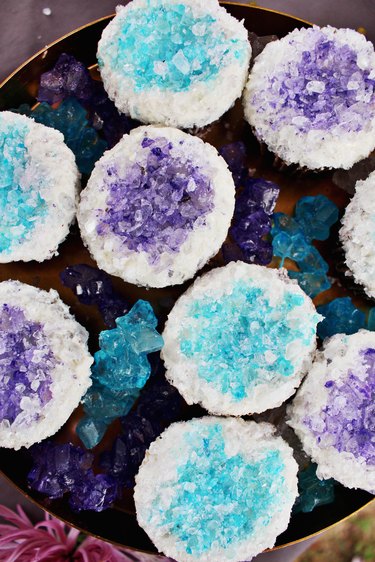
Who doesn't like cupcakes? After all, their soft texture and sweet topping make for perfect just-for-me treats. But there is a way to make these individual desserts even more irresistible: add rock candy. By creating divots in your cupcakes for the hard pieces, you can assemble a topping that looks identical to a precious geode. Choose a color that resembles the real deal, like purple or blue, and then create the jeweled effect — don't worry about uneven lines, since imperfections make each cupcake look all the more unique! When you can add a gemstone-inspired look to your next fresh batch, you'll not only like your cupcakes, you'll love 'em.

Video of the Day
Things You'll Need
Cupcake recipe
White frosting
Cupcake liners (a tan color looks best)
Rock candy in white
Rock candy in desired interior color
Spoon or melon baller
Sandwich-size plastic ziplock bags
Knife
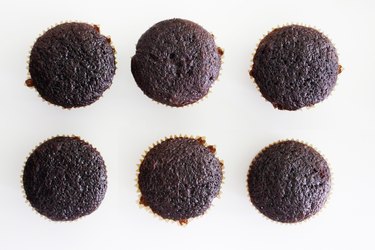
Step 1: Bake Cupcakes
Use your favorite recipe to whip up a batch of cupcakes.
Video of the Day
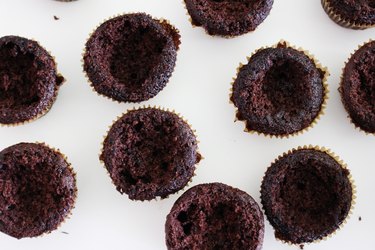
Step 2: Create a Geode Shape
Once your cakes have cooled, take a melon baller or a spoon and scrape out some of the middle of each cupcake.
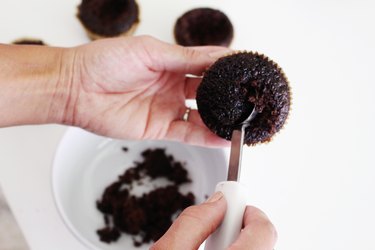
They don't have to be uniform, since geodes themselves are all unique in their structure. Save the insides to make cake pops, or just devour them as you go.
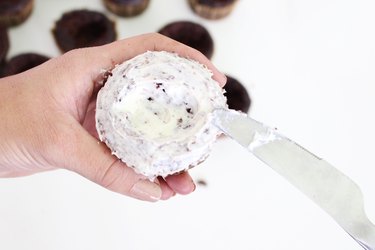
Step 3: Apply a Crumb Coat
Make your favorite white frosting — whether it's buttercream frosting or whipped cream frosting — and give each cupcake a thin layer. This doesn't have to look perfect: the purpose is to help keep all crumbs (and there will be a lot) from showing when the cupcakes are complete. After every cupcake is coated, pop them into the freezer to let the frosting harden.
Tip
You can leave the cupcakes inside the freezer for a few days, as long as they're in an airtight container. When you're ready to complete the final steps, let the cupcakes sit at room temperature for 30 minutes.
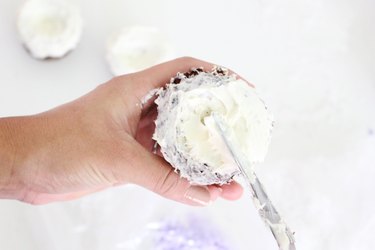
Step 4: Apply a Final Layer of Frosting
Now, apply another layer of frosting. This layer should hide all the crumbs.
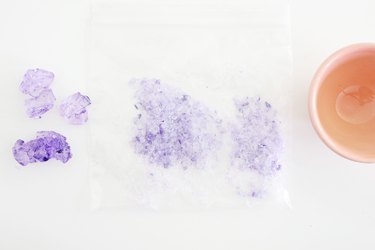
Step 5: Crush Rock Candy
Place your rock candy, whether the pieces are on strings or on sticks, inside a plastic bag. Next, take the underside of a bowl, cup or a mallet to crush your candy into tiny bits. Do this to each shade of rock candy in individual bags.
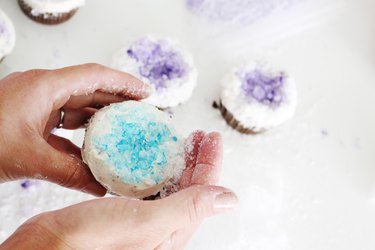
Step 6: Apply Rock Candy to Cakes
First, sprinkle the interior color into the divot you've made in each cupcake. This color can also come out of the divot, too —again, it doesn't need to be perfect.
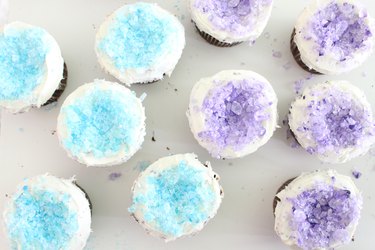
Next, take the white candy and press it onto the edges, surrounding your inside candy and covering the cakes completely.
Step 7: Dig In and Rock On
These pretty cupcakes sure know how to steal the show! As an added bonus, most rock candy is fruit-flavored, so you'll taste a fun combination when you bite in.