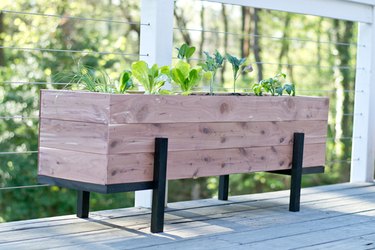
Even if you have a small space, you can still grow a garden robust enough to produce a complete salad. Container gardening is the perfect solution, whether you're short on square footage or just trying to protect your greens from lettuce-loving critters. And don't worry, building your own planter is easier than you think, especially when you use weather-resistant cedar. Follow these steps to create your own cedar planter, and then learn how to fill it with fresh vegetables. Soon, you'll have a great mix for the perfect salad conveniently growing on your balcony.
Video of the Day
Things You'll Need
1 x 6 cedar, 8 feet long (1)
1 x 2 cedar, 8 feet long (5)
Tape measure
Power miter saw
Eye protection
Cedar closet liner (1 pack)
Drill or power screwdriver
1/2-inch twist bit
Pneumatic or electric stapler
Staples (3/4 inch and 1 1/4 inch)
Kreg pocket screw jig
2-inch wood screws
1 1/4 inch wood screws
Wood stain
Applicator brush
Clear water sealer
Gardening gloves
Nature's Care® Organic Raised Bed Soil, 32-ounce bags (3)
Nature's Care® Organic & Natural Vegetable, Fruit & Flower Food (1 bag)
Step 1: Create the Base of the Planter
Using a miter saw, cut two 46 1/2-inch pieces from the 1 x 6 cedar. Next, cut the 1 x 2 cedar into the following pieces:
Video of the Day
- Two 46 1/2 inch pieces
- Four 12-inch pieces
- Two 11 1/2 inch pieces
- Six 9 1/2 inch pieces
- Eight 9-inch pieces, with 45-degree miters cut on one end
- Two 11 1/2 inch sections, with 45-degree miters on both ends
Now, cut the planks from the cedar closet liner into six 47-inch long sections and six 11-inch long sections. Keep in mind that you'll have to remove a 1/2 inch from each end to get rid of the tongue-and-groove, so measure and cut accordingly.


Step 2: Build the Planter Base
Place the two 46 1/2 inch 1 x 6 pieces together on a work surface, butted tightly together. Position the four 9 1/2 inch pieces of 1 x 2 cedar centered across the two boards. Two should be positioned at each end, and the other two should be spaced at 15 1/2 inch intervals in between. There should be a 3/4-inch gap on each side (you can use a scrap of 1 x 2 turned on edge as a spacer block). Secure the 1 x 2s to the 1 x 6s with 1 1/4 inch wood screws.


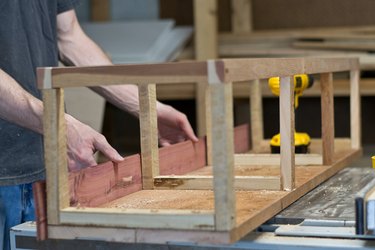
Step 3: Finish the Interior Framework of the Planter
One at a time, attach eight 9-inch 1 x 2 pieces upright against the ends of the four 1 x 2 horizontal sections. Secure them with 1 1/2 inch wood screws. Now position two 46 1/2-inch 1 x 2 sections across the tops of the four upright legs, and then secure them with 2-inch wood screws.
Complete the framework with two 9 1/2 inch pieces attached crosswise between the ends of the 46 1/2 inch pieces, using 1 1/2 inch screws.
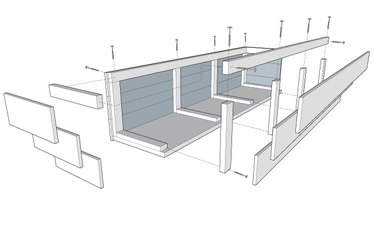
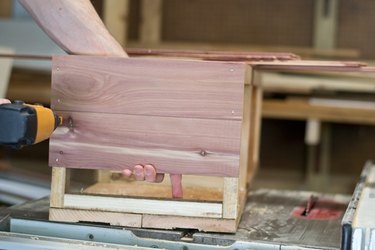
Step 4: Apply the Cedar Plank to Sides of the Planter
Begin with the ends of the planter box. Using the 11-inch cedar plank sections, start by aligning one piece on the top edge with the tongue facing upward. Secure it to the framework with four 3/4-inch staples. Then, insert the tongue of the next piece down and staple it in the same pattern. Repeat for the third row. Go to the opposite side of the planter and repeat this process.
Apply planks to the front and back of the planter, using the 47-inch cedar planks. Align the top piece and secure it with two 3/4-inch staples driven into each of the four vertical 1 x 2s. Insert the tongue of the next row down and repeat until the planter box is entirely covered.

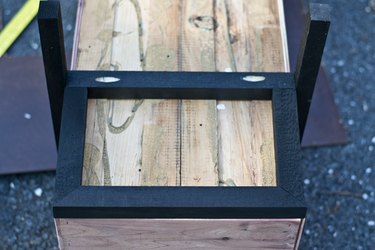
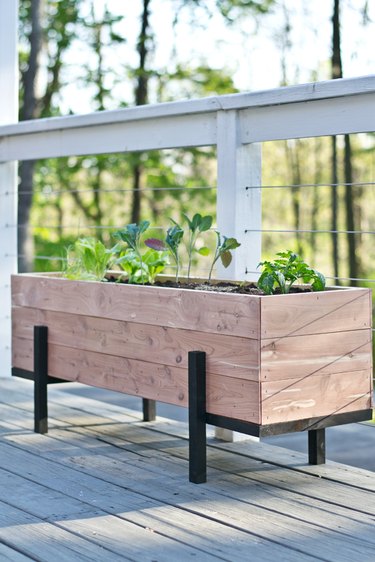
Step 5: Create Legs for the Base
If desired, stain the remaining 1 x 2 pieces with a contrasting hue. Then apply an outdoor clear water sealer to protect the exterior of the cedar.
Tip
If your cedar is purple, let it lay in the sun for about an hour prior to sealing. This will tone down the purplish hue.
Once the stain has dried, drill pocket holes in the ends of the two 11 1/2 inch sections, using the Kreg pocket jig.

Using 1 1/4 inch staples and miters on both ends, secure the 11 1/2 inch 1 x 2 sections to the underside of the planter, making them flush with the edges. Next, align the 8-inch long 1 x 2 sections with miters on one end to the front and back edge of the planter, butted tightly against the mitered ends of the previous pieces, and then secure with staples.
Now, install the 11 1/2 inch pieces with pocket holes against the square ends of the 8-inch sections, and staple to the base. Finally, position the 12-inch sections vertically against the box, aligned with the pocket holes so that 5 1/2 inches extend up past the base. Screw it in place through the pocket holes. From the inside of the planter, use 3/4-inch staples to secure the top of the legs in place.
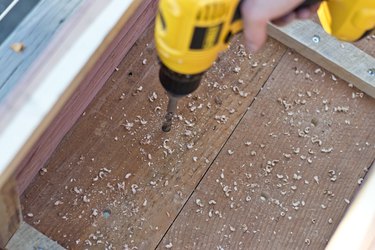
Step 6: Drill Holes for Drainage
In bottom of the planter, drill six holes per section for water drainage, using a 1/2-inch twist bit.
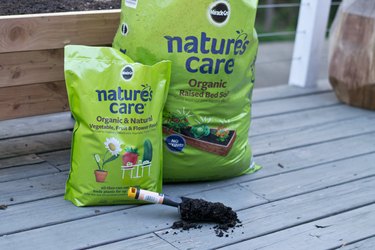
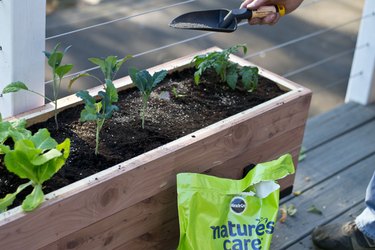
Step 7: Fill With Raised Bed Soil
Use Nature's Care® Organic Raised Bed Soil to give your garden a great foundation.
Tip
Optional: To protect the inside of your planter, you may want to line the inside of your box with black landscape fabric.
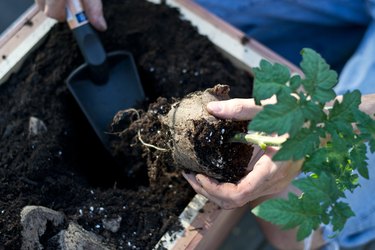
Step 8: Add Your Favorite Salad Ingredients
Fill your planter with a variety of vegetables and plants per directions. I used a dwarf container tomato plant (it only gets 2 feet tall), a green pepper plant, Lacinato kale, butter lettuce, and chives. If the plant is somewhat root-bound, gently break the roots into loose tendrils to make it easier for the plant to root itself within soil.
Tip
Almost all vegetable and herb container gardens will thrive best in locations with plenty of sunlight—very few will grow well in part shade. One of the advantages of this planter box is that it can be moved around to take advantage of moving patterns of sunlight on your balcony. However, if you are in a situation where shade is unavoidable for much of the day, herbs and vegetables with plenty of leafy top growth are best. Here are some good options for part shade: Arugula, beets, kale, leaf lettuce, parsnips, radish, spinach, thyme, parsley, and chives
Step 9: Feed and Water
After one month, sprinkle Nature's Care® Organic & Natural Vegetable, Fruit & Flower Food over the soil in your completed container, following instructions, including working the granules into the soil. Water thoroughly. Follow the instructions for follow-up feedings over the course of the growing season.
This post is sponsored by Miracle-Gro ® Nature's Care