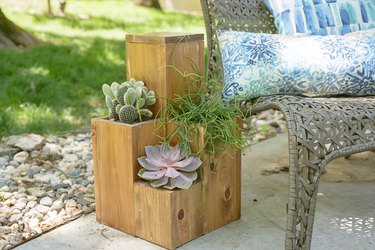
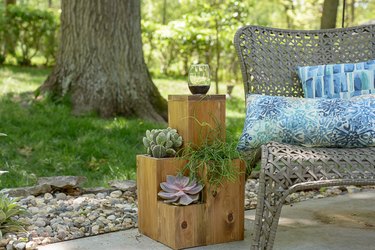
When the weather warms and the outdoors are in bloom, getting some fresh air is a given. And if you have a patio or backyard, the need to unwind outside – and perhaps enjoy an al fresco meal – is even stronger. Give into that desire by creating a geometric side table that combines functionality with greenery: the table includes three built-in planters. Place a cool drink on the table's flat surface, and watch as the plants grow with each passing day. It's a charming and unexpected furniture accessory that just seems to work. Naturally.
Video of the Day
Things You'll Need
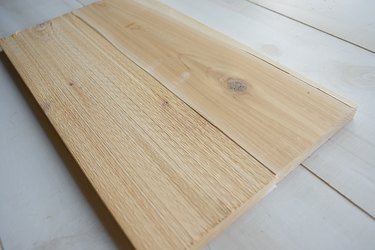
1-inch x 6-inch cedar, 8-feet long, 2
Pneumatic finish nailer
Galvanized finish nails
Wood glue
Circular saw
Measuring tape
Clamp
Sanding pad
Wood filler
Stain
Polyurethane finish
Paint brush
Plants
Potting soil
Small rocks
Step 1: Cut and Assemble the Parts of the Table
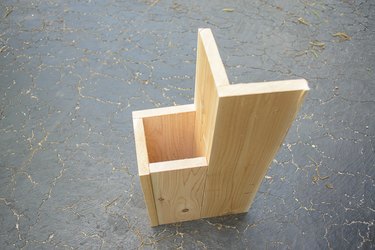
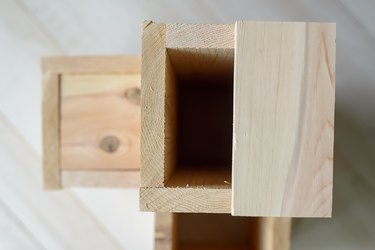
Our table will have three tiers: a 20-inch-high table top, a pair of planter boxes set at 12-inches high, and a single planter set at 6-inches high. You can easily alter these measurements to create a side table with your own dimensions. To build the table according to our dimensions, start by measuring and marking four cedar boards at 20 inches, and cut them with your saw.
Video of the Day
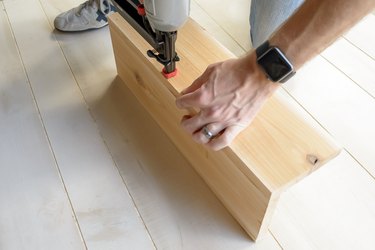
Next, use the nailer to join two of the 20-inch boards on edge lengthwise to form an "L" shape. Make sure to position the boards' rough sides toward the inside of the "L" so that the smooth sides are on the exterior. Continue to face the rough sides of each piece inward throughout the project.

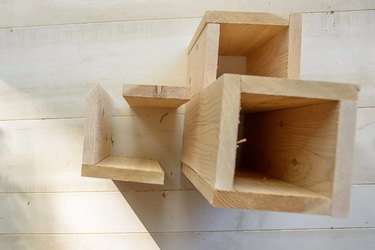
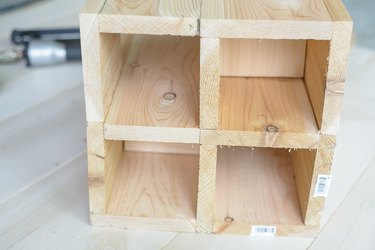
Step 2: Cut and Assemble the Two 12-Inch High Planter Boxes
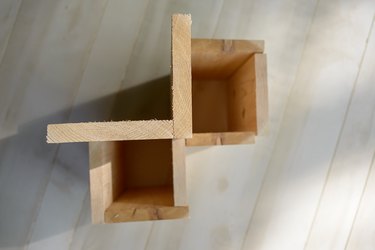
Cut six pieces of cedar at 12 inches long. Set the 20-inch "L" shape upright, so you can see how the planter boxes will be attached. Each of these boxes will be a "U" shaped box made from three pieces that fit against the tallest side-table section. One board from each of these planter boxes will need to be cut again to fit. Don't worry. That will be taken care of in a little bit.
Create smaller "L" shapes from two of the 12-inch boards, using the same process you used for the taller side table section.
To finish off each box, you will need to take a narrow strip off the third board so that it fits with the other two pieces to create a square box. Draw a line along the full length of the board at the exact thickness of the board (usually this will be 3/4-inches thick). Use the circular saw to cut the strip off.
Now, repeat the same steps for the other side of the tall "L" shape, and for the second 12-inch-high planter box.
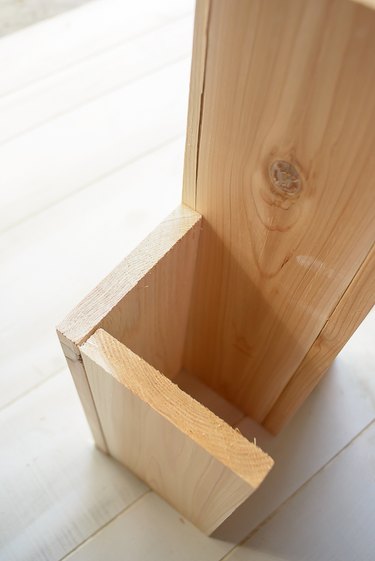
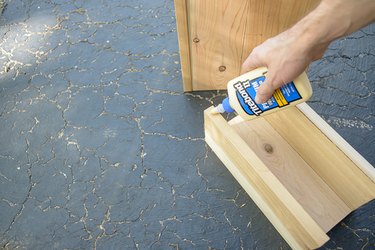
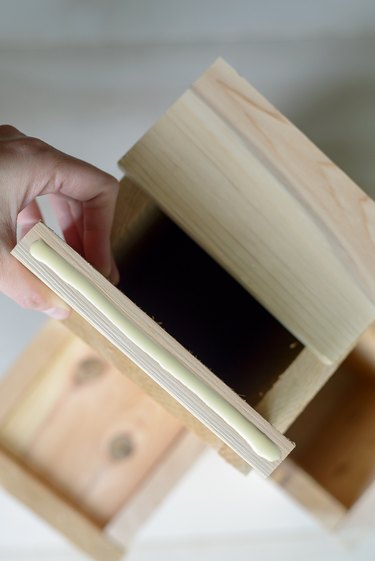
Because there is no way to nail through this side of the tall box, use wood glue on both ends of the box to attach it to the large box. Once glued, use a large weight or clamp to hold the wood in place while it dries.

Step 3: Cut and Assemble the Six-Inch Planter Box
Cut two pieces of cedar to 6 inches long. Rip-cut a strip off the edge of one of the 6-inch pieces, equal to the thickness of the board (it will probably be 3/4-inches thick). Attach the two pieces together to form another "L" shape, using the nailer. Use wood glue to adhere the two pieces to the front of the planter, between the 12-inch planter boxes. Clamp until the glue dries.
Step 4: Cut and Attach the Bottom Inserts
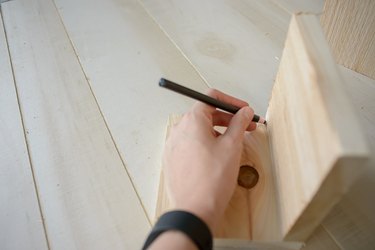
The three planter boxes need wood inserts so that you have a bottom inside each planter to hold the soil. Measure the inside of each planter box before cutting each insert. Wood warping will cause your measurements to vary slightly. The measurements on the two larger boxes for this project were 4 and 5/8 inches x 4 and 1/2 inches. The small box measured 4 5/8 inches x 4 and 5/8 inches. Cut the cedar boards to the size of the insert.
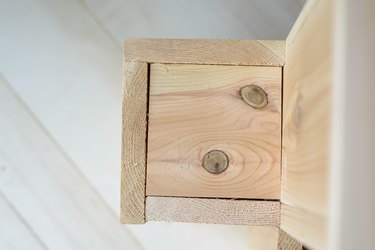
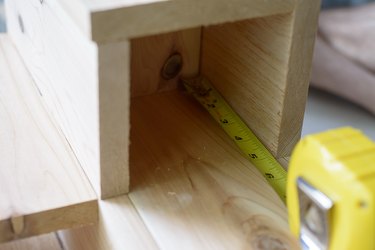
Put the insert in each box, approximately 5 inches from the top of the planter. Using measuring tape, measure the same distance on the outside of the box and shoot a nail in on each side. Check to make sure you secured the insert.
Step 5: Cut and Assemble Table Top
Measure the top of the tallest box. The measurements of this box were 6 and 1/4 inches x 6 and 1/4 inches. With the cedar on hand, cut 2 pieces to 6 and 1/4 inches x 3 and 1/8 inches. Wood glue the two pieces together and then nail them down onto the box.
Step 6: Stain and Finish the Piece
Before staining, you will want to fill all the nail holes with wood filler. After the wood filler dries, lightly sand. Apply a stain and a polyurethane finish according to the instructions listed on each label.
Place some rocks in each of the planter boxes to help with drainage, and then plant some flowers. Now all that's missing from your side table is a tasty drink!