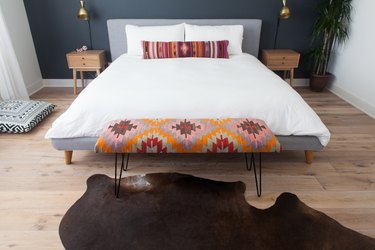
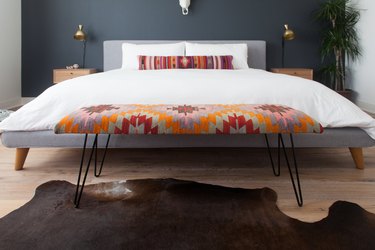
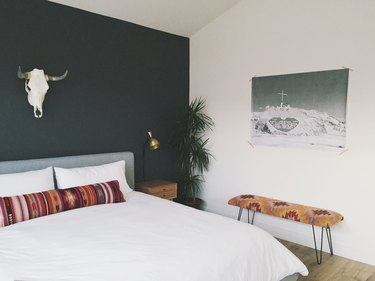
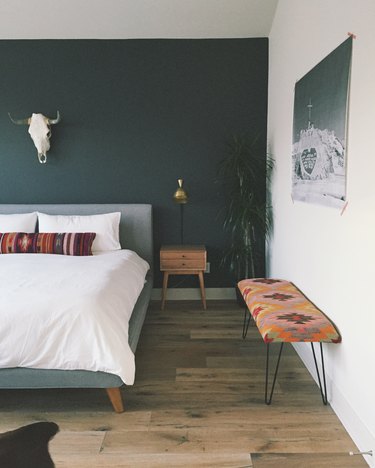
This is a quick and easy DIY for a mid-century modern-style bench using a cheery colored kilim rug! We love the way the vibrant colors of the fabric really brightened up our nearly neutral bedroom, making the bench the perfect statement piece. With less than $200 and a couple hours of your time, you can easily make one too!
Video of the Day
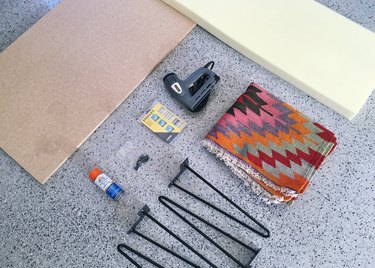
Things You'll Need
Particleboard – 1-inch thick, 16 inches x 48 inches
Upholstery foam – 4-inches thick, 16 inches x 48 inches
Spray adhesive
Kilim rug (about 3 feet x 5 feet)
Staple gun and staples
Heavy-duty scissors
Set of four hairpin legs
Power drill
Step 1
Lay the board and foam next to each other on a flat covered surface. The spray adhesive tends to travel and make everything around it tacky when sprayed, so we chose to do it on the grass in our backyard. You could also use a tarp, drop cloth or old bed sheet to get the job done.
Video of the Day
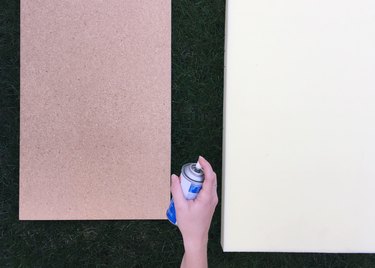
Hold the can about a foot above both surfaces and spray a thin, even layer over the board and the foam. Let sit for about one minute to get tacky, and then lay the foam, tacky sides facing each other, onto the board. Apply strong, even pressure across the board for a few minutes, allowing the adhesive to bond.
Tip
You will most likely have to buy a standard size 3 foot x 4 foot piece of particleboard, but most hardware stores will cut it down to size for you.
Step 2
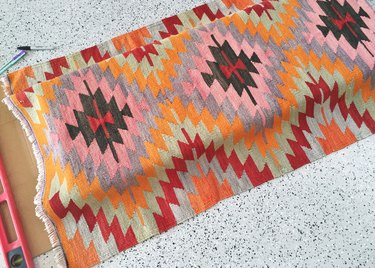
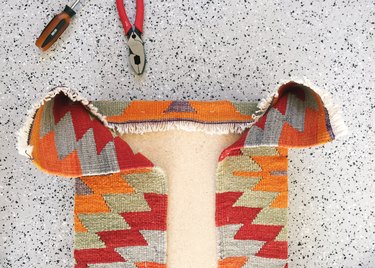
Place the bonded board, foam side up, on a large, clean surface and lay the kilim rug on top, carefully making sure the pattern is aligned to the center of your bench. Our rug pattern was slightly off center, so we had to be mindful of that while we were lining everything up. Yours might not be misaligned, but it's something to be aware of.
Tip
We found our Kilim rug on eBay from a very highly rated seller in Turkey for about $80.
Step 3
Holding both ends of the bench, making sure the rug stays put, carefully flip the bench upside down so the rug is now face down under the board. Starting with the center of the rug, pull the rug tightly over the edges of the bench and secure with the staple gun.
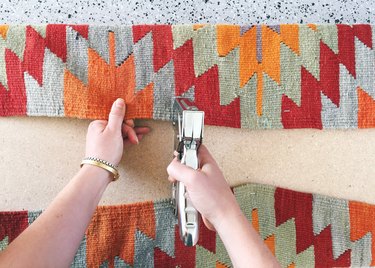
Once we secured two staples into the center of the bench, we flipped the bench back over to make sure the rug had stayed put and that the pattern was still exactly where we wanted it. If your rug shifted at all, simply pop out the 2 staples and do it over. Once you have the center point of the rug secured, you can begin securing the rest of the rug.
Step 4
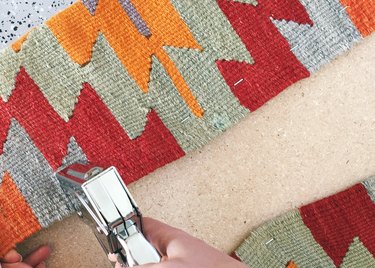
Working on one side at a time, firmly wrap the rug over the edge of the bench, pulling tightly, and staple every two inches down the length of the bench. Once one side is secured, repeat on the other side, again working outward from the center.
Step 5
Now that both of the long sides of the bench are secured, grab the center point of the rug on the short ends and secure with staples about 1½ inches apart, while pulling tightly over the edge of the bench, stopping about 2-3 inches away from each corner.
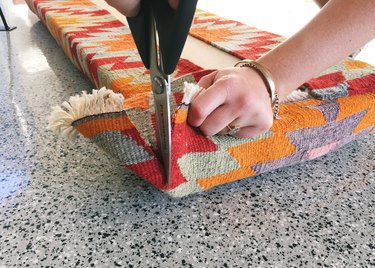
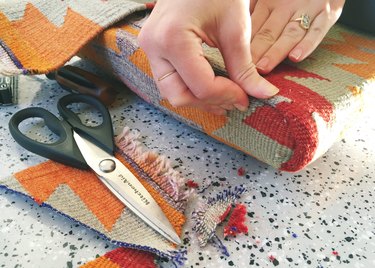
Step 6
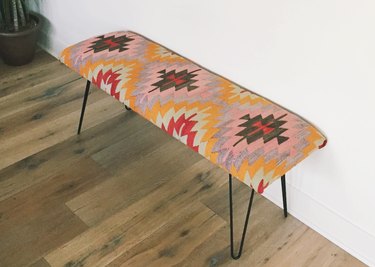
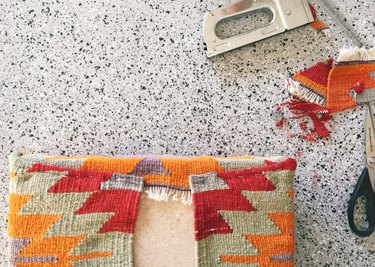
At each bench corner, grab the pointed corner of the rug and cut horizontally about 3 inches above the bench to remove the extra bulk of fabric. Working carefully from the outer edges, roll the fabric tightly toward the bench and secure with staples. Just for extra security we stapled about ½ inch apart here and in a couple different directions. Repeat until all corners are tucked and pretty.
Step 7
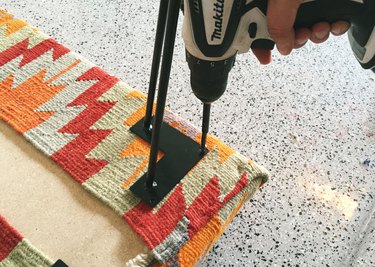
Time to add the legs! We wanted our legs pretty close the corners so we decided on 3 inches in from the ends and 1 inch in from the sides. Have someone firmly hold the legs in place while you drill in the screws using the power drill. We upholstered almost the full underside of the bench so we assembled the legs over the fabric. This is totally fine. If your rug is not as wide and does not cover as much as the underside of the bench, you will simply screw the legs directly into the wood.
Tip
We chose hairpin legs that were 16-inches tall because we wanted a lower bench. You are able to order them in all different heights and finishes on Amazon, so take that into consideration when designing it for your own space! The legs also come with the right amount of screws for assembly.
Step 8
Flip your bench over and admire your work!
Tip
This bench also looks awesome as a statement piece in an entryway, at the foot of a bed, or in a wide hallway adding a pop of color and cool style to any space!