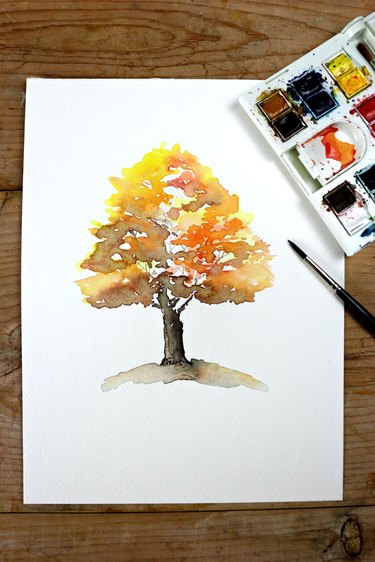
There is something majestic about the tree colors in fall, but sadly the season doesn't last very long. Fortunately, you can preserve a little bit of autumn by painting a fall tree of your own. These watercolor principles can be used to paint trees of various shapes and sizes, and by simply changing the colors, the trees can be adjusted to reflect different seasons.
Video of the Day
Things You'll Need
Cold press watercolor paper
No. 8 round brush
No. 6 round brush
No. 2/0 fine brush
Watercolor paints
Water basin
Paper towel
Palette

Tip
Paints required for this project are: Cobalt Blue, Crimson Red, Burnt Sienna and Winsor Yellow. Prepare your palette accordingly.
Step 1
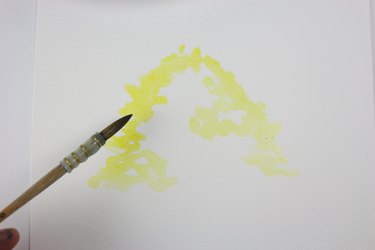
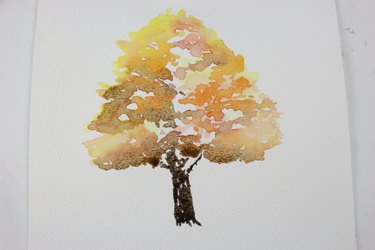
Dip your No. 8 round brush in Winsor Yellow and outline the loose shape of a tree. Use organic and loose strokes, leaving the center of the tree blank. Alternatively, you can lightly draw in the shape of a tree with pencil and then paint it using the same criteria.
Video of the Day
Step 2
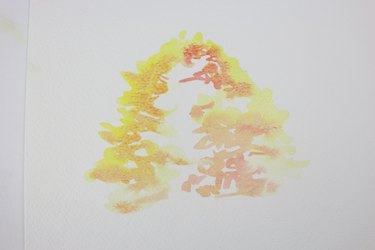
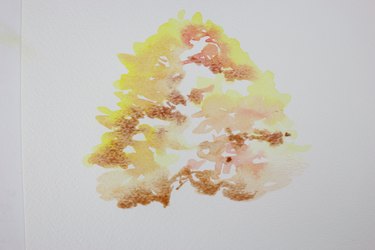
Mix some Winsor Yellow with Crimson Red (3:1 ratio). While the paint is still wet, paint over the inner edge of the outline and some of the white area in the center. Allow the colors to mix to create texture and movement.
Step 3
Mix some Cobalt Blue and Burnt Sienna (1:2 ratio), and paint the outer edge of the orange and some more of the white in the center of the tree. Again, it's important to keep the lines organic and loose in order to create movement.
Step 4
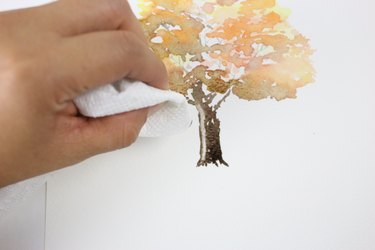
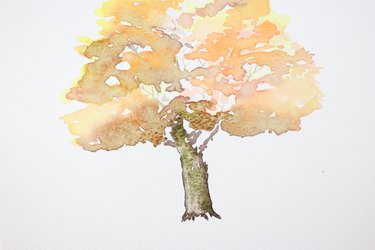
Mix more Cobalt Blue and Burnt Sienna, this time using a 1:3 ratio. Using your No. 6 round brush, paint the trunk of the tree.
Step 5
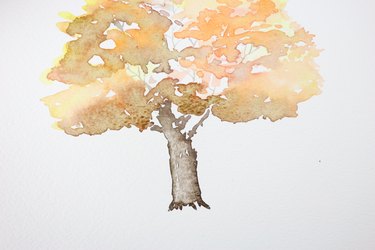
While the paint is still wet, take some paper towel and "lift" away some of the paint from the center of the trunk. By "lifting" or removing some of the paint, you are creating the illusion of highlights and shadows on the tree trunk.
Step 6
Using your No. 2/0 fine brush and the same color as the tree trunk, paint in some small branches through the white gaps of the foliage.
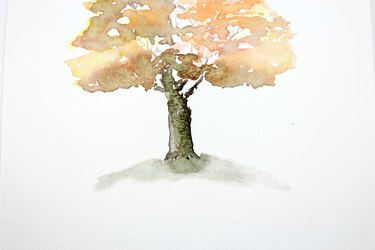
Step 7
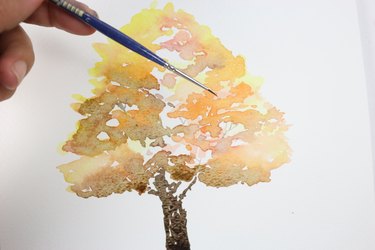
Mix some Winsor Yellow, Cobalt Blue and Burnt Sienna (2:1:1 ratio) to create green. Using your No. 6 round brush, paint in some of the green paint on the right side of the tree.
Step 8
At this time, you can take some of the residual paint from the brush and lightly paint the ground in a loose mounded shape.
Step 9
Dip your No. 6 round brush in the pre-mixed orange color used in Step 2 and dab it randomly onto the ground. This will serve as the fallen leaves on the ground.
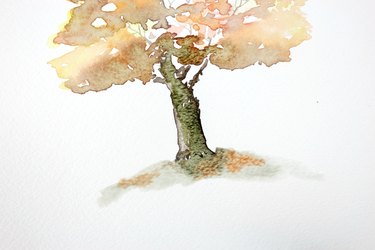
Step 10
Repeat Step 9, this time using Winsor Yellow. Add more shadows on the trunk if desired, using the dark green color.
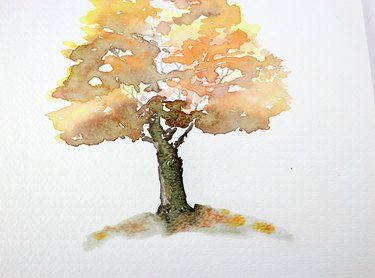
Once dry, hang it up using some decorative washi tape for a whimsical autumn display, or frame it and incorporate it into your existing wall art.
