Falling leaves. Pinecones. That gorgeous fall color scheme. Is there anything better than this time of year?
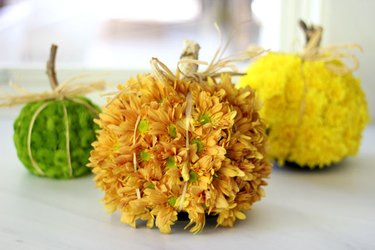
If you're brainstorming some fall decorating ideas, autumn-hued chrysanthemums turn a ball of floral foam into an easy DIY pumpkin flower arrangement, with a little raffia and a stubby branch to complete the gourd look. Whether you use them as a table centerpiece or eye candy for trick-or-treaters on the front porch, these floral arrangements decorate indoors and out, and they make beautiful additions for any fall festivities.
Video of the Day
Video of the Day
Skip the florist and read on for our DIY pumpkin floral arrangement tutorial.
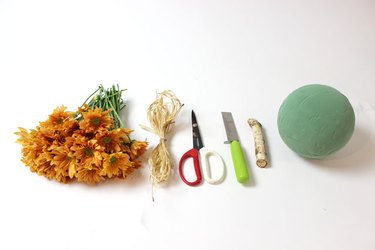
Things You'll Need
6-inch floral foam ball
Knife
Bucket
Plate
Chrysanthemums
5- to 6-inch branch
Scissors
Raffia
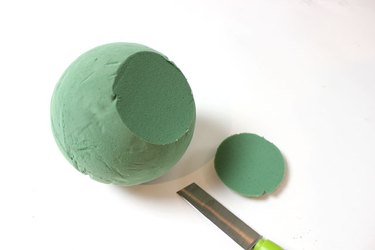
Slice the Floral Arrangement Foam
The foundation for the floral pumpkin is a 6-inch foam sphere, which you can find in the floral supply section of the crafts store. (You can also make a smaller pumpkin with a 4-inch sphere.) Using a sharp knife, slice off about 1/2 inch from one end of the foam so there is a flat surface. This flat surface will allow the foam — and subsequent floral pumpkin — to sit up without rolling around.
Tip
Look for the floral foam designated for real fresh flowers, as crafts stores also sell floral foam for artificial flowers.
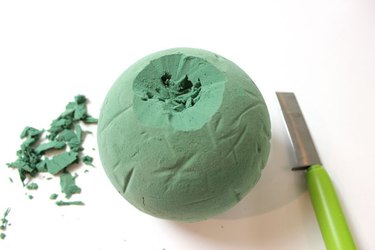
Dig a Crater into the Foam
To approximate the shape of an actual pumpkin, carve out a crater at the very top of the floral foam. It does not need to be uniform or even very attractive. It will be covered later by flowers.
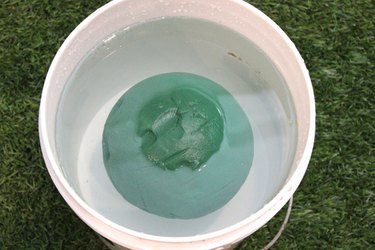
Soak the Foam
Place the foam in a bucket of water and allow the foam to slowly absorb water. You will know the foam is filled with water when the entire ball turns dark green. Remove the foam and place it on a plate or water-safe work surface.
Tip
Do not push the floral foam down into the water. Forcing it will create air bubbles inside the foam, and water will not be completely absorbed.
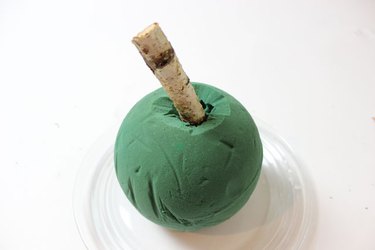
Insert a Branch
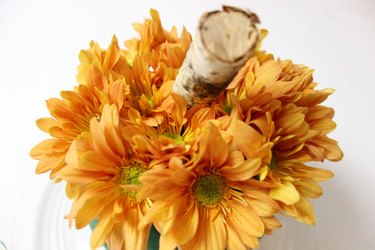
For the stem of the pumpkin, a branch between 5 and 6 inches provides a nice rustic touch. Insert the branch into the top of the floral foam so that the foam holds the branch firmly.
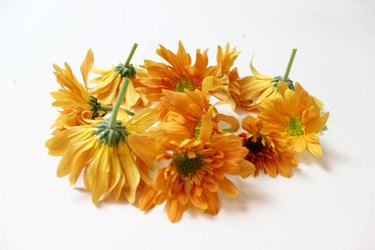
Cut the Chrysanthemums
Chrysanthemums are an ideal flower to make pumpkins because they come in a variety of vibrant fall colors, and, from a practical standpoint, they are relatively inexpensive and easy to find in stores. They are usually sold in bunches, with each bunch yielding about 25 buds. Depending on their size, you'll need about 100 buds to make one pumpkin. Use scissors to cut the stems, leaving 1 inch of stem.
You can, of course, opt for any flower of your choosing if chrysanthemums aren't your style. We suggest carnations or daisies as well, both easily found at your local grocery store. The important thing is to use fresh flowers to create the perfect autumnal centerpiece.
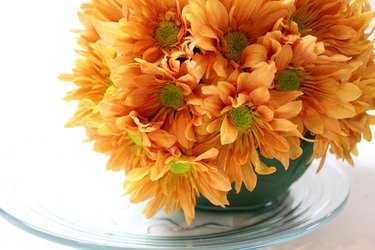
Insert the Flowers for Your Floral Arrangement
Insert the stems of the flowers into the floral foam. Start at the top and work your way down. Push the stems all the way into the foam. You will soon see that even though the floral foam ball is only 6 inches in diameter, the flowers will make the finished pumpkin much bigger.
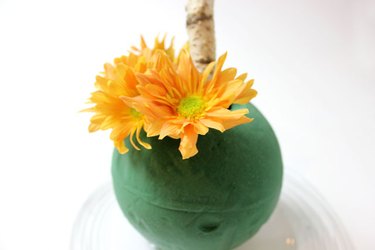
Select smaller flowers for the crater at the top so that the shape at the top slopes downward, just like a real pumpkin.
When you get to the bottom, ensure the stems point up — with the buds pointing down — to maintain a round shape. If all the flowers are facing the same direction, the arrangement will be boxy instead of spherical.
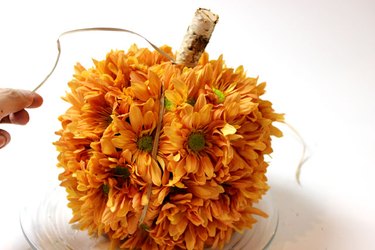
Wrap Some Raffia
To mimic the vertical grooves of the pumpkin's exterior, tuck a 36-inch length of raffia underneath the base of the floral foam, wrap it around the circumference of the pumpkin, and tie a knot at the top where the stem is. Repeat three more times around the floral pumpkin so you have four pieces of raffia creating eight grooves and sections.
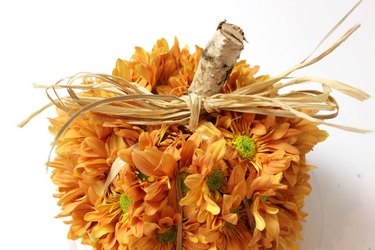
Tie a Raffia Bow
With the remaining strands of raffia at the top of the pumpkin, tie a bow and trim any loose ends that are too long. Your floral pumpkin is now finished.
Display it on a small plate, like a saucer, so that the plate is completely hidden beneath the flowers.
These floral pumpkins greet visitors with a warm, festive, "Hello." You can also make one for a hostess gift and know you'll be invited back all season long.