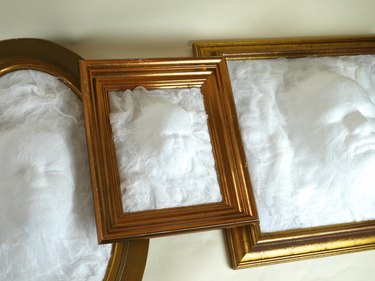
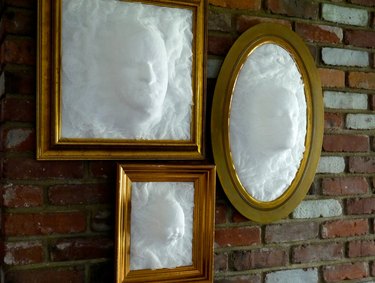
Eerie ghost face picture frames are sure to scare the pants off of anyone whom encounters them this Halloween season. Created using a simple cheesecloth and starch technique, you can make a single framed ghost head or an entire set to hang and spook the halls. At night, shine a light from below or make the room dark and use a black light, and they will frightfully glow. Boo!
Video of the Day
Watch the Video Tutorial
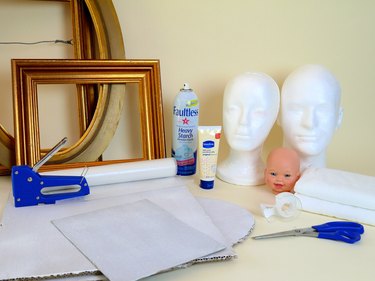
Things You'll Need
3 picture frames
Cardboard or the existing frame backings
White acrylic paint or gesso primer (or use white cardboard or foam core board and omit paint)
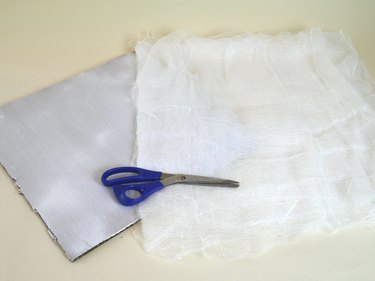
#50 cheesecloth, 12 yards
Scissors
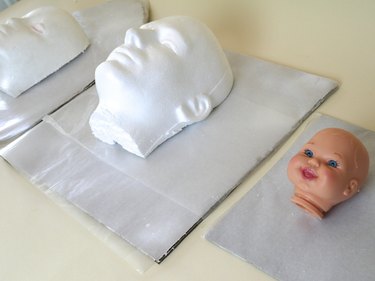
Foam head, male
Foam head, female
Small doll head
Hand saw or serrated kitchen knife
Surface protection, such as newspaper or plastic
Wax paper
Clear tape
Petroleum jelly
Heavy starch spray
Staple gun or glue gun
Hanging hardware, if needed
Tip
- Find inexpensive frames at flea markets or garage sales. Any sizes will work as long as they are big enough to fit the form heads with at least 3 extra inches on all sides. The ones pictured are 8-by-10-, 15-by-15- and 11-by-20-inch frames.
- If white cardboard is unavailable, simply paint a coat of gesso primer or white acrylic paint over regular cardboard for the same effect.
- If a staple gun is unavailable, substitute a glue gun.
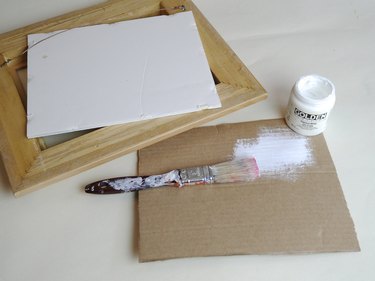
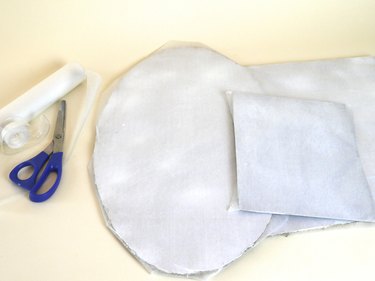
Cut the Cardboard the Same Size as the Frames
Cut cardboard to fit the inside frame dimensions, or use the existing frame backings. Paint a coat of white acrylic over one side, or save the painting step and use white cardboard or white foam core board instead.
Cut 10 Layers of Cheesecloth for Each Board
Trim 10 single layers of cheesecloth 5 inches bigger (2 1/2 inches on each side) than each of the boards. For the frames pictured, 12 yards of 36-inch cheesecloth worked perfectly. The best cheesecloth for this project is crafting cheesecloth (#50 Size TAM) found at the craft store.
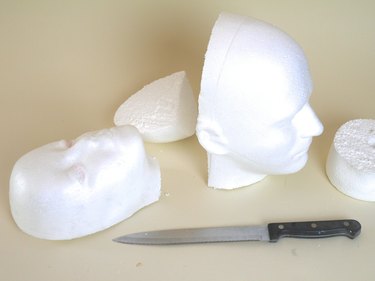
Cut the Backs off of the Foam Head Forms
Use a hand saw, a serrated kitchen knife, or if available, an electric kitchen knife to cut the back of the foam heads completely off just behind the ears so they lie flat when horizontal.
Cover the Cardboard with Wax Paper
Completely cover the white side of the cardboard with a single layer of wax paper. Use clear tape to loosely secure it to the back of the boards.
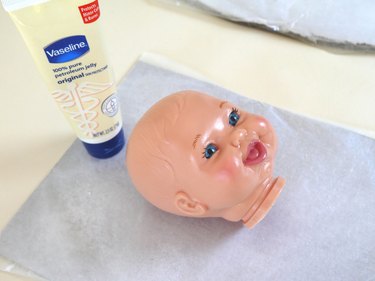
Cover the Faces with Petroleum Jelly
Petroleum jelly will keep the cheesecloth from sticking to the forms. Use your fingers to rub a thin layer over the entire surface of the three heads, including the top, sides and neck.
Arrange the Faces on the Boards
Center the heads onto the wax paper boards. Transfer the boards outdoors if weather permits. If the weather is cold and wet, cover an indoor work surface with newspaper or plastic.
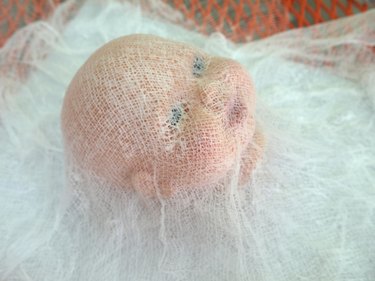
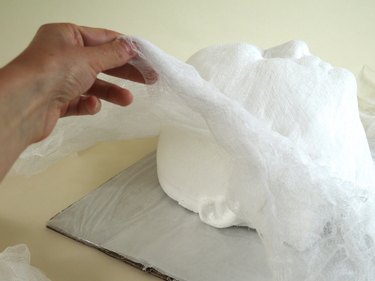
Drape and Spray the Cheesecloth
Start by loosely draping two layers of cheesecloth over the form heads and spray with starch. Completely saturate the cheesecloth. Spray the sides of the cloth all the way to where it meets the edge of the board. Use your fingers to smooth the saturated cheesecloth over the features of the face. Begin with the nose and work down, creasing and smoothing the cloth into the tiny contours of the face.
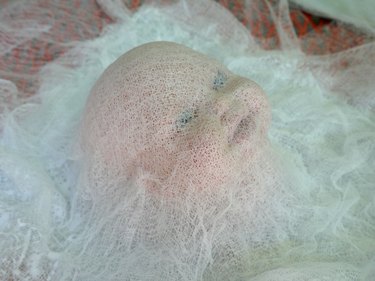
Continue Adding Cheesecloth Two Layers at a Time
Add two more layers of cheesecloth and spray with more starch. Repeat this process until all 10 layers are covering the face, each time smoothing into the crevices and contours of the face. Spray and saturate the entire cloth, including the area around the head. After all of the cloth is in place, bunch the cheesecloth loosely from the base of the head out to the edges of the board to give the fabric a light, wavy appearance.
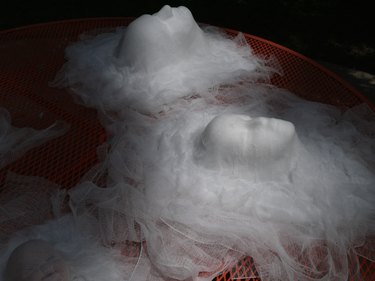
Set Aside to Dry
Drying times can vary depending on the humidity and the weather. On a hot sunny day, the forms will dry in about four hours if placed in the sun. If cool and damp, keep the forms indoors and leave undisturbed for up to 36 hours.
Remove the Forms
When completely dry, carefully peel the cheesecloth away from the wax paper. Remove all of the edges first, and the face should lift easily off of the form head. Set the heads aside and remove the wax paper from the boards.
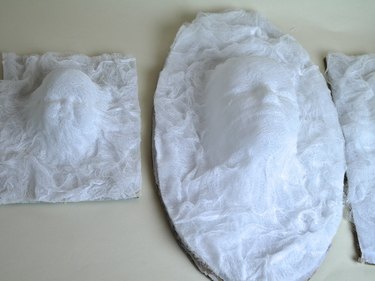
Trim the Cheesecloth
Place the ghost heads centered onto the white side of the cardboard and trim the excess cheesecloth. The cheesecloth should be exactly the same size as the boards.
Place in the Frames
Keep the ghost heads flat on the work surface and carefully place the frames over the top. If there is a wire hanger on the back, carefully slide the heads over the wire and under the frame, with the faces pointing up. Then check that the entire cheesecloth edge is under the lip of the frame. Hold the backing securely in place with your hands and raise the frames to sit vertically. Keep pressure on the backing so that the cheesecloth doesn't slip. Use a staple gun on the backside of the frame to secure the cardboard in place. If a staple gun is unavailable, a thick bead of hot glue connecting the cardboard to the frame will do the trick. Now they are ready to hang.
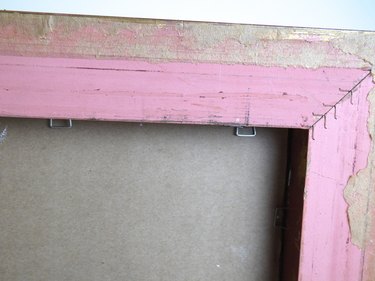
Tip
If the frames do not have existing hangers, add them before inserting the ghost heads. Picture-hanging supplies are available at craft stores, frame shops and online. Follow the directions on the hardware package to easily install yourself, or take the frames to a frame shop for professional assistance.
Store Face Up
When your ghost heads are not hanging on the wall and scaring the neighbors, store them face up in a large box or plastic container. Make sure the lid of the box doesn't touch any part of the faces, and your spirits will haunt Halloween for many years to come.