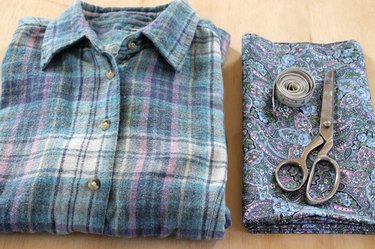
Pop some pattern into your wardrobe by combining a floral and a plaid. Simply sew some fun, floral fabric to the button plackets and give a classic plaid shirt a fresh new look.

Things You'll Need
1/4 yard of coordinating cotton fabric
Measuring tape
Sharp scissors
Iron and ironing board
Seam ripper
Pins
Sewing machine with a 90/14 universal needle and buttonhole function
Needle and thread
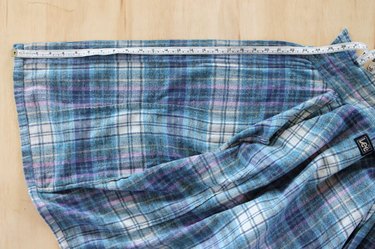
Step 1:
Use a measuring tape to measure the length and width of the shirt's button placket. Add 1/2 inch to both the length and the width measurements.
Video of the Day
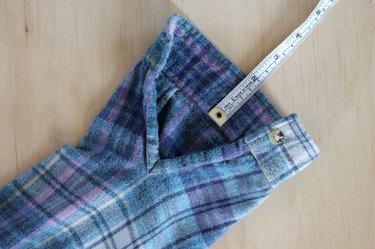
Step 2:
Use a measuring tape to measure the length and width of the shirt's sleeve placket. Add 1/2 inch to both the length and the width measurements.
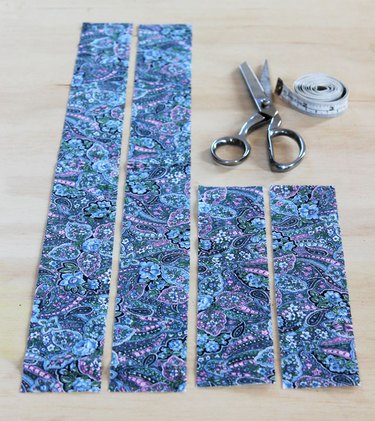
Step 3:
Cut two strips of cotton fabric to the match the button placket measurements, and cut 2 strips of cotton fabric to match the sleeve placket measurements.
Video of the Day
Tip
Be sure to pre-wash the cotton fabric to minimize future shrinkage. Use the washer and dryer settings that you plan on using with your shirt. You can also serge or zig zag the raw edges of the fabric before washing to prevent raveling and to keep your fabric from twisting up into a knot in the washer and dryer.
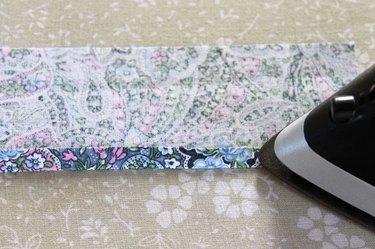
Step 4:
Use a hot iron to press under 1/4 inch on all four sides of each fabric strip.
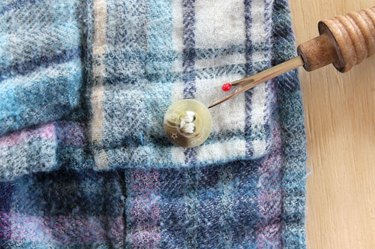
Step 5:
Use a seam ripper to remove the buttons from the button and sleeve plackets.
Step 6:
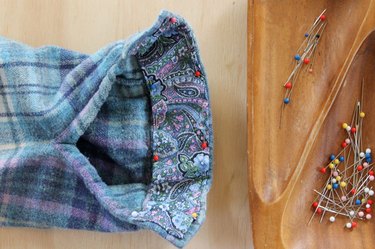
Pin the wrong sides of the decorative strips to the wrong sides of the button plackets.
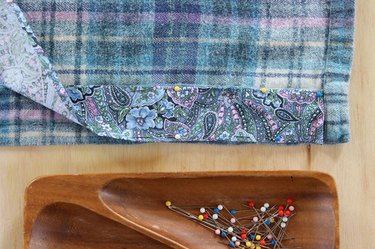
Step 7:
Fold under the top of the strips to match the angle of the collar.
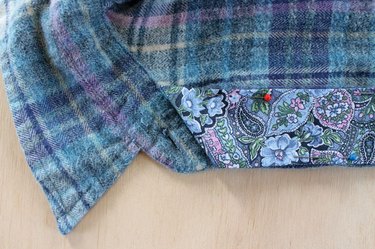
Step 8:
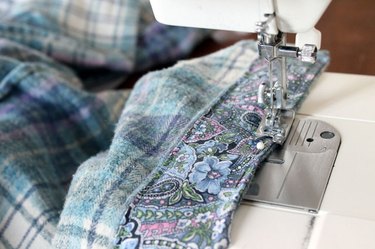
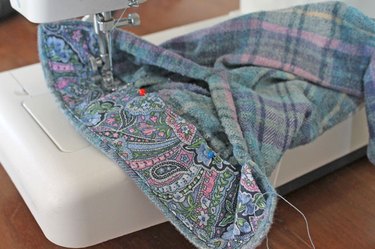
Attach the decorative strips to the button plackets by sewing close to the edge of the button plackets around all four sides. Remove the pins as you sew.
Step 9:
Pin the wrong side of the decorative strip to the wrong side of the sleeve placket.
Step 10:
Attach the decorative trims to the sleeve plackets by sewing close to the edge around all four sides of the sleeve plackets. Remove the pins as you sew.
Step 11:
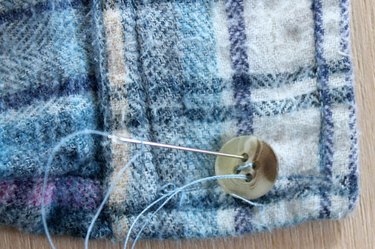
Reattach all the buttons to the button placket and the sleeve placket with a needle and thread.
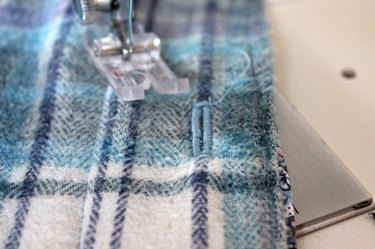
Step 12:
Sew a new buttonhole directly on top of the existing buttonholes through both fabrics.
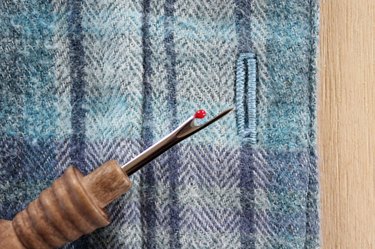
Step 13:
Use a seam ripper to open the new buttonholes.
Now you can roll up your sleeves, flip your collar and throw on a pretty necklace for a fresh and comfortable new look.