Things You'll Need
Golf balls
Liquid dye
Hot water
Glass jars with lids
Oil-based markers
Hot glue gun
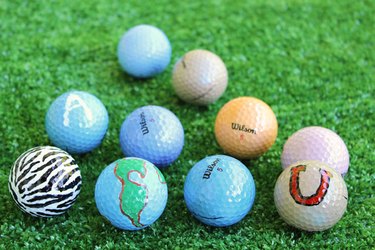
When playing a round of golf, it's hard to identify your ball from all the other ones on the course. Try personalizing your golf balls to make them easier to identify from even several feet away, so everyone will know it's you who just made that hole in one. These personalized golf balls would also be great gifts to make for the golfing enthusiast in your life.
How to Dye Golf Balls
Step 1
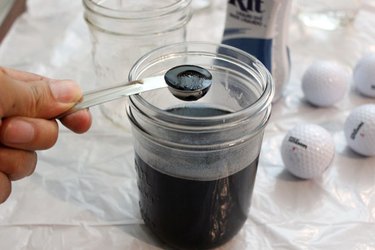
Dyeing golf balls is an easy way to make them stand out from the crowd. Fill a jar halfway with hot water and add about two teaspoons of liquid dye.
Video of the Day
Step 2
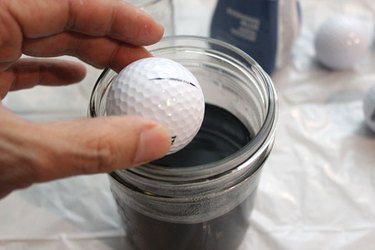
Drop a golf ball in the jar, making sure that it is completely covered in the dye solution.
Step 3
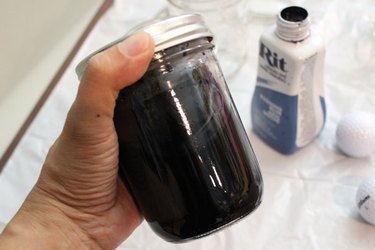
Place the lid on the jar and shake it to mix up the dye solution and golf ball. Let it sit for about 30 minutes before checking on the color. If it is not saturated enough, place more dye in the jar and let the golf ball sit in the solution for a longer period.
Step 4
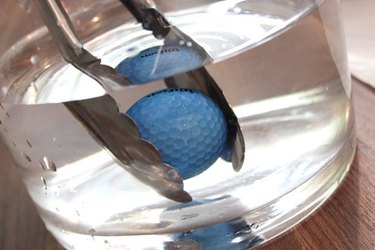
When the golf ball has reached the color saturation you desire, remove it from the jar with tongs and rinse it in water.
Step 5

Place the dyed golf balls on a towel to dry. As you can see, blues reach the highest saturation, while reds and oranges remain pastel. This variation in color will also depend on the brand of the dye you use. Nevertheless, they will all stand out beautifully on the golf course.
How to Draw Designs on Golf Balls
Step 1
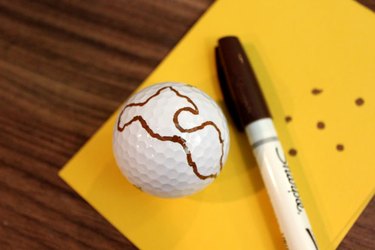
Another way to personalize golf balls is to paint them with markers. Oil-based color markers work on practically any surface. And because they have fine tips, you can create detailed designs like the golf globe in this example. Start by painting outlines of continents with a brown marker. Do not worry about being geographically perfect; you are not being tested.
Step 2
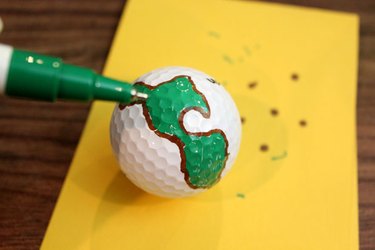
Fill in the interior of the continents with a green marker. You will find that, even with the dimples on the golf ball, the oil-based markers provide excellent coverage.
Step 3
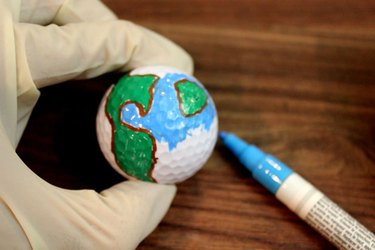
Paint the rest of the ball with a blue marker to surround the continents with water.
Step 4
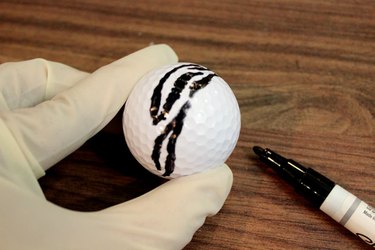
In this additional example, zebra stripes are drawn on the golf ball with a black oil-based marker. The possibilities for personalizing golf balls with markers are endless, and they would be perfect gifts for kids to make.
How to Monogram Golf Balls
Step 1
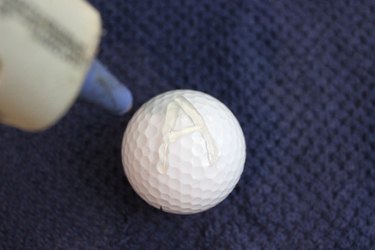
One way to add a monogram on a golf ball is to dye it with a resist method. Using a hot glue gun, write an initial on the surface of the golf ball. Allow the hot glue to dry, and then place it in a jar of dye solution.
Step 2
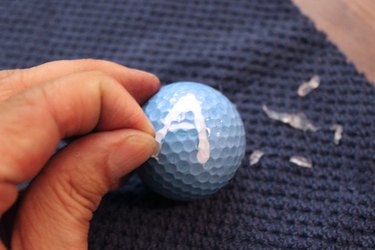
When you place the golf ball in the dye solution, the glue resists the dye. Remove the colored golf ball from the jar, rinse it in water, and peel off the dried glue from the ball. The monogram remains.
Step 3
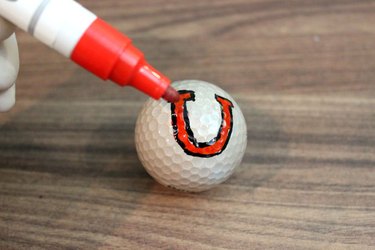
An even easier way to monogram a golf ball is with oil-based markers. Write your initial on the ball with a marker, accentuating it with a different-colored outline. You can even write out words and messages with the markers.
Tip
When using dyes and markers, it's a good idea to wear rubber globes because it can get messy.
Video of the Day