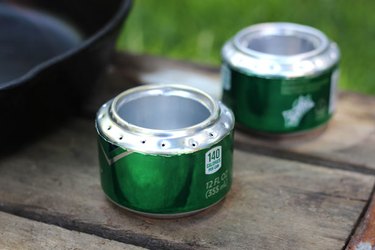
When you're camping, there's nothing quite like cooking your own meals under the stars. For a handy camping stove that's lightweight, portable and easy to make, try a beverage can stove. Made of two aluminum soda cans, they weigh almost nothing, yet can generate enough heat to boil water. These stoves are also great to have around for emergencies. They're a perfect complement to your <ahref="http: www.ehow.com="" how_2143120_boost-metabolism-smoothie.html"=""> </ahref="http:>favorite camping recipes.
Things You'll Need
Two aluminum soda cans
Hardcover book that is about 1 inch thick
Black marker
Hobby knife
Scissors
Masking tape
Push pin and hammer
Ruler
Stapler
Denatured alcohol
Video of the Day
Step 1
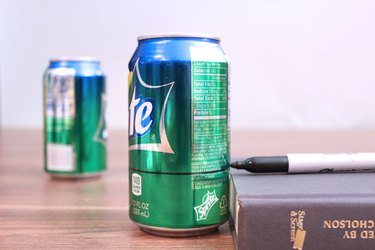
The stove has three components: the top section, the bottom section, and an inner wall. Find a hardcover book that is about 1 inch thick. Place a black marker on the book with the tip touching the side of a soda can, and spin the soda can to create a level mark around the can. This can will be for the bottom section.
Video of the Day
Step 2
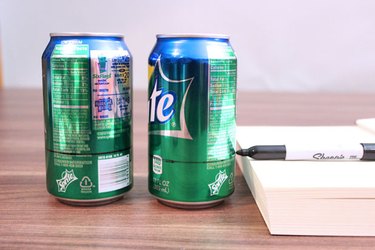
Fold back the front and back cover of the book, and place the black marker on the stack of inner pages. With the marker tip touching the side of the second soda can, spin the can to create a level mark around the can, resulting in a line that is about a quarter inch lower than the line on the first can. This can will be for the top section.
Step 3
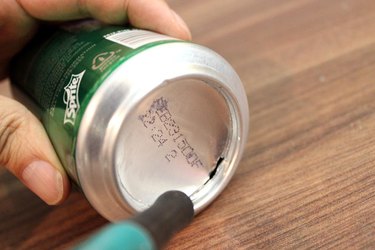
Lay the can for the top section on its side. Using a sharp hobby knife, cut the bottom of the can, just inside the outer rim. For safety, it is best to be patient with this step. Keep running the blade in a circle until the metal weakens and the circle pops out.
Step 4
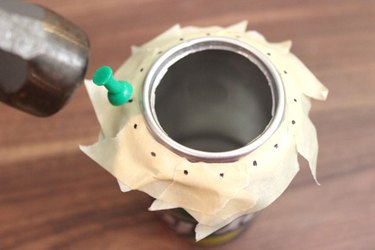
Turn the can upside down with the hole you just cut at the top. Cover the rim with masking tape and mark 16 equidistant points. Using a push pin and hammer, punch a hole at each of these marks, and then remove the tape. The tape helps to keep the push pin from slipping as you hammer it into the can. You now have your top section completed.
Step 5
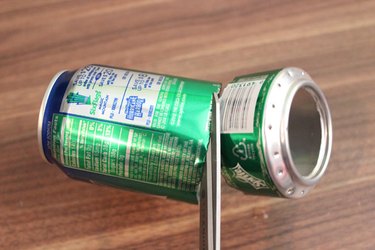
Now that the top-section can is prepared, cut off the rest of the can using the black line drawn on the can as a guide. It is easier to puncture the can with a hobby knife and then cut along the line with scissors. Repeat this step with the second can -- the one that will be used as the bottom section of the stove.
Step 6
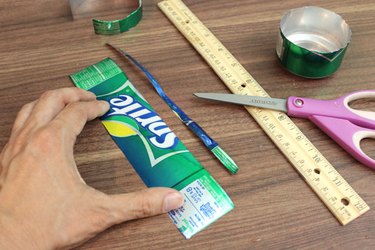
Measure the height of the bottom section. From some of the excess aluminum, cut a strip of metal that is about one-fourth inch higher than the height of the bottom section. This will become the inner wall of the stove.
Step 7
Roll the metal strip so it fits snugly in the bottom groove of the bottom section. Staple the ends of the strip where they overlap to keep this inner piece at this size. You now have your inner wall.
Step 8
Cut three squares on the bottom of the inner wall to allow fuel to travel from the center cavity to the outer rim.
Step 9
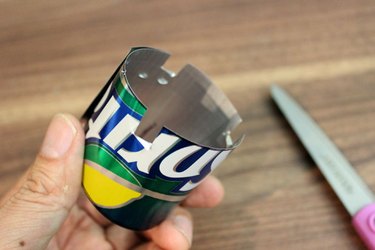
Cut eight vertical slits in the top section up to the line where the printing on the can starts. When it's time to connect all the pieces, these slits will help you slide the top section into the bottom section.

Step 10
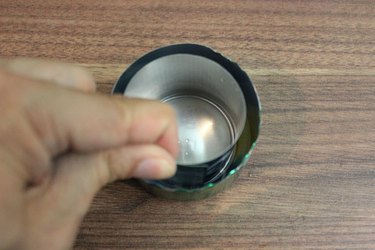
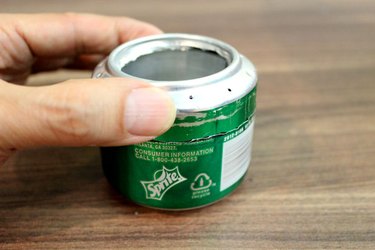
Place the inner-wall piece within the bottom can, making sure that the openings you cut are at the bottom. The inner wall should fit snugly in the grooves in both the top and bottom sections. Slide the top section between the inner wall and bottom section.
Step 11
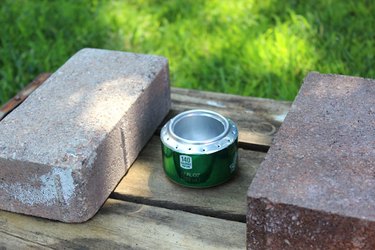
Fill the inner cavity of the stove about half way with denatured alcohol. You can find denatured alcohol at hardware stores in the paint aisle. Place the stove between two bricks that are slightly taller than the stove. Your pot will sit on the bricks and be elevated above the stove.
Step 12
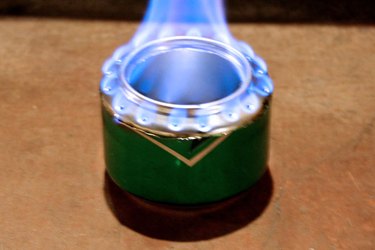
When it is time for cooking, ignite the fuel in the stove with a match or lighter. As the fuel heats, flames will come out of the holes on the rim of the soda can.
Warning
The edges of the aluminum cans are sharp, so be careful when cutting them.
Never leave a flame unattended.
Allow all the alcohol in the stove to burn off instead of trying to extinguish the flame. Unburned alcohol left in the stove can be a hazard.