


Making snowshoes is something of a lost art, but in deep snow a pair of reliable snowshoes can make the difference between hiking out of a blizzard and winding up a people-sickle buried to your waist in a snow drift. Making your own snowshoes can be a very satisfying project.
Items you will need
Snowshoe form made of a plank and wooden pegs Strips of hardwood 1 by 2s (ash is best) A roll of at least 1/16-inch rawhide long (at least 50 to 75 feet or so) Tape measure Drill and bits 5/8" short wooden dowels Sander or planer for shaping the wood Sandpaper (course, medium and fine) Rawhide lacing needle
Preparing the Jig

Simple wooden frame jig. Extra dowels or tie-downs can be added as needed.
Cut a solid wood plank (not plywood) that's a bit wider and longer than the shape you choose for your snowshoe to create a jig upon which to build your snowshoes. The frame of the snowshoe should be large enough to bear the weight of the person. A small child's snowshoe can run 10 by 40 inches while a man's might be as much as 14 by 44. Women's sizes would be somewhere in between. Traditional snowshoe making is rather more of an art than a science. A plank that's 15 or 16 x 48 inches should work well as a jig for most snowshoe projects.
Bend the end of your jig plank 1/1/2 inches to make the toe of the snowshoe tip up. It's important to bend the tip of your shoe upward like skis so you don't catch the toe in the snow and fall on your face.
Bend the end of the jig by wrapping one end in an old wool blanket and pouring boiling water over it. After a bit of this treatment, the wood fibers will soften and you can gradually bend the end of the board. Brace the bend by clamping it securely to something solid. As you continue pouring boiling water over the end, steadily pull down on the opposite end of the jig frame till it stays bent at the correct angle.
Draw the shape of the snowshoe on the working side of the jig (the tip of the jig slopes downward). Once you've marked the shape of the frame, then drill 5/8 inch holes in the top where you will need the frame braced to form the characteristic paddle shape of the snowshoes.
Cut 6-inch long 5/8-inch dowels to push into the brace point holes. Look for spots where you would hold the ash strips in order to bend them to form the shoe's desired shape. Insert the dowels in the holes so that as you bend the wooden frame into shape, you can slip it behind the dowels and the dowels will prevent the frame from springing back out of shape again. For this project, the shoe will be made in the classic pear shape with the outer frame in one single piece fastened at the trailing heel.
At both ends of the jig, screw thick wooden strips loosely so you can tighten them down over both ends of the snowshoe frame to hold the frame long enough for the curve to set.
Making the Frame
Trim the Frame: The ash strip used for the snowshoe frame should be about 7 or 8 feet long to start with. Since you'll be making the frame from a single piece of bent wood, you'll have to do some careful sanding, planing or carving. The wood strip itself will need to be at least 7/8 inch wide by 5/8 inch thick across the center of the frame where it is widest. Two cross braces are inserted about a third of the way down from the toe and the other about a third of the way up from the heel. The frame strip will need to be planed down to about 3/8 inch thick at the toe and about 1/2 inch thick at the heel. Use your tape measure to figure out where to trim down the frame before you bend it.
Bend the frame using a wool blanket to wrap the frame. Pour boiling water over the frame until the wood fibers soften and the frame becomes flexible. Screw the wood strip across the center of the frame strip at the toe at the curved end of the plank. You may have to hang the curved end off the edge of your work table to make it steadier.
Continue the blanket and boiling water till the frame bends for you, once the frame strip is fastened securely at the toe. Don't overdo it. There should still be some resistance as you pull the frame down and bend the ends around the dowel pins in the jig. Alternate bending the right and left sides of the frame strip to keep the pressure evenly balanced in the jig. Don't rush.
Clamp the two ends of the frame at the toe and let the frame set and dry, once you've got your frame shaped.
Drill a set of four holes in the toe of the frame and lace the ends tightly together with rawhide thong. You can also bolt it if you prefer a stronger, less traditional fastener at this critical point.
Balance the frame. To achieve proper balance, place the cross braces on top of the frame and balance the frame on your fingertips at the exact midpoint of the frame. The tail of the frame should drop slightly if the frame is properly balanced. You can adjust the position of the cross braces till you achieve the proper balance. Mark the spot where the cross braces will go. The braces should divide the frame into about thirds: the toe, center and heel.
Trim the sticks you use for the cross braces down to 1 1/8 inches wide and 3/8 inch thick. You'll need to cut a shallow mortise into the center of the frame strips at the place you want to put your cross bracing. Measure the distance allowing for the depth of the mortise, cut the cross braces to the proper length and then spring the strips into place. Once they are laced up, the pressure of the lacing should hold the cross braces in place, but if you're a nervous Nelly like me, you'll probably put a little glue in the mortises. Gorilla Glue works great!
Drill three holes on edges of the cross brace facing the inside of the tip and tail sections, two close to the edges and one at the center for adding lanyard loops to hold the criss-crossed rawhide net that forms the surface pad of the snowshoe.
Webbing the Frame
Drill two rows of holes on the sides of the frame at about a third of the depth of the frame from the edges. Stagger the holes about a 1/2 to 3/4 inch apart. The top row of holes will be 1 to 1 1/2 inches apart and so will the bottom holes. The two rows will be offset so that on hole is high and the next is low.
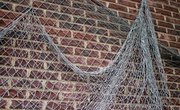
With the rawhide thong, lace through the holes in the frame so that you create a series of tight even loops along the edge of the frames. It is through these loops that you will lace the criss-crossed rawhide cords that will form the surface pad of your snowshoe. You can use a stiff cord or even tennis racket gut nylon if you decide not to go authentic.
Lace the lanyard loops from low hole to high hole going all the way around the frame for each section, front, center and tail including the three holes in the cross braces where there will be only two longer lanyard loops. It's best to use wet or green rawhide if possible as it will tighten as it dries. Install lanyard loops around the inside of the tip sections.
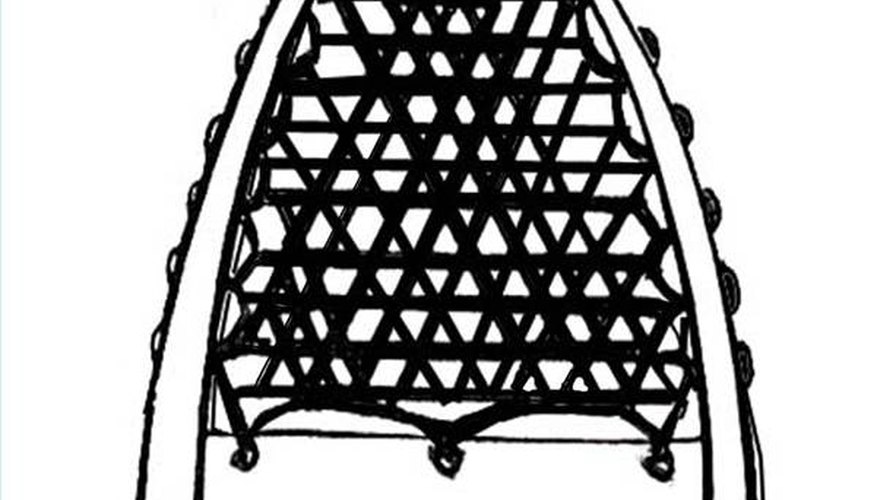
Note the triangular weave pattern
Plan your weave. Snowshoe webs are not square nets like tennis rackets, but a triangular web laced from three directions--horizontal and diagonal right and left. When starting the weave, first string the horizontal thongs going from opposite loops back and forth horizontally till you have completed all the cross thongs. Use a special needle made for rawhide thongs or create one. Use wet or green rawhide to weave your webbing or use heavy gut cord.
Start at the center and string diagonally to the right and left and then keep lacing back and forth, weaving through the horizontal web till you have two overlaid diagonal rows. You may have to experiment a bit to get it right, but it's not difficult. The picture shows the weave pattern. Again, the rawhide thongs should be strung tight, but not extremely tight as they will shrink up as they dry.
The Rawhide Cross Brace
Complete the weave in the tip and tail sections first--above and below the wooden braces. Now you will create a rawhide cross brace from which the boot harness will be attached.

Note the position of the rawhide cross brace.
Loop three turns of doubled rawhide across the frame about an inch or so below the front cross brace.
Loop the ends of the rawhide thongs around the cross braces above and below the center section so that each cord is attached by a couple of loops round the braces. Weave the weave pattern shown above through the center section, incorporating the rawhide cross brace within the pattern.
Add horizontal passes with the rawhide thongs to give the section greater strength if the center web is not strong enough. Remember, though, that extra webbing is extra weight you'll have to schlep through the snow!
Make sure you make the rawhide cross brace strong as it will provide the attachment point for the boot harness. If necessary, use heavier rawhide thongs or extra loops around the frame so that the harness has a secure mounting point.
Attaching the Boot Harness
Cut a 3- to 4-inch wide band of tanned leather, long enough to wrap over the toe of your shoe or boot.

Note the toe strap is tied to the webbing, but the heel is free to lift as you walk.
Bore four holes in each end of the leather toe strap large enough for rawhide thongs to pass through.
Lace the toe strap to the rawhide cross brace in a toe sized arch at the center of the rawhide brace just behind the front wooden cross brace.
Cut holes for rawhide thongs at the base of the toe strap along the rear edge. Cut a leather boot heel strap with holes in either end and cut long enough to slip over the heel of the boot. If you want the heel strap to be adjustable, cut it in two longer pieces and install a small belt buckle. For "working" snowshoes that the user will be in and out of repeatedly during the day, an elastic or rubber boot heel strap may be more effective.
Attach a smaller permanent strap attached at the sides of the heel strap that goes across in front of the ankle to improve the security of the strap. Do not tie the heel strap to the webbing as the heel must lift when walking or the toe will dig into the snow and trip you.
Tips
- Remember to work slowly. You'll save time. You can lengthen the working life of your snowshoe by cutting grooves in the outside of the frame where lacing passes. This recesses the lacing and protects it from abrasion, making it last longer. Avoid knotting loose ends together to save cordage. Knots in the webbing not only look bad, they are a weak point in the webbing and prone to breakage and slipping. Don't varnish the frame as this will make the snowshoe slippery and in snow and ice you need all the traction you can get.
References
Tips
- Remember to work slowly. You'll save time. You can lengthen the working life of your snowshoe by cutting grooves in the outside of the frame where lacing passes. This recesses the lacing and protects it from abrasion, making it last longer. Avoid knotting loose ends together to save cordage. Knots in the webbing not only look bad, they are a weak point in the webbing and prone to breakage and slipping. Don't varnish the frame as this will make the snowshoe slippery and in snow and ice you need all the traction you can get.
Writer Bio
Tom King published his first paid story in 1976. His book, "Going for the Green: An Insider's Guide to Raising Money With Charity Golf," was published in 2008. He received gold awards for screenwriting at the 1994 Worldfest Charleston and 1995 Worldfest Houston International Film Festivals. King holds a Bachelor of Arts in communications from Southwestern Adventist College.