Things You'll Need
Brushes
Greeting Cards
Acrylic Paints
Crayons
Glues
Scissors
Snowman Cookie Cutters
Pencils
Black Felt-tip Pens
Black Permanent Markers
Card Stock
Markers
Rulers

How to Make a Snowman Pop-Up Card. Let your kids send their own 3-D holiday greetings with this easy pop-up card.
Step 1
Use a blank greeting card or a piece of card stock that has been cut to the desired size and folded in half. A folded card measuring 6 by 8 inches works well for this project.
Video of the Day
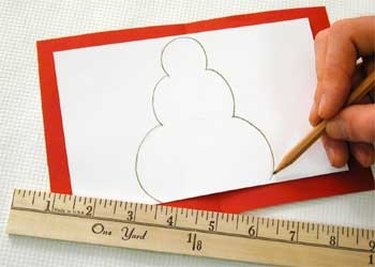
Step 2
Draw or trace a snowman shape onto a separate piece of heavy white paper. Card stock or cardboard is best. The snowman should be one-half to three-quarters of the length of your greeting card (4 to 6 inches) and three-quarters of the width of the open greeting card (4 1/2 inches).
Step 3
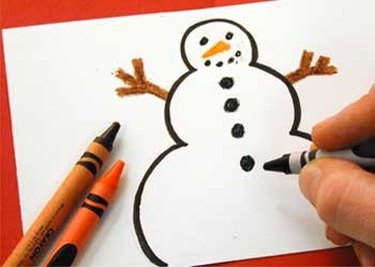
Outline the snowman shape with a black felt-tip pen or permanent marker.
Step 4
Use crayons, acrylic paint or markers to decorate the snowman.
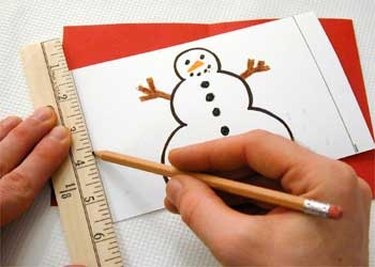
Step 5
Use a ruler and pencil to draw one vertical line along each side of the snowman. Place each line 2 inches from the snowman's widest point.
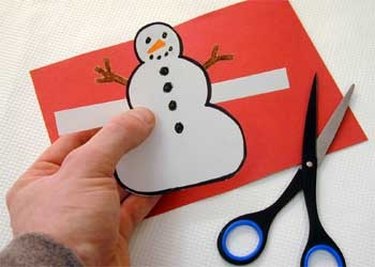
Step 6
Use scissors to cut along the outside of the snowman outline so that the black marks made in step 3 remain. Leave uncut the 2-inch-long tab of paper on the center of each side of the snowman. Make sure both tabs are centered and even with each other. (Note: if your card is smaller than 6 by 8 inches, make the tabs 1 inch instead of 2 inches.)
Step 7
Fold the snowman in half vertically, blank sides together. Make a sharp crease and unfold. Fold the tabs on the sides of the snowman under by 1/2 inch. Make a sharp crease.
Step 8
Position the snowman over the open greeting card so that the snowman's centerfold lines up with the center of the card; keep in mind that the snowman fold should oppose the card fold. Determine where to place the tabs depending on how far you want the snowman to pop up. Mark the two spots for the tabs with a pencil, making sure that they are equidistant from the edges.
Step 9
Glue the 1/2-inch, folded-back portion of the tabs to the surface of the greeting card so that the pop-up shape remains in the position determined in step 7. Allow the glue to dry.

Tip
Use a snowman-shaped cookie cutter as a template for your snowman. You can also make other shapes, such as a star, angel or heart to create pop-up cards. Make sure that the tabs are the same color as the interior of the greeting card. You may have to draw your snowman on a white piece of paper and then glue it onto paper that matches the greeting card.
Video of the Day