If you have a set of stairs that has closed stringers, you may want to give the stairway a more open look with open stringers. Stair stringers are the diagonal supports that hold the stairway in place. You want to make sure you're following your local building code anytime you are building stairs, and you may need a building permit and inspection during the process.
What Are Stair Stringers?
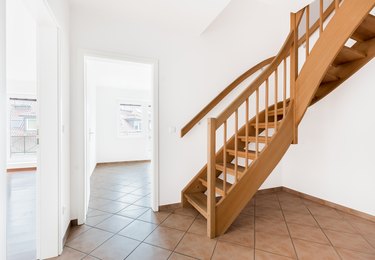
Stairways are composed of flat sections, called treads, and vertical sections, called risers or toes kicks. The stair treads and risers rest against the stair stringer, which holds the weight of the stairs. In a closed stringer stairway, you cannot see the stringer. When you open up the stairway, on one side or both, you can then see the zigzag pattern of the stair stringer, which is why it's called an open stringer stairway.
Video of the Day
Video of the Day
You'll need to router or screw the risers into the inside face of the stringer, giving the open stringer a nice, finished look. You will probably end up with slightly narrower stairs, so you don't compromise the ability of the stringer to hold the weight of the stairs.
Stair Stringer Layout
You'll need to make sure your stairs are wide enough to go through with the project. If you are opening up the stairwell of an older house, you will need to remove the upper part of the wall from the stairwell. Beneath the stairwell is the stringer, which has been hidden from view by the walls. If you are opening up closed stringer deck stairs, you will also want to make sure your new stair treads have a slight overhang over the risers and the stringer. That will give it an attractive, updated look.
Your stair stringer layout probably rises in the traditional stair-step pattern. To do the project, you will need to pry the treads and risers from the stair stringer. This will not be easy, so do it carefully, removing nails with a nail puller. If a mortise holds the stairs to the stringer, you will need to remove the boards from the mortise. You will then need to remove the stair stringer from the top and bottom landings. Do this carefully, so as not to damage surrounding areas. If you damage the stair stringer, you will need to replace it.
Opening the Stringer
Once your walls are opened, you will need to measure your stringer. Then you will need to use a saw to notch the stringer in order for it to attractively hold up the risers and treads, and to reveal the pattern of the stringer. Use a square to measure and mark where the cuts will be made. Using a circular or hand saw, cut the stringer to the dimensions that match where you will place your risers and treads. Make sure you cut very carefully, because you do not want to damage your stringer. You will want to mark on the top step where the stairway will attach to the upper and lower floors. Then, re-attach the stringer to the upper and lower floors.
Next, you will need to re-attach your risers and treads to the stringer. You may need to cut them to fit. If you have decided to lengthen your risers and treads, you may need to install new ones. You will need treads and risers that will fit to your stringer. Start at the bottom, and install the risers with screws. Then install the treads. Remember, each tread should have a bit of an overhang over each riser and the stringer. When completed, you'll need to trim your new stairs. If you have a stair railing, you will need to re-attach it. If the stairway is now open on both sides, you may want to replace the railing with a banister on each side for a finished feel to your home.