Perhaps you've just removed a tree from your yard and would like to re-purpose some of the wood, or you want to add a rustic accent piece to your living room. Using fresh-cut wood for lumber requires proper drying and seasoning to prevent staining, rotting and insect damage. The process is time consuming and varies depending on type of wood, your climate and the time of year, but the finished product allows you to build any number of wood tables.
Drying and Seasoning
Video of the Day
Step 1
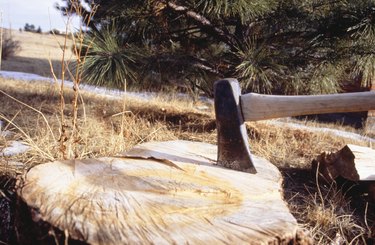
Cut the wood into lumber panels, slabs or stumps depending on how you want to make your table. Smaller, thinner pieces of lumber dry faster than solid blocks and stumps.
Video of the Day
Step 2
Chisel the bark from the fresh-cut wood using a rubber mallet and heavy-duty chisel. Removing the bark allows the wood to season faster.
Step 3
Locate a stacking area on open, level earth with good drainage and wind exposure. Face the stack south or west for minimal exposure to precipitation.
Step 4
Create a foundation to stack the wood atop, making sure it allows for air circulation and keeps the wood off the ground. A line of railroad ties or concrete blocks works well. Place a layer of polyethylene below them to keep moisture out and deter weed growth.
Step 5
Stack the thickest boards on the bottom layers. Place a row of stickers, or wood spacers, between each layer of slabs or planks. Lay the stickers perpendicular to the length of the planks, placing them directly over the foundation beams, ties or blocks. The stickers must be completely dry and about 1 to 2 inches thick to provide adequate airflow. Repeat the layering process.
Step 6
Paint a waterproof sealer on the edges of the wood pieces so they don't dry too quickly, causing uneven moisture content.
Step 7
Place a roof or waterproof shelter over the pile for moisture protection. Let the wood season according to its type, your climate and time of year. Determine length of time needed for moisture content to drop below 20 percent using a seasoning chart or calendar.
Making the Table
Step 1
Build a tree stump table. Sand a dried tree stump using a belt sander. This will serve as the table's base. Sand jagged corners and any knots so they don't pose a safety hazard. Sand a giant slab of fresh-cut wood thin enough to serve as a tabletop. Cut the slab to desired thickness using a hand saw, if necessary. Lay the tabletop slab atop the stump, centering it for stability. Insert one or more shims, or wedged spacers, if necessary so the top sits flat on the base.
Step 2
Build a rustic table using thinner cut planks and beams. Cut a plank to desired tabletop size, or nail together several thinner beams to form a slatted top. Attach a crossbeam on the underside, and cut pieces for legs. Stain the table, or seal it with a clear coat for a more rustic finish.
Step 3
Create a small side table with rustic log pieces. Cut planks and nail them into a cube shape. Cover the facing with thin slices of dried and seasoned logs, gluing and nailing each in place to cover the entire surface area. Glue seasoned twigs on to add more texture.