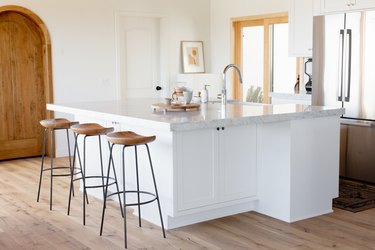
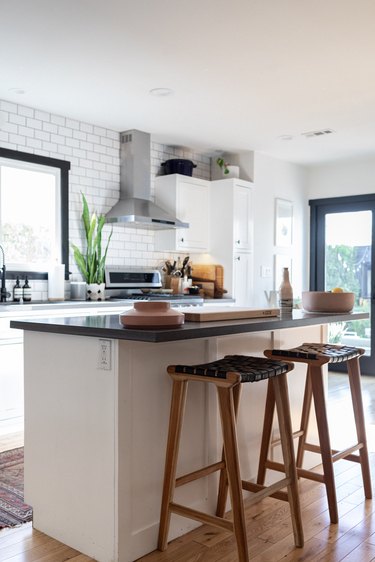
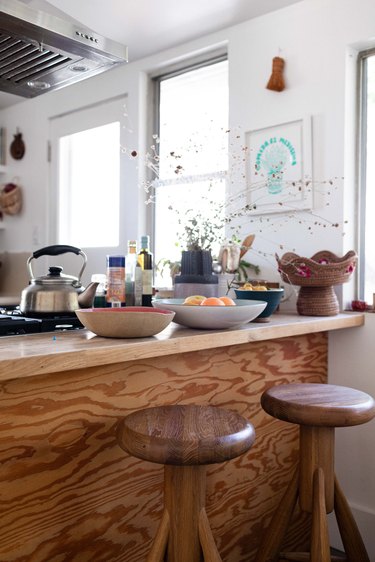
If counter space feels in short supply at breakfast time, a breakfast bar could be the answer. A few bar stools and some extra countertop can make a huge difference during busy mornings — and doubles as a great place to have coffee with friends or to help the kids do their homework. Adding a breakfast bar is a simple DIY home improvement project that doesn't take a lot of time or money. It also lets you make your kitchen more functional without the time or hassle of a complete kitchen makeover.
The IKEA Breakfast Bar Hack
Video of the Day
If you're working in a very small kitchen or are fairly new to DIY projects, this breakfast bar hack is perfect for you. The project begins with a store-bought shelf and flanged table legs, saving you some cutting and measuring. It also saves you from having to finish the top of the breakfast bar manually. With this project, you can mount your breakfast bar to a wall or leave it freestanding, which is perfect for renters who can't always drill holes wherever they like.
Video of the Day
- Visit your favorite home decor store and purchase a floating wall shelf. If you plan to leave your breakfast bar freestanding like a small dining table, you can also choose a shelf that attaches to the wall via two underside brackets.
- Purchase prefabricated table legs in the color of your choice. Legs with a top flange are the easiest to use and screw onto your breakfast bar without the need for additional brackets and hardware. The IKEA ADILS table leg, part number
- 537.43, is an excellent choice.
- Turn your shelf upside down and screw in the legs where you want them to be, making sure your screws aren't long enough to poke through the top of the shelf. If you're attaching the breakfast bar to the wall, place two table legs near the front of the shelf. If making a freestanding bar, place a table leg at all four corners. The IKEA ADILS legs come with the screws you'll need.
- Measure the height of your breakfast bar with the legs and install the shelf mounting bracket according to the instructions that came with the shelf. Shelves are made differently, but installation typically involves mounting the bracket at the correct height after checking to ensure that it's level. Anchor the bracket into as many wall studs as possible. If some of the screws won't hit studs, use heavy-duty drywall anchors, such as toggle bolts.
- Slide the shelf over the mounting bracket and adjust the table legs as needed. Because floors aren't always level, most table legs should provide for some minor height adjustment.
Off the Wall
If you have some unused wall space in your kitchen, you can use it to build a peninsula. While the IKEA hack mounts the breakfast bar parallel to the wall, the peninsula approach mounts it perpendicular to it instead.
The first step is to choose the type of top you'll want on your new bar. You can opt to match your existing countertop surface, choose a coordinating color or use a wood surface. While matching your countertop exactly will look great, remember that natural stone and other surfaces are difficult to cut and may require the help of a pro who has tools that you don't.
When you know how you want your breakfast bar to look, determine how long it will be. Your kitchen space may limit the size somewhat, so make sure you have enough room for this plan. According to RLPS Interiors, you'll need to leave 6 to 10 inches between your breakfast bar stools to seat people comfortably.
- Choose and prepare the top of your breakfast bar. Cut the bar to the desired length and width. If you're using a wood countertop, sand and polyurethane the top and edges.
- Measure the thickness of your breakfast bar top and mark your wall. Draw a pencil line on the wall where you want the top of your breakfast bar to be. Draw another one where the bottom of the bar will then fall.
- Mount a cleat to the wall, aligning it with the line you drew for the bottom of your breakfast bar. A cleat is simply a 2x4 mounted to the wall on which the breakfast bar will rest. When installed properly, the narrow side of the 2x4 will form the top of the cleat. Keep your cleat level during installation and make sure you're screwing into studs and not just drywall or plaster.
- Flip your breakfast bar upside down on the floor and install the table legs beneath it. Place the legs on the end of the breakfast bar that will be furthest from the wall. If your breakfast bar is long or heavy, consider installing two more table legs in the middle for extra support. Before screwing your table legs onto the breakfast bar, make sure your screws are short enough that they won't poke through the top of your new bar.
- Turn the breakfast bar right-side-up again. Set the end of the bar on top of the cleat and attach it using screws or construction adhesive. You want the end of the bar flush with the wall, but the wall may not be perfectly straight. If it's not, sand away any extra material on the end of the breakfast bar to make it fit.
- Adjust the feet on your table legs if needed to compensate for an uneven floor and keep your breakfast bar level.
Tip
For extra storage, you can place a row of cabinets under your breakfast bar rather than leaving the space open. If you do, mount the breakfast bar to the cabinets rather than using table legs for support. Remember to leave some overhang on the back of your cabinets so you have leg room when sitting at the breakfast bar.
Add a Counter Peninsula
Another simple way to add a breakfast bar to your kitchen is to create a peninsula off your existing countertop. Because this breakfast bar will sit flush against your countertops, this arrangement looks best when you use the same material as the rest of your kitchen counter.
You can also get away with using a butcher block countertop. Once again, you may need a pro to cut and shape the edge of the breakfast bar for you if you're using natural stone, cement or another tough material that requires special cutting tools.
- Cut your chosen breakfast-bar top to the desired size and length. If using wood, sand and finish the top as needed.
- Purchase a kitchen cabinet, preferably one identical to your existing cabinets. Install the cabinet against the wall next to your counter so that it sits snugly against the cabinetry beneath your existing countertop.
- If necessary, use 2x4s to build up the top of the cabinet so that your breakfast bar will sit even with your current countertop.
- Turn your breakfast bar upside down on the floor and install your table legs. As always, make sure your screws don't pop up through the top of the breakfast bar and add extra legs if you feel the bar needs additional support.
- Place the breakfast bar in position and mount it to the new cabinet. You can do this using construction adhesive or by screwing the bar top in place from underneath, setting your screws at a 45-degree angle.
- Apply a bead of clear caulk at the seam where your countertop and breakfast bar meet, if necessary, to avoid trapping dirt and bacteria between the two.