In This Article
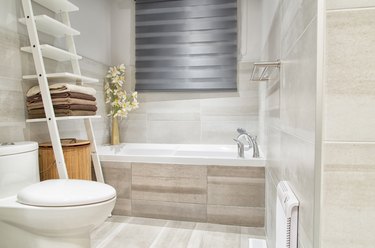
If a bathtub is installed in a three-wall alcove, it's known as an alcove bathtub, and most of these have a flat panel on the front known as a skirt, which makes them skirted bathtubs. Not all skirted bathtubs are alcove tubs, however, because some tubs have two skirted sides, which makes it possible to install them in a corner defined by only two walls. In fact, all four sides of a freestanding bathtub can have panels, which technically also qualifies that tub as a skirted tub.
The wide number of variations makes it difficult to generalize installation instructions for a skirted bathtub, because installation methods differ according to the number of walls the tub attaches to, whether it has "feet" or is designed to rest on a mortar bed and the material the tub is made from. However, the skirted tub that fits into a three-wall alcove is the most common type, and if you know how to install one of these, you shouldn't have trouble installing other types of skirted tubs.
Video of the Day
Video of the Day
Preparing for Tub Installation
Preparation for a bathtub installation begins with stabilizing the floor, making it level and constructing whatever framing is needed to surround it. If you're installing a tub against existing walls, the wall coverings should be removed so you can secure the tub's nailing flanges to the studs. After the tub is in place, you typically cover the walls with cement backerboard or water-resistant drywall followed by the wall covering of your choice.
One more important step prior to actually installing the tub is to install the drain, which typically consists of a 1 1/2-inch P-trap which connects to a 2-inch drain pipe that ties in to the nearest sewer. You also usually have to attach a drain assembly to the bathtub before you install the tub with its drain end against a wall; it's impossible to do this afterward unless the wall is open. If the tub has no frame or feet, you'll want to wait until you dry-fit the tub before installing the drain to avoid damaging the drain when you drag the tub around.
Dry-Fitting and Checking Level
If your tub doesn't have a frame or feet, the manufacturer will instruct you to set it in a mortar bed or glue it to the subfloor with construction adhesive. Before you do that, it's a good idea to move the tub temporarily into position and level it. Put a 2-foot level on one of the side rims and one of the end ones and adjust the position of the tub until the bubble is centered, then draw lines on the studs above the rims or, if you're setting the tub in mortar, about 2 inches above the rims. These marks will be handy references when you do the final installation.
Doing the Final Installation
Once the drain has been installed and you've made reference marks, follow the manufacturer's instructions for laying a mortar bed or spreading adhesive. Lift the tub into place (this is a two-person job), re-check the level and let the mortar or adhesive set overnight before you secure the flange on the tub's open sides to the wall studs with stainless steel screws. The final installation step is to hook up the drain. Installation of the tub faucet and the wall coverings are also necessary procedures, but they can both happen after you've finished installing the tub.